2013 POTD Thread Archive

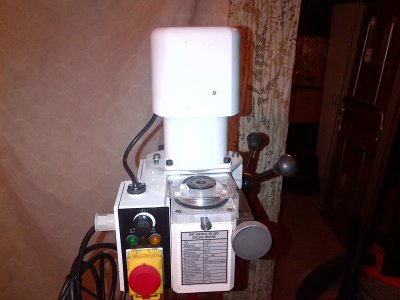
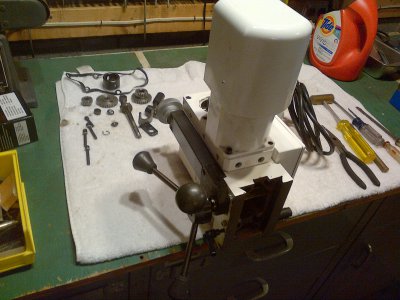
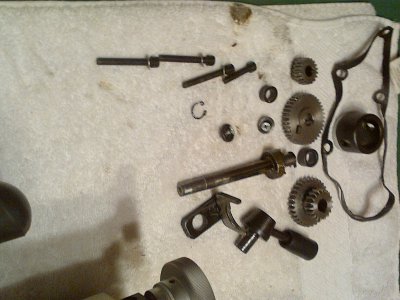
I converted my Real Bull mini-mill to belt drive.

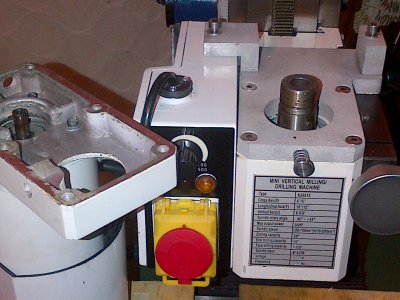
Photo 1 - Mill head with gear drive components removed
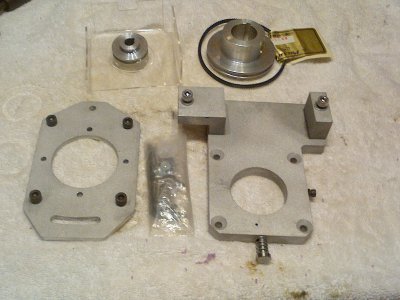
Photo 2 - Gear drive components only
Photo 3 - Belt drive components
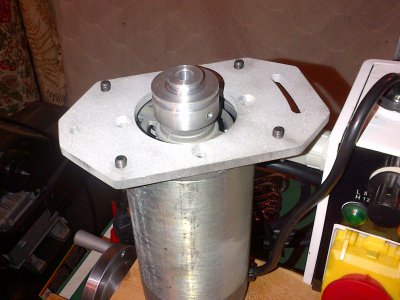
Photo 4 - New base bracket mounted
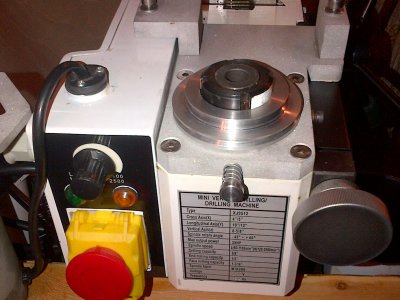
Photo 5 - Spindle pulley installed
Photo 6 - Motor pulley installed
Photo 7 - Completed conversion
Real Bull Belt Drive Conversion July 2013 (7).jpgReal Bull Belt Drive Conversion July 2013 (6).jpgReal Bull Belt Drive Conversion July 2013 (4).jpgReal Bull Belt Drive Conversion July 2013 (5).jpgReal Bull Belt Drive Conversion July 2013 (3).jpgReal Bull Belt Drive Conversion July 2013 (2).jpgReal Bull Belt Drive Conversion July 2013 (1).jpg

Real Bull Belt Drive Conversion July 2013 (7).jpg Real Bull Belt Drive Conversion July 2013 (1).jpg Real Bull Belt Drive Conversion July 2013 (2).jpg Real Bull Belt Drive Conversion July 2013 (3).jpg Real Bull Belt Drive Conversion July 2013 (4).jpg Real Bull Belt Drive Conversion July 2013 (5).jpg Real Bull Belt Drive Conversion July 2013 (6).jpg
 
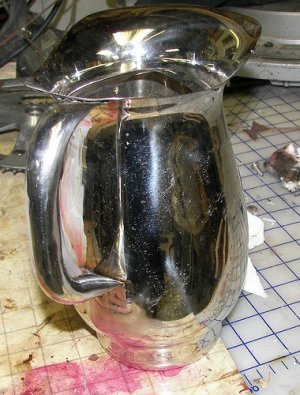
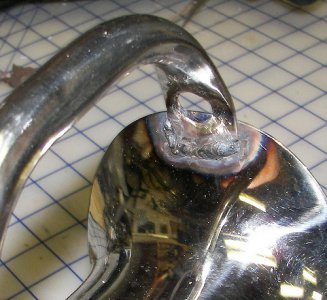
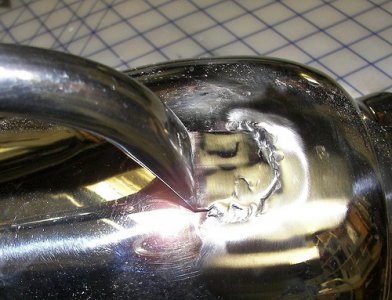
Ok so this is not that impressive for most people but I am pleased to have made it work. A friend who plays percussion has this entire set of junk he uses it make noise. One of the things is this stainless steel water pitcher. He tried drilling a hole in the top of the handle to hang it from something and not understanding how spot welding works :roflmao::roflmao: the handle broke off. He of course asked me if I could reattach it. I said I could but it would not be pretty. He said not a problem rough looking was fine. Guess it goes with the act. So I set out to TIG a 24ga stainless handle back onto a 20ga water pitcher.
9302160087_4edc1c9ae9.jpg9304937766_550ae39354.jpg9304938920_c4910b86df.jpg

It won't win any art shows but I won't break off again either. :)):)) This is some of the thinnest sheet I have welded especially a lap joint in the middle of a flat/curved area. The weld had great penetration (you could see the bead on the backside) but it didn't blow through. I did use mild filler rod instead of SS because I figured it would not be a brittle. I didn't know the SS alloy so I figured mild steel filler was better. Anyone know if that was a good idea or bad? I was not worried about it rusting just strength. I used a 1/16th electrode at around 30 amps DC.

Jeff

9302160087_4edc1c9ae9.jpg 9304937766_550ae39354.jpg 9304938920_c4910b86df.jpg
 
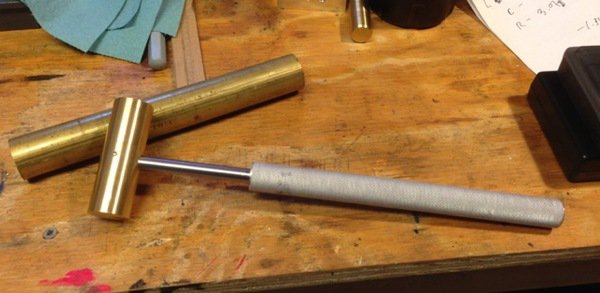
I finished this brass hammer last night. The head was turned from 1" brass rod, the shaft made from a piece of 3/8" drill rod, and the handle from 3/4" 6061 aluminum. The pins securing the head and handle to the shaft were made from nails.

brass-hammer.jpg
 
dro's are mounted on my rong fu 30 mill.
I finally finished mounting all three axis dro's and guards have also been
fabricated and installed on "X-Y"'s. I spent 1/2 of yesterday and half of
today, measure, layout, fab, modify, fab again, modif again. . . . you know the
drill. I think this will work fine for most anyone that desires to copy what I
did, and even make improvements.

I made sketches and saved them for scanning and sending, and I took lots of
pictures that I hope will make it easier for you guys than it was for me.

the majority of the work involves bending some sheet metal and tapping a few holes. I used
#8-32 and 3m-.50 screws and allen screws for most all of it. a little wire feed
welding was done but there are other ways for making that part .

you'd be surprised how ridged 19ga sheet metal is when it has even the slightest
90 degree bend put in it. I have many square feet of it in shelving I got years
ago.

I will post pictures and some comments at a later date.

davidh
 
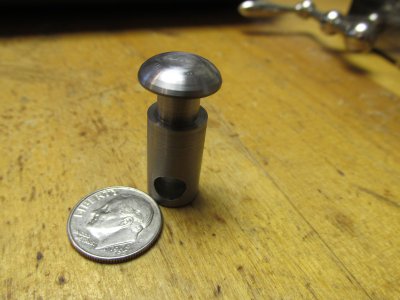
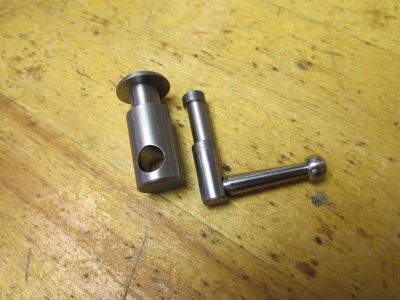
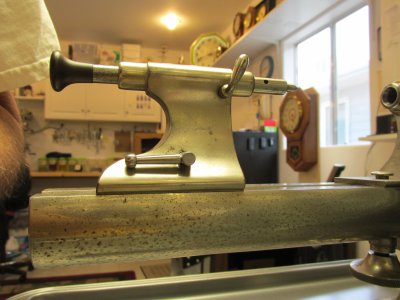
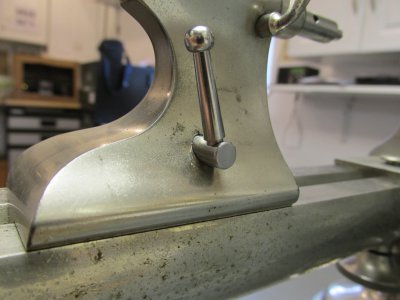
I finished my first-ever project turning any kind of steel at all (newbie alert). This is a cam/follower mechanism to lock down the tailstock on my Rivett watchmaker's lathe. I turned everything on the Rivett, since (for now) it's the only lathe I have, but there's a chance I'll be scoring a Myford Super-7 sometime soon.
All parts are turned from 1144 stressproof.
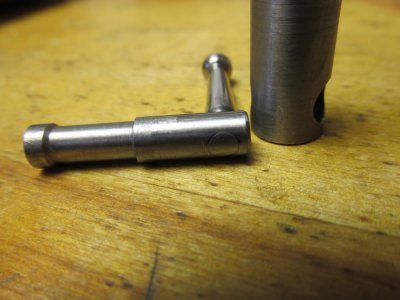
Handle was press-fitted into the cam's shank. Handle's post was .140", hole was #25 = .1405". The fourth picture shows the tailstock loose, the last picture shows the locked position.


IMG_0929.JPGIMG_0936.JPGIMG_0938.JPGIMG_0941.JPGIMG_0945.JPG

IMG_0929.JPG IMG_0936.JPG IMG_0938.JPG IMG_0941.JPG IMG_0945.JPG
 
Congratulations on a well done project.

"Billy G"
 
Nice work Doug!
Just makes you want more machines, doesn't it?
 
Congratulations on a well done project.

"Billy G"

Thank you Billy.

Doug, you did a FINE job. Well done!!!!!!
Phil

Thank you Phil.

Nice work Doug!
Just makes you want more machines, doesn't it?

Yes it does LJP. I now see the need for a larger lathe, it seems to me that a decent larger lathe would let me take heavier cuts without stressing the machine. Heavier cuts = quicker working time. Also, I suspect I would benefit with a mill - hopefully at some point I'll also be acquiring one of Little Machine Shop's offerings.
 
fixed the ac, nothing else matters :drinkingbeer:
 
Back
Top