2014 POTD Thread Archive

Nice work Charles, hopefully I can get down to see it soon.

Meanwhile....

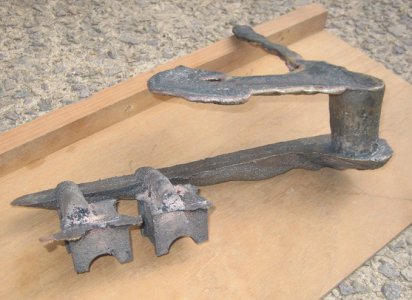
I've added a new half bearing to my slip roller. IMG_6384_zps352a52bd.jpg The lower cranked roller only has a 1/2 bearing under it for support, and nothing on top, which allows dirt and crap to get in.
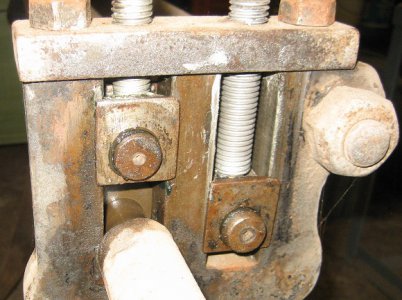
So I made a couple of patterns out of some machinable wax I had left over from an experiment/experience. IMG_6369_zps436ee005.jpg
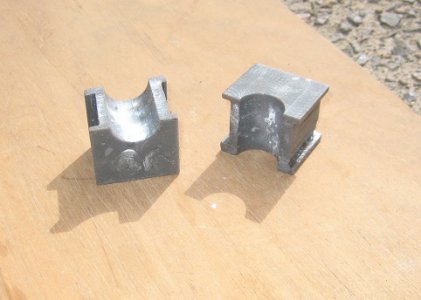
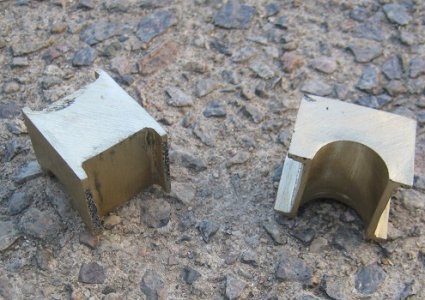
Then I cast them in tap brass. IMG_6371_zpsa48ddb37.jpg Cleaned up. IMG_6389_zpsec5a68ab.jpg

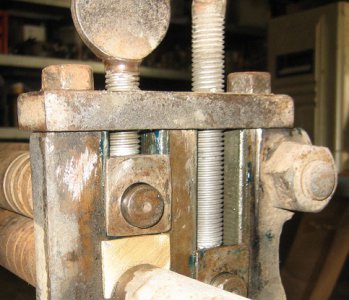
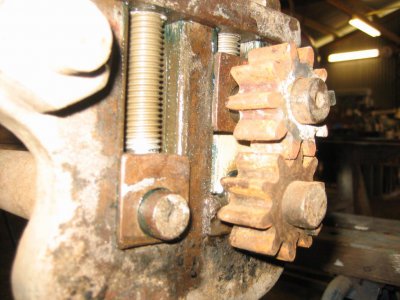
A little bit of hand fitting and I'm a happy camper. IMG_6390_zps1db8624d.jpg IMG_6391_zps8e19db2e.jpg
Cheers Phil

IMG_6384_zps352a52bd.jpg IMG_6369_zps436ee005.jpg IMG_6389_zpsec5a68ab.jpg IMG_6390_zps1db8624d.jpg IMG_6391_zps8e19db2e.jpg IMG_6371_zpsa48ddb37.jpg
 
All the sections on this forum, this one I like the most! The bike build Im enjoying, so please continue to post progress please. This section opens my eyes to so much!
 
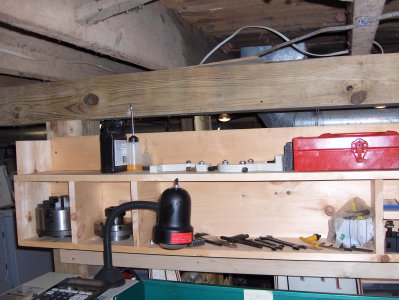
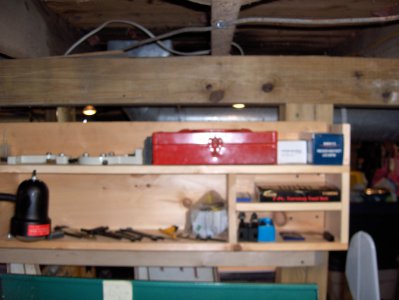
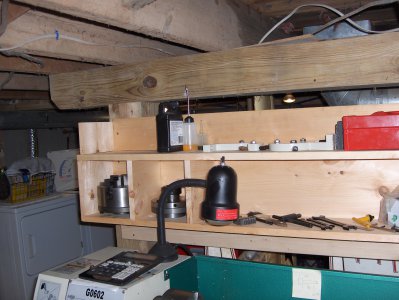
I was tired of having my lathe tooling spread all over the basement, in drawers and under the machine. I got some 1X8's and made up a nice boxed shelf and mounted it on the support timbers behind the lathe. My wife suggested I make another for the top. I didn't have enough wood to make a full enclosure but I made the back and end pieces. Good enough!

shelf box 001.jpg shelf box 002.jpg shelf box 003.jpg
 
After years of using a bench grinder while kneeling I decided to finally make a stand. I went to my local Metals Supermarket and the guy there sold me some 3/8" plate cut offs and a piece of 4" steel pipe. I sprayed it with Rustoleum Silver Hammered finish.
Oh yeah. I had to add a Holman Moody sticker to it. Why? Why not.

I like that stand

For those not so fortunate and financed My pal used a car spare wheel ,. for his grinder stand complete with tyre.
He cut two hole in the side wall 180 degrees opposite after taking out the valve core and screwed a big soda water bottle in that had the base cut off to make a funnel , then poured in a freshly made 50 /50 slurry of sand and cement powder & left it to set for a week . Meanwhile he made 3/4 inch round bar five supports about 20 inches long to eventually weld it all to a 3 inch tube and & eventually welded them in the wheel stud holes ensuring the upright was perfectly vertical
He made a simple grinder mount plate to fit the grinder and take a detachable small water trough . Welded it on the underside to a section of " adjusted pipe that slid inside the upright tube for about five inches and then welded the platform it in place to the main upright tube so it was all level & true.

The beauty of this design is that being round not only can you stand on it with one foot if needed , you can also roll it around the workshop on the weighted tyre or take it out side with ease .

- - - Updated - - -

I was tired of having my lathe tooling spread all over the basement, in drawers and under the machine. I got some 1X8's and made up a nice boxed shelf and mounted it on the support timbers behind the lathe. My wife suggested I make another for the top. I didn't have enough wood to make a full enclosure but I made the back and end pieces. Good enough!

That's handy
My in the head design for my man cupboard is similar , perhaps ad a tiny 1/4 "wood4n or metal lip on the shelf fronts so that nothing can easily slip or roll out due to vibrations onto the lathe when it's running .
 
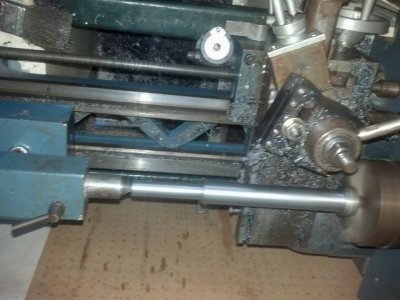
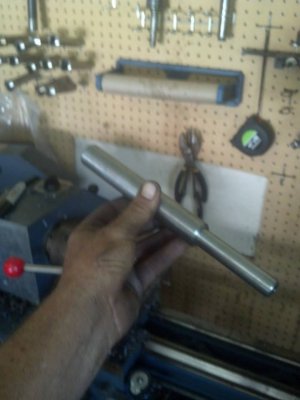
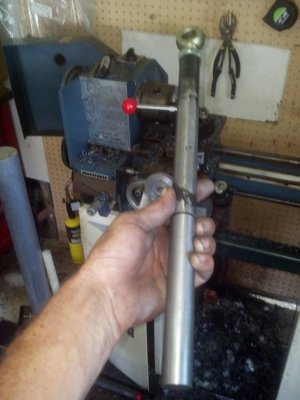
Nothing fancy here. The neighbor took his drag car apart to use the chassi under his ford falcon street rod. He needed one of the links for the rear end to be 6in longer. So he brought me about 20ft of various rounds in 4-5ft sections. I used 10in and kept the rest.

I simply cut it 10in long we needed 9in. Used a steady rest to face and turn down the end. Flipped it, faced it and center drilled it. Then used the tail stock from there. I turned it to 1in up to 9.25. Then took 3in and turned it down to .675 for a .675 hole. Chamfered the step for a weld and the end for ease. Then used emory to clean up the end till it fit good. Partd it, welded it, turned down the weld. Heres my 250 dollar 9x20 lathe taing .025 with carbide. I figure thats pretty respectable.

https://www.youtube.com/watch?v=DSk31DlhDxs


10671303_909406052407688_1432052341706413852_n.jpg10613085_909406005741026_1412324003442519302_n.jpg1972546_909405942407699_4395839597539694347_n.jpg

10671303_909406052407688_1432052341706413852_n.jpg 10613085_909406005741026_1412324003442519302_n.jpg 1972546_909405942407699_4395839597539694347_n.jpg
 
I was tired of having my lathe tooling spread all over the basement, in drawers and under the machine. I got some 1X8's and made up a nice boxed shelf and mounted it on the support timbers behind the lathe. My wife suggested I make another for the top. I didn't have enough wood to make a full enclosure but I made the back and end pieces. Good enough!

Nice job. That looks nice, clean and organized. A good combination.
 
Nothing fancy here. The neighbor took his drag car apart to use the chassi under his ford falcon street rod. He needed one of the links for the rear end to be 6in longer. So he brought me about 20ft of various rounds in 4-5ft sections. I used 10in and kept the rest.

I simply cut it 10in long we needed 9in. Used a steady rest to face and turn down the end. Flipped it, faced it and center drilled it. Then used the tail stock from there. I turned it to 1in up to 9.25. Then took 3in and turned it down to .675 for a .675 hole. Chamfered the step for a weld and the end for ease. Then used emory to clean up the end till it fit good. Partd it, welded it, turned down the weld. Heres my 250 dollar 9x20 lathe taing .025 with carbide. I figure thats pretty respectable.

https://www.youtube.com/watch?v=DSk31DlhDxs


View attachment 83757View attachment 83758View attachment 83759

Nice job on the suspension link. Must have been a lot of that suspension stuff going around this weekend.:pondering:
 
Back
Top