-
Welcome back Guest! Did you know you can mentor other members here at H-M? If not, please check out our Relaunch of Hobby Machinist Mentoring Program!
- Forums
- THE PROJECTS AREA
- PROJECT OF THE DAY --- WHAT DID YOU DO IN YOUR SHOP TODAY?
- Project of the Day Mega-Thread Archives
You are using an out of date browser. It may not display this or other websites correctly.
You should upgrade or use an alternative browser.
You should upgrade or use an alternative browser.
2015 POTD Thread Archive
- Thread starter jumps4
- Start date
- Joined
- Dec 11, 2014
- Messages
- 891
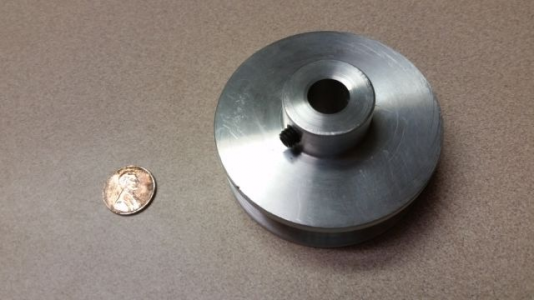
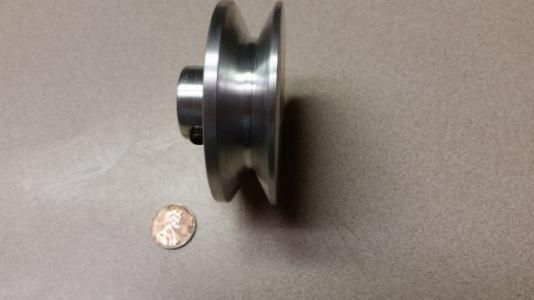
Needed a pulley for a motor I rebuilt for a squirrel cage fan in the garage.
Smallest I had was 6" so I just turned a scrap piece of round 3" Aluminum into what I needed.
Drilled 15/32" then reamed to .4990 Fits the 1/2" shaft perfectly. Drilled and tapped for 1/4 x 20 set screw.
Took about 1- 1/2 hrs total. For me, it was cheaper than driving to hardware store 30 miles and paying $12 for one.
Plus, I got to play on the lathe and mill.


- Joined
- Sep 28, 2013
- Messages
- 4,318
- Joined
- Feb 17, 2013
- Messages
- 4,407
Nice color chips!Here's a cool pic just to show, these are .100 chips from my mitsubishi face mill
Very appropriate! After all, chips are the most prolific product we all produce ;~)it's my avatar pic in case anyone wondered what it is lol
- Joined
- Jan 22, 2012
- Messages
- 655
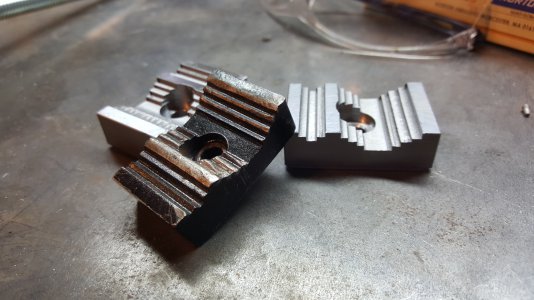
Made a set of pipe jaws for the Wilton 5A vise at work. The black jaw is the original, we have 2 vises at work, each with a broken pipe jaw.
View attachment 109358
Those look very nice.
- Joined
- Aug 29, 2013
- Messages
- 1,050
A little while ago I noticed the tailstock on one of my lathes was having a little trouble holding a drill chuck. I switched chucks and it was better but still seemed a little iffy.
I thought about it off and on for about two weeks.
Then it hit me...
To quote Bugs Bunny, "What a maroon!"
I reamed it with an MT2 reamer that I've had sitting in my tool box. It works great now.
I thought about it off and on for about two weeks.
Then it hit me...
To quote Bugs Bunny, "What a maroon!"
I reamed it with an MT2 reamer that I've had sitting in my tool box. It works great now.
- Joined
- Jul 9, 2014
- Messages
- 613
I've had a hard time obtaining the UNF Allen key capped machine screws so I didn't want to waste any by making them wrong for I only had four screws off eBay .
As a result I made a little jig yesterday to help me quickly and accurately get all the replacement gib screws the same length and with the same spigot size on the end .
To get the jig accurate I put a brand new half thickness nut on the new Allen screw and wound it in the threaded gib screw hole till it stopped then recorded the remaining distance showing between the nut outer face and the thread side of the lip of the cap . Unsurprisingly all were exactly the same to within 3 thou .
I then turned the jig over length and counter sunk the end to take the securing nut using a twist drill a little bigger than the diagonals of the nut in the lathe tailstock chuck
On putting it together I then calculated how much I'd need to turn off the jig to allow me to re put the screws in and turn of the unwanted material but to leave 1 & 1/2 threads of unused thread once the gibs were reset . The MK 1 eyeball came into play I couldn't be bothered to try and work out what the 1.5 threads clearance would be as I couldn't find my feeler gauges
Anyway it worked well, once all the gibs were reset I was puzzled because the compound would only traverse so far back & forth .
It took a few minutes and a mug of coffee to realise that the new half thickness nuts I'd also used were 1.2 mm more across the flats than the ones that came off with the old well wrecked gib screws .
A quick session of waste bin diving saw me rescue the original nuts and put them on the new Allen screws , once I cleaned up the slip burrs on the old nuts . This all happened because I'd had a lunch break between taking of the old gib screws out , making & fitting the new ones I'd failed to measure the new nuts and I didn't realize that iI had to use a different spanner to tighten them up.
All's well that ends well it's all back together now and it's as sweet as a nut .
The securing nut was drawn into the aluminium to hold it & the screw secure whilst I turned the screw to end shape & total length.
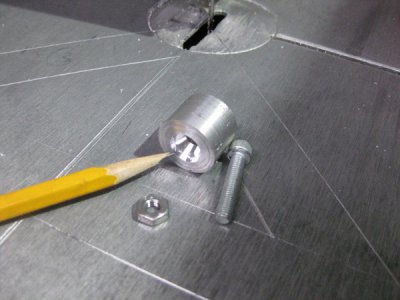
Set up
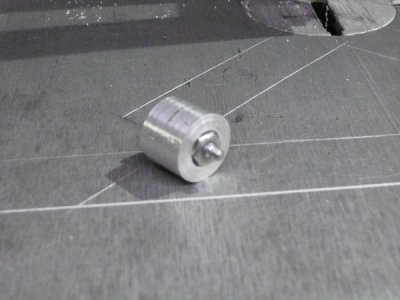
Various stage for the gib screws .. forefront screw is correct and properly tensioned .
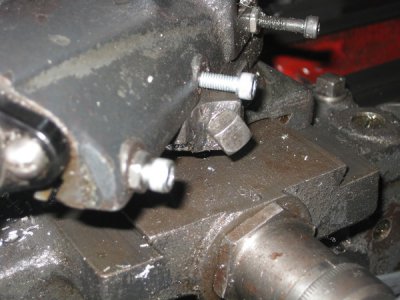
Note how much the new nut on the left & right is so much bigger that it will foul the base of the compound slide once it hits the anti rotation locking screw part of the casting .
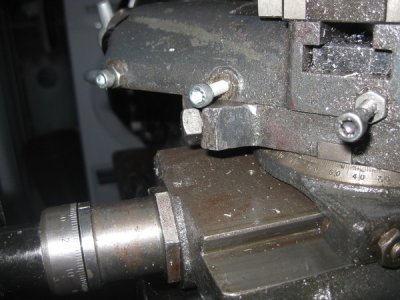
I must remember to check to see if that during the 70 or so years since the lathe was made that any other nuts & bolt head dimensions have changed . Fortunately the nuts thicknesses were identical so it didn't matter when I put the original nuts back on.
As a result I made a little jig yesterday to help me quickly and accurately get all the replacement gib screws the same length and with the same spigot size on the end .
To get the jig accurate I put a brand new half thickness nut on the new Allen screw and wound it in the threaded gib screw hole till it stopped then recorded the remaining distance showing between the nut outer face and the thread side of the lip of the cap . Unsurprisingly all were exactly the same to within 3 thou .
I then turned the jig over length and counter sunk the end to take the securing nut using a twist drill a little bigger than the diagonals of the nut in the lathe tailstock chuck
On putting it together I then calculated how much I'd need to turn off the jig to allow me to re put the screws in and turn of the unwanted material but to leave 1 & 1/2 threads of unused thread once the gibs were reset . The MK 1 eyeball came into play I couldn't be bothered to try and work out what the 1.5 threads clearance would be as I couldn't find my feeler gauges
Anyway it worked well, once all the gibs were reset I was puzzled because the compound would only traverse so far back & forth .
It took a few minutes and a mug of coffee to realise that the new half thickness nuts I'd also used were 1.2 mm more across the flats than the ones that came off with the old well wrecked gib screws .
A quick session of waste bin diving saw me rescue the original nuts and put them on the new Allen screws , once I cleaned up the slip burrs on the old nuts . This all happened because I'd had a lunch break between taking of the old gib screws out , making & fitting the new ones I'd failed to measure the new nuts and I didn't realize that iI had to use a different spanner to tighten them up.
All's well that ends well it's all back together now and it's as sweet as a nut .
The securing nut was drawn into the aluminium to hold it & the screw secure whilst I turned the screw to end shape & total length.

Set up

Various stage for the gib screws .. forefront screw is correct and properly tensioned .

Note how much the new nut on the left & right is so much bigger that it will foul the base of the compound slide once it hits the anti rotation locking screw part of the casting .

I must remember to check to see if that during the 70 or so years since the lathe was made that any other nuts & bolt head dimensions have changed . Fortunately the nuts thicknesses were identical so it didn't matter when I put the original nuts back on.
Last edited:
Put together a Trammel for my Mill to check the spindle alignment. I noticed a few nights ago while doing a test face milling on a piece of scrap that it milled off more on one side than the other. So I made the Trammel after watching the video from Metal Tips and Tricks "DIY Spindle Square". It was pretty simple. Works great as I found my head was .003 off on the G0704 even though it shows it set at 0 on the dial.
View attachment 109139
View attachment 109140
Nice job, I spent my career swing my indicator around using a small pocket mirror to check the back side.


