2016 POTD Thread Archive

Was given two homemade boring bars today, guys at the son in laws work place started spring cleaning. The bars take 1/4" square HSS cutter stock, one is about 6" long the other about 12". Both are 1" in diameter! Need to build tool holders for them now. Sharpened two drill bits on my "General" bit sharpening tool, must have made compensating errors as the results were good on both bits.
Have a good day!
Ray
 
Haha, good one. Thanks Mike

It's funny, I was about as jazzed about it as I was the first time I figured it out!
And Mike I hope your epiphanectomy wasn't too painful

Stan,
Sent from my iPhone using Tapatalk
 
Last edited:
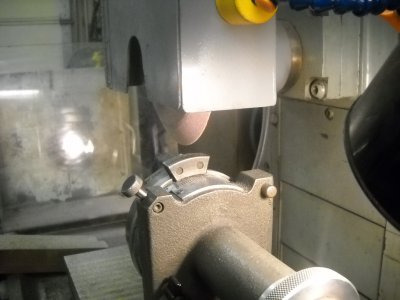
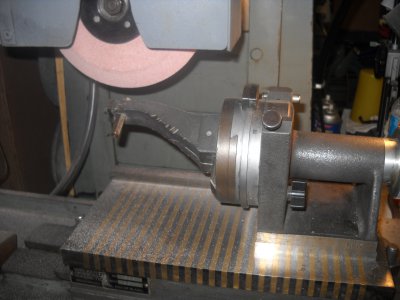
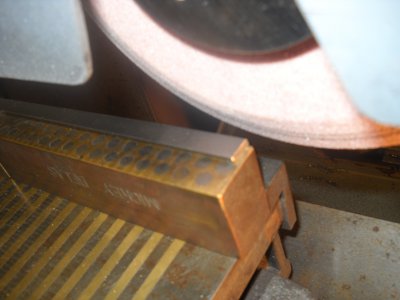
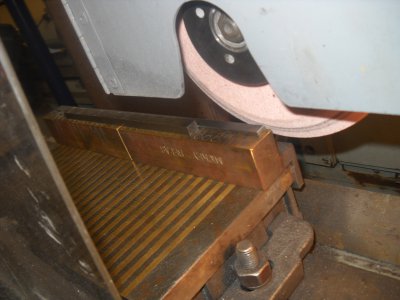
I've been trying to figure out a "lazy" way to cut the beveled edge on a straight flat gib for the slide I've been working on for one of our members. Came up with the idea of doing this on my surface grinder. It doesn't require a lot of metal removal so I figured to give it a try. Started out beveling the edge of a grinding wheel that I had which had a steep bevel on it when I bought them a couple of years ago. Just had to get the correct angle on the wheel. Well after some fiddling around got her done!

DSCN3172.JPG DSCN3173.JPG DSCN3174.JPG DSCN3175.JPG
 
Always lots of nice looking work and great ideas in this thread.

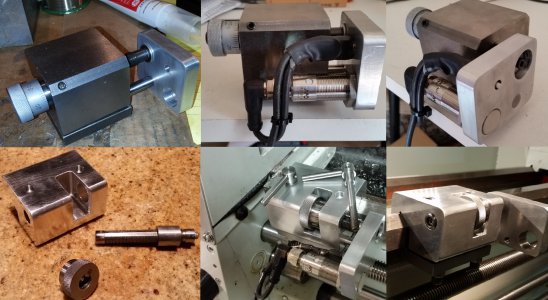
In building a number of different VFD systems, I have been evolving the proximity sensor holder and traditionally mount them as a separate unit onto the micrometer stop body. This works very well if one wants to add it to their micrometer stop using two 10-32 Allen screws, there is an adapter hub adapter that slides onto the micrometer shaft and locks with a set screw. All of these systems require some form of guide mechanism to keep the proximity stop sensor in the same position parallel to the stop body as the micrometer stop is advanced.

I built two recent variations, the first was building a complete stop using an aluminum block for the body and a steel foot underneath. The body has a steel insert threaded with a 1/2"x20 thread, a corresponding threaded micrometer rod was machined to a 0 play tolerance. I started out using the traditional Allen key lock screws to lock the foot to the micrometer body, but I always seem to misplace the key. So I machined new threaded locking bolts with locking arms, the arm positions are adjustable so one can set where the arms sit when locked.

The second build was for a forum member, the micrometer body was bored to accept a 3/8" guide shaft with a 0.001" clearance fit. The P sensor mechanism is held close to the micrometer body, and allows easy access to the micrometer stop thumb wheel. In both of these stops, I tapped the micrometer shaft to directly connect a floating hub. The floating hub allows for a certain degree of alignment mismatch without affecting the index resolution. So it is very easy to read the DRO setting and advance the stop to the new stop position. The accuracy is a bit uncanny in that the cutter/chuck will stop in the exact same position when doing repeated passes. Always learning new things.

Proximity Sensor Micrometer stops.jpg
 
Last edited:
I love surface grinding, I try to use my ol harig whenever I can.
I don't love the new 32A wheel I got, it's a grade too hard and galls quickly on hard steels, thought I could get away with forming it to use it for a face wheel and it REALLY puts the heat into the work, pretty much garbage I guess, not sure what else it could be good for, it's either a J or K, I've had great luck with 38A wheels in I hardness, I use 60gr wheels
 
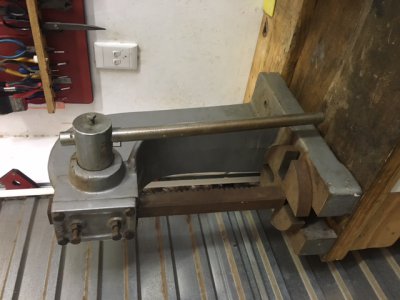
Been too busy with other things to get any time playing in the workshop lately, but yesterday I did travel up to Pretoria so took the opertinity to buy a second hand 3 ton arbor press. Needs a bit of a clean up and a good greasing but otherwise appears in good order.
I suppose now making a stand is another thing to add to the 'to do' list.

image.jpeg
 
Always lots of nice looking work and great ideas in this thread.

In building a number of different VFD systems, I have been evolving the proximity sensor holder and traditionally mount them as a separate unit onto the micrometer stop body. This works very well if one wants to add it to their micrometer stop using two 10-32 Allen screws, there is an adapter hub adapter that slides onto the micrometer shaft and locks with a set screw. All of these systems require some form of guide mechanism to keep the proximity stop sensor in the same position parallel to the stop body as the micrometer stop is advanced.

I built two recent variations, the first was building a complete stop using an aluminum block for the body and a steel foot underneath. The body has a steel insert threaded with a 1/2"x20 thread, a corresponding threaded micrometer rod was machined to a 0 play tolerance. I started out using the traditional Allen key lock screws to lock the foot to the micrometer body, but I always seem to misplace the key. So I machined new threaded locking bolts with locking arms, the arm positions are adjustable so one can set where the arms sit when locked.

The second build was for a forum member, the micrometer body was bored to accept a 3/8" guide shaft with a 0.001" clearance fit. The P sensor mechanism is held close to the micrometer body, and allows easy access to the micrometer stop thumb wheel. In both of these stops, I tapped the micrometer shaft to directly connect a floating hub. The floating hub allows for a certain degree of alignment mismatch without affecting the index resolution. So it is very easy to read the DRO setting and advance the stop to the new stop position. The accuracy is a bit uncanny in that the cutter/chuck will stop in the exact same position when doing repeated passes. Always learning new things.

View attachment 123322

Damn, thats nice work! What a game changer when the whole system comes together. It looks your stop design (centered wheel) will get you closer to the headstock vs the end wheel adjustment type. Bothe look fantastic. Nice solution for the Allen key replacement too.
Its gonna be a new machine!
 
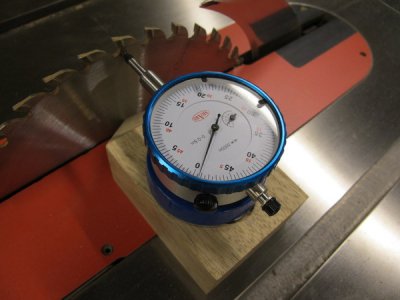
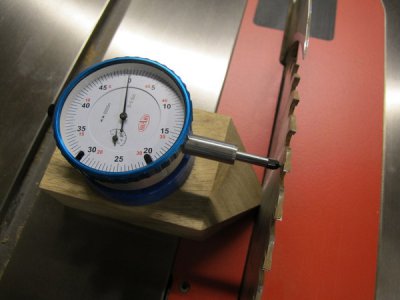
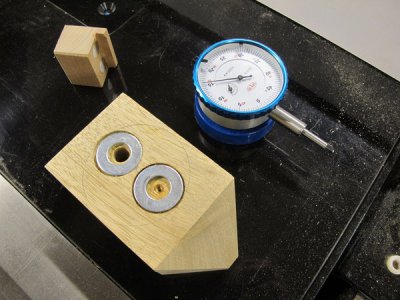
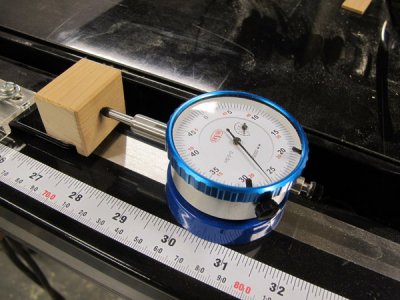
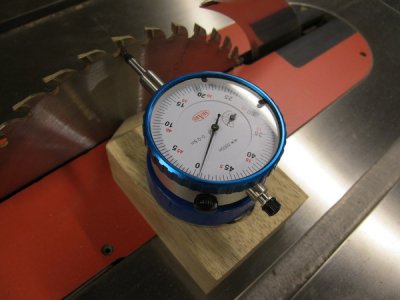
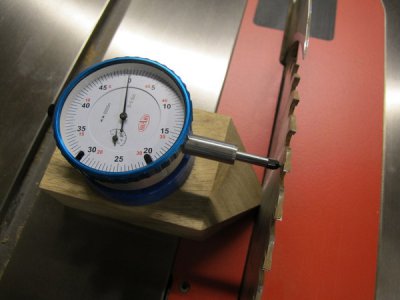
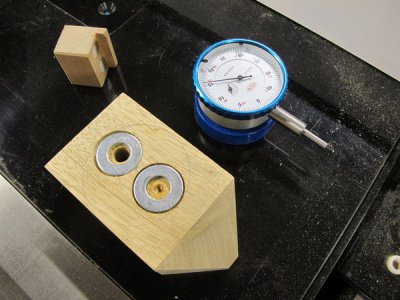
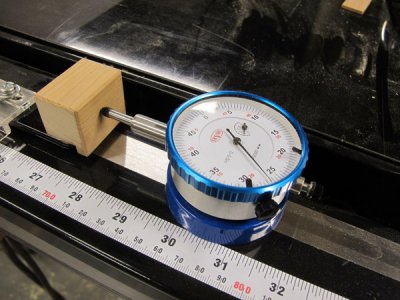
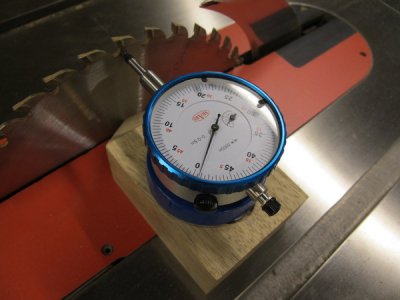
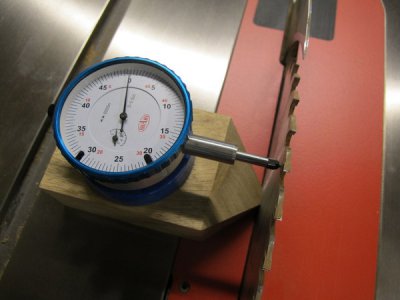
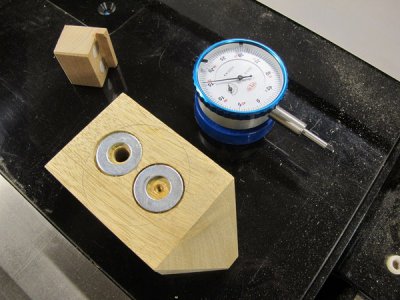
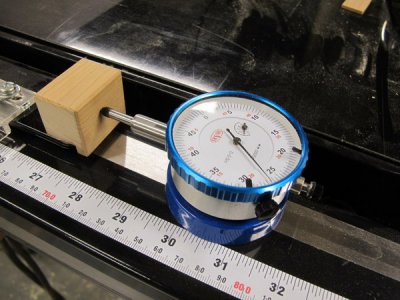
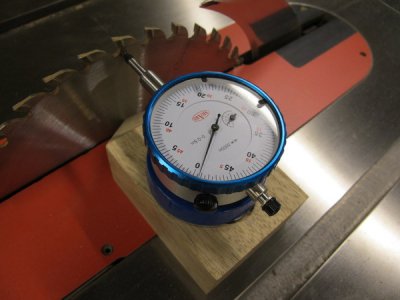
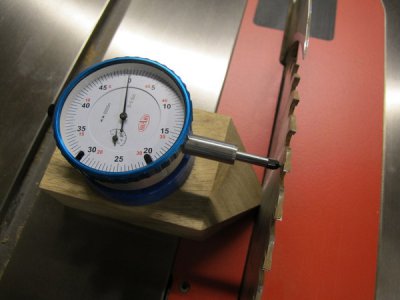
Finally got around to a small project I have been mulling over in my head for some time.

Solves a couple of problems:
  • How do you set your table saw blade perpendicular when you cannot focus on the square
  • How do you move the fence over 0.025" without making 4 test cuts
IMG_3060_zpslxjndhg8.jpg

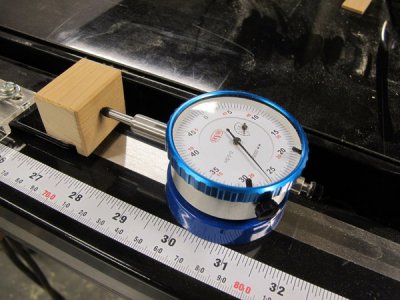
The small block sits on the fence and allows me to use the indicator to measure small movements.
IMG_3062_zpsh0b7ir7n.jpg

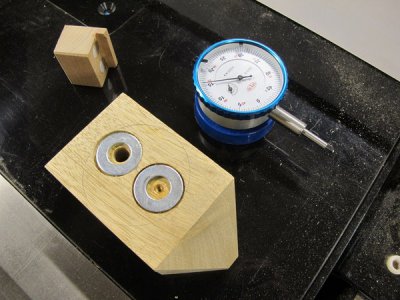
This block allows me to use the indicator to test the blade for perpendicular

IMG_3063_zpsy90oigeq.jpg

No more squinting at the square next to the blade trying to see if there is daylight showing anywhere. I figure 0.0005" over 2.25" is close enough to square for me.

IMG_3065_zps6mvljpod.jpg

Looks like you have a SawStop. Me too. Love it.

Just wondering what you use to zero the blade gauge?

IMG_3060_zpslxjndhg8.jpg

IMG_3062_zpsh0b7ir7n.jpg

IMG_3063_zpsy90oigeq.jpg

IMG_3065_zps6mvljpod.jpg

IMG_3060_zpslxjndhg8.jpg

IMG_3062_zpsh0b7ir7n.jpg

IMG_3063_zpsy90oigeq.jpg

IMG_3065_zps6mvljpod.jpg

IMG_3060_zpslxjndhg8.jpg

IMG_3062_zpsh0b7ir7n.jpg

IMG_3063_zpsy90oigeq.jpg

IMG_3065_zps6mvljpod.jpg
 
Back
Top