Mbfrontier's Logan 200 Rehab

Ah...

Those aren't nicks and dings, they are oil holders! Stone'm down and don't give'm another thought. Paint removal on the big stuff; 4" electric grinder, twisted wire round and cup brushes. Ear plugs, safety glasses and a dust mask.
 
Oil holders. I like it!

I disassembled the legs, chip pan, and bed and worked on the sides and bottom of the ways some more and got the major gunk scraped and scotch-brited off. The legs should fit in my blast cabinet and the chip pan needs a little body work to fix some dings and bends but should turn out just fine.

Thanks for the wire brush tip. I'll be picking up a couple tomorrow.

Mike B.
 
Yeah. I used chemical stripper on mine first, but it doesn't take every little bit off. Didn't have all that much effect on the original enamel paint, interestingly. A 4 inch grinder with a wire brush on it is not for the young your faint of heart, but it really rips everything right down to the bear casting. It really does the job and does it quick.

Reporting live from Brockville Ontario.
(Even got my little Canadian flag)
 
Ah...
Those aren't nicks and dings, they are oil holders! Stone'm down and don't give'm another thought. Paint removal on the big stuff; 4" electric grinder, twisted wire round and cup brushes. Ear plugs, safety glasses and a dust mask.

I am also busy with a Logan 200 rebuild. I bought the lathe about a year ago, but didn't get too far when a house move slowed down the proceedings. I am hoping to get going again in the next few weeks.
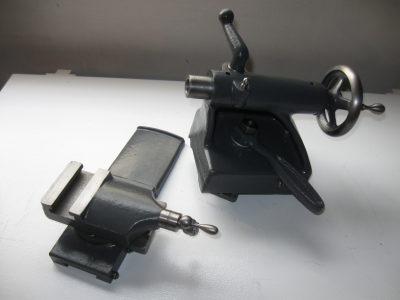
Unfortunately most of the before and other photos were lost in a hard drive crash, but this is the current status - so far only the tailstock and topslide are done:

LoganTailStockAndTopSlide.png

I used the Benjamin Moore Baby Seal Grey Black 2119-30 but it looks much darker. This may be due to camera variations, or perhaps there are two different Baby Seal colours, a grey and a black? Either way I am quite happy with the colour on mine.

Anyway, the point of this posting, was wondering about stoning the bed. What stone would be recommended, and how does one actually go about it?
Thanks,
Clive
 
Nice looking parts clivel.

Take a look at post #61 on "Redlineman's 200 Rescue" thread. He explains what he used to stone his ways and what he used to do it.
 
Take a look at post #61 on "Redlineman's 200 Rescue" thread. He explains what he used to stone his ways and what he used to do it.
Thanks MBfrontier that is exactly what I was looking for,
Regards,
Clive
 
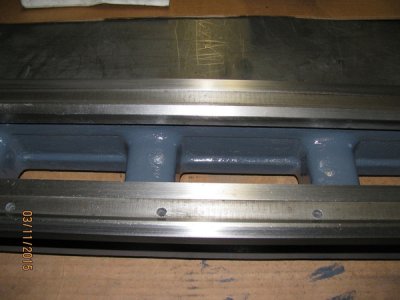
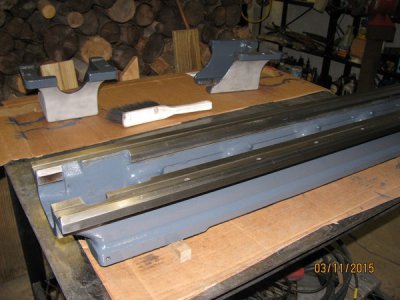
The last few days I have been working on stripping and painting the bed, risers, chip pan, and legs. The bed is done. The risers, chip pan, and legs have been stripped and painted on one side. I will paint the other sides tomorrow. Here’s a picture of the finished bed and the risers painted on the inside and bottom.
IMG_0970_zpszkirximc.jpg
IMG_0971_zpsumiszzz7.jpg

That’s it for now.

Mike B.
 
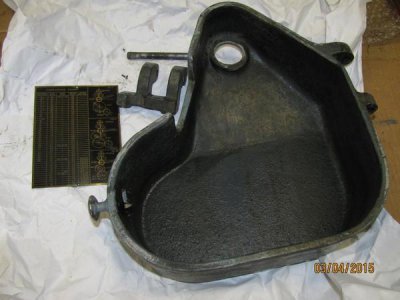
I was able to remove the change gear threading plate off of the change gear cover the same way I removed the nameplate from the headstock.
IMG_0962_zpsvxxnbnyj.jpg

.

Mike, Could you scan a high res copy of the change gear plate? I do not have one and would not mind printing one in color on heavy stock and laminating it and sticking in inside the cover.

James.
 
Mike, Could you scan a high res copy of the change gear plate? I do not have one and would not mind printing one in color on heavy stock and laminating it and sticking in inside the cover.
James.
James,
Take a look here: http://conradhoffman.com/Logan Tricks.html scroll down about two-thirds of the page and you will see a little image of the change gear plate. Click on it to open it up in hi-rez.
I hope that helps and hopefully saves Mike from having to scan his :)
Clive
 
Hey, James Douglas.

It looks like the link that clivel provided is much less faded than the threading chart plate that I have. However, if you need a higher resolution image you can send me a PM and I can email one to you. PhotoBucket allows up to 1024 X 768 resolution images. I just tried scanning the threading plate at 600 dpi as a jpg image and the file is 3.8 mb.
 
Back
Top