Mbfrontier's Logan 200 Rehab

Mine was also missing. I eventually found a VERY nice one on ebay for $10. Very much the same as Conrad's. He knows his Logans, for sure. I like the print out of the chart he has on the wall! If you need a good photo, let me know.
 
Hey, James Douglas.

It looks like the link that clivel provided is much less faded than the threading chart plate that I have. However, if you need a higher resolution image you can send me a PM and I can email one to you. PhotoBucket allows up to 1024 X 768 resolution images. I just tried scanning the threading plate at 600 dpi as a jpg image and the file is 3.8 mb.

A thanks to Clive as I pulled that one down. However, I like yours in brass :) I will PM you my email address. I run my own mail server so attachment size is not an issue. When you have time...no hurry at the rate I am going.

Best, James
 
Last edited by a moderator:
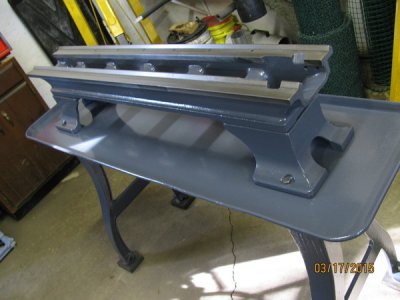
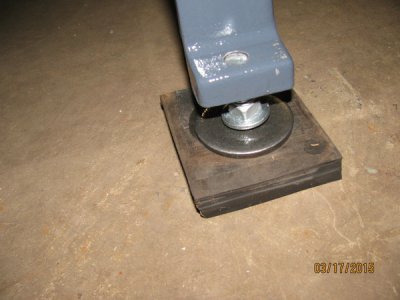
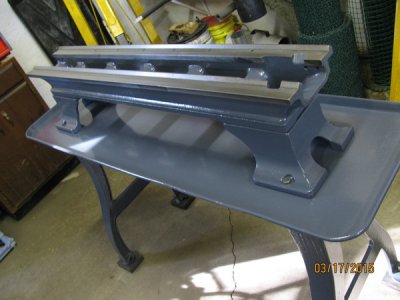
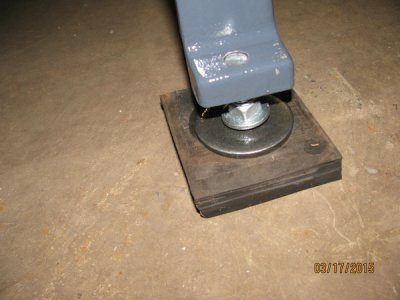
OK, I’m back with the bed, risers, chip pan, and legs cleaned up, painted, and assembled. Also, I picked up some 5/8 – 11 carriage bolts that I screwed into the bottom of the legs that I am using as levelers. I am placing the curved portion of the head of the carriage bolt into a hole in the middle of a large washer placed on top of a 1 inch piece of rubber setting on the concrete floor. Makes it a lot easier to level the lathe without having to use shims and is cheap.
IMG_0975_zpsfhl6hpat.jpg
IMG_0976_zpsdhfcrneu.jpg

Now I’ll be able to install the components as I complete them. I know I’ll be installing the headstock next.

That’s all for now.

Mike B.

IMG_0975_zpsfhl6hpat.jpg

IMG_0976_zpsdhfcrneu.jpg
 
Thanks, Redlineman.

Yes, now I get to "fiddle" with all the parts and deal with fit and adjustment issues.

I think I have the back gears properly installed in the headstock considering the two keyways that are cut in the shifter gear. Also, I received and installed the latch key and spring from Logan for the shifter rack assembly so now it locks in position when its' pulled out. I'll have to check the engagement with the bull and cone gears after I install the spindle assembly. I had a screwdriver slot cut in the eccentric shaft and appreciate how convenient that will be in getting the adjustment right.

While looking for a local machine shop to turn my spindle and bore my cone pulley I found a very cool machine shop within two miles of my home that I never knew existed. It's in one of those concrete block buildings that you pass by between farms that you have no idea what is inside. I live in a rural farming community where there are plenty of old farm machines that the local farmers need parts made to repair. That is what this shop specializes in. I had them turn my spindle to remove the scoring where the cone pulley rides, bore the cone pulley bushing to fit the turned spindle (purchased a cone pulley with good cone gear from eBay and the bushing bore was 1.200 in. so there was plenty of bushing to bore), cut a screwdriver slot in the back gear eccentric shaft, and bore the motor pulley from 1/2 in. to 5/8 in. and cut a 3/16 in. keyway to fit on a new motor. I thought the $100.00 they charged me was fair for nice work and one day turnaround time. It's good to know there is a shop like this close to me and I'll happily use them again when needed. Nice surprise.

Mike B.
 
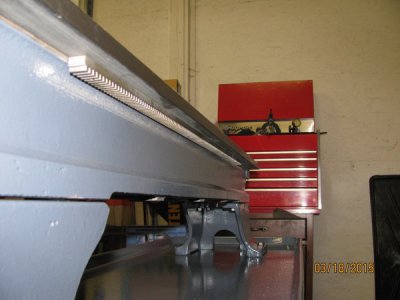
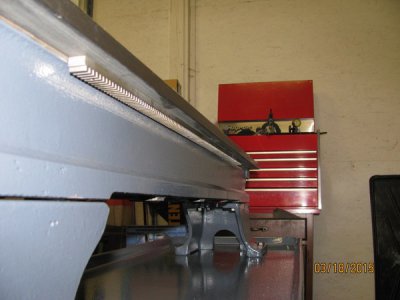
Today I cleaned and mounted the rack with six screws (I was in error on a prior post when I said seven screws).
IMG_0982_zpsfs9lsggc.jpg


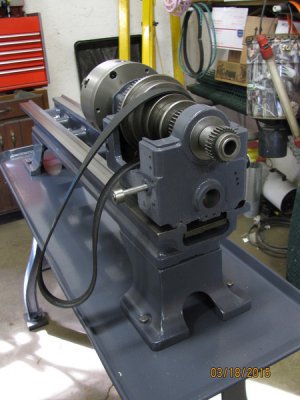
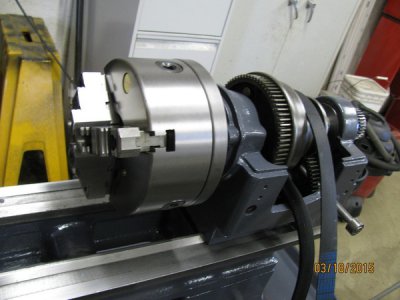
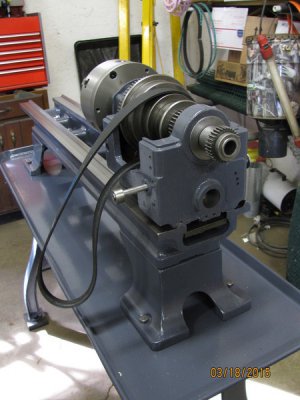
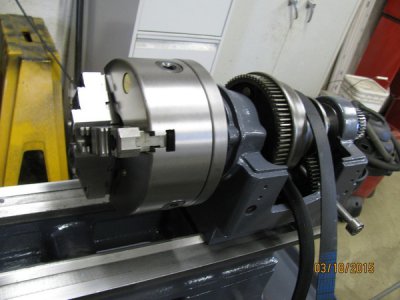
I installed the back gears in the headstock and there are is an allen set screw for each of the eccentric shaft bearing caps that need to be tightened in the same screw hole that doubles as the headstock mounting holes. Then, I mounted the headstock to the lathe bed and installed the spindle assembly. At this point I tried to engage the back gears and realized the back gear under the bull gear was jamming up against the front rim of the cone pulley. So, I had to remove the headstock mounting bolts to loosen the eccentric shaft bearing caps to adjust the back gears so they would ride in between the two rims of the cone pulley without rubbing. Then I reinstalled the headstock and adjusted the back gear shifter to get full engagement between the back gears, bull gear, and cone pulley gear. Piece of cake with the screwdriver slot in the eccentric shaft. Redlineman, the beer’s on me.
IMG_0983_zps877ltmpa.jpg
IMG_0984_zpsx3csvnel.jpg

That's it for now.

Mike B.

IMG_0982_zpsfs9lsggc.jpg

IMG_0983_zps877ltmpa.jpg

IMG_0984_zpsx3csvnel.jpg
 
Wow;

That thing looks fantastic. Yep, there sure is a lot of jiggering and fiddling to get everything lined up and talking the right language. I just couldn't resist trial fitting everything on my spindle a whole bunch of times, even before I had all the parts to finish it, like the poly v belt. It was a useful exercise in the end, as when I had it all ready, the final fitting went pretty quickly.

We all owe a beer to whoever it was that told ME about that screw driver slot trick!
 
Looking good. You are doing a very nice job. Thank you for sharing.
 
Back
Top