Please post pictures of your projects

Wow, I'm jealous of that telescope... :)

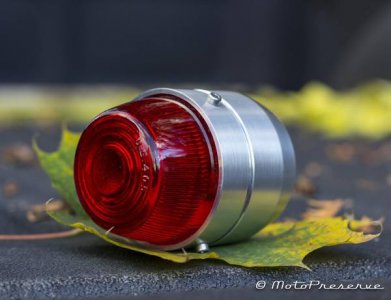
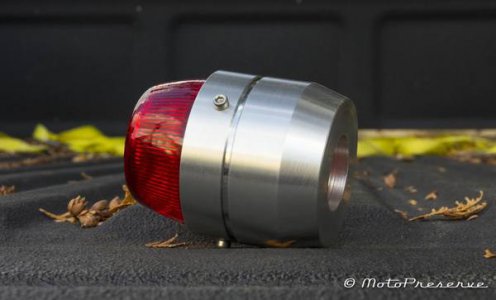
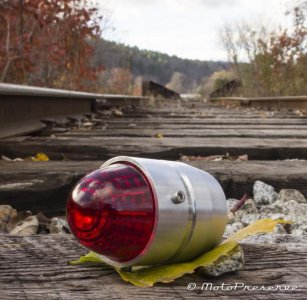
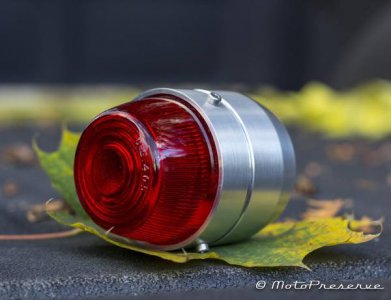
Nothing fancy from me, but they function well as tail/brake lights for motorcycles. They start life as 6061 on my hacksaw by Millers Falls (patented 1893!), bulk done on the South Bend 9B and usually finish up with some hand files and the drill press. Simple but effective. The lenses are off vintage cars from the 30's to the 50's found online at random.

I am always inspired seeing the projects done by you folks here - and although the lights are very basic projects, I have applied much of what I have learned here into these, and it's nice to see the work riding down the road when you're finished....
IMG_1181_zps08003f76.jpg

IMG_1156_zps2a9f2595.jpg

IMG_1202_zpsd2c4457f.jpg

These are really good. Where did you get the lenses? Are they glass or plastic? What does the inside look like, LED or incandescent? Please post more pictures of these.

Jeff
IMG_1181_zps08003f76.jpg

IMG_1156_zps2a9f2595.jpg

IMG_1202_zpsd2c4457f.jpg
 
I make a line of products for harmonica players. My "signature line" is custom microphones. This one is made from burl maple with black stone chip inlay. The rear end of the mic is a volume control. The brass grill starts out as round bar. Many of my other products require the lathe and milling machine as well.

View attachment 63045View attachment 63056

/Greg
http://www.BlowsMeAway.com


Nice work. Your site has some great pieces. How are you cutting the grills. Some of them look CNCed. Are they threaded onto the mic body? If so how are you chucking them to thread? I have a Shure Super 55 mic that I picked up at a yardsale. Would love to redo it for a desk mic for the computer. Love to hear more about how you make yours.

Jeff
 
These are really good. Where did you get the lenses? Are they glass or plastic? What does the inside look like, LED or incandescent? Please post more pictures of these.

Jeff
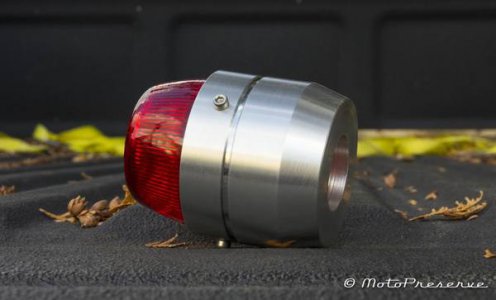
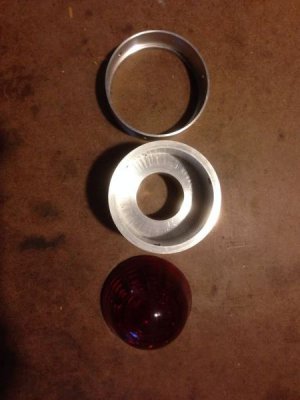
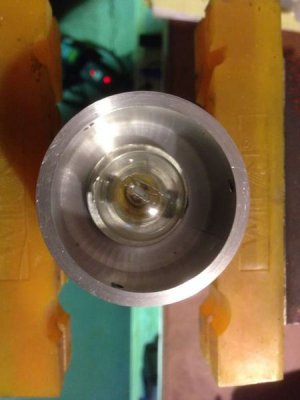
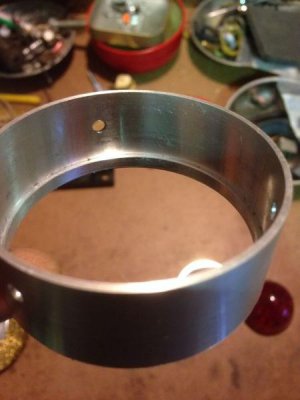
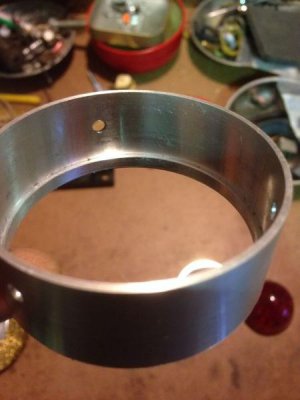
Ill take some more photos tomorrow when I get to the shop. The insides are bored out to a little over an inch after opening it with the largest drill I have. The "mouth" where the bulb sits is is the widest part - and the cap is bored down to fit over the turned end of the body.

I make them for incandescent or LED (1157 replacements) bulbs right now. The LED bulbs can cause some more wiring work if the bike is vintage. Once you've done it once it's fine, but it can be a drag to get it right the first time :)

The lenses are from eBay. Vintage car glass. If you wait long enough, sometimes you stumble on a lot for pretty cheap. Friend may have a source for repop lenses - some guy here in Vermont that refurbishes air streams.
 
These are really good. Where did you get the lenses? Are they glass or plastic? What does the inside look like, LED or incandescent? Please post more pictures of these.

Jeff
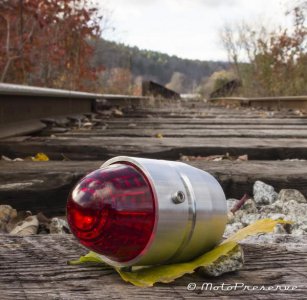
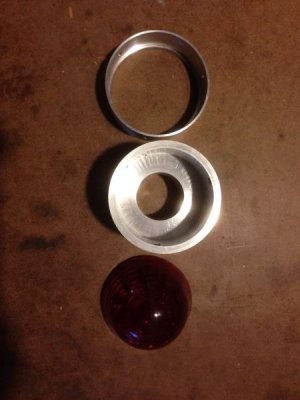
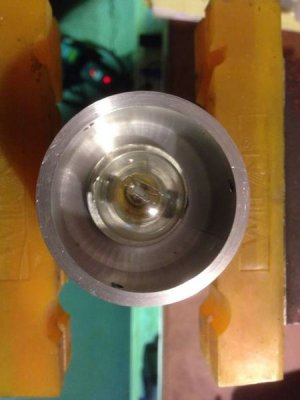
Jeff, here are some more photos. This one is unfinished, but you get the idea...

The parts:
3C9596F4-BDDD-440E-9928-960FCCF2BC4A-620-0000006713A63632_zpsca28f7a0.jpg

With bulb in the body:
9DA12525-4C3F-4DED-972D-2C8EF396157D-620-000000671FC97662_zpse431175f.jpg

The cap:

DA90CC0C-24B8-4538-B2A4-0CBCF3ED8C49-620-000000671A4FD7C4_zps1ba62971.jpg

3C9596F4-BDDD-440E-9928-960FCCF2BC4A-620-0000006713A63632_zpsca28f7a0.jpg

9DA12525-4C3F-4DED-972D-2C8EF396157D-620-000000671FC97662_zpse431175f.jpg

DA90CC0C-24B8-4538-B2A4-0CBCF3ED8C49-620-000000671A4FD7C4_zps1ba62971.jpg
 
Cool tail light! I checked out you website, also very cool... I'm into old bikes also. If it's new, I don't like it. Also not a fan of those ridiculous fat tire bikes. The skinnier the tire, the more I like it.. Big fan of those old board trackers. REAL big fan.
 
Cool tail light! I checked out you website, also very cool... I'm into old bikes also. If it's new, I don't like it. Also not a fan of those ridiculous fat tire bikes. The skinnier the tire, the more I like it.. Big fan of those old board trackers. REAL big fan.

Thanks so much for the kind words. I am a fan of the old bikes obviously, but I also enjoy a couple of my new bikes too (Husky TE610 etc).

Trying to figure out a system of threading (my albatross!) the cap to the body. At this point, that cap is only .05 at its thinnest - and sorta press-fits onto the body, with the screws for safety. Seems some people would prefer no screws....

back to to the drawing board... :)
 
Moto,

Have you considered putting a lip on the male end, and a recess on the female end? Granted, its a one way trip once you put it on, but if you can change the bulb from the back side, does it need to come out again?

Terry

- - - Updated - - -

Thinking, plastic easter eggs.
 
Moto,

Have you considered putting a lip on the male end, and a recess on the female end? Granted, its a one way trip once you put it on, but if you can change the bulb from the back side, does it need to come out again?

Terry

- - - Updated - - -

Thinking, plastic easter eggs.

The bulb holder is secured from the top side of the female (body) part. So the lack of access would be a step back I think.
 
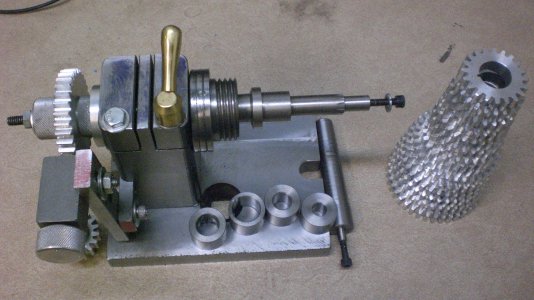
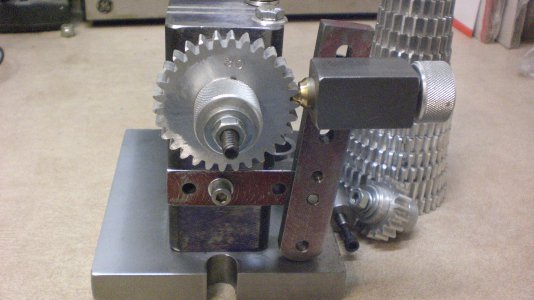
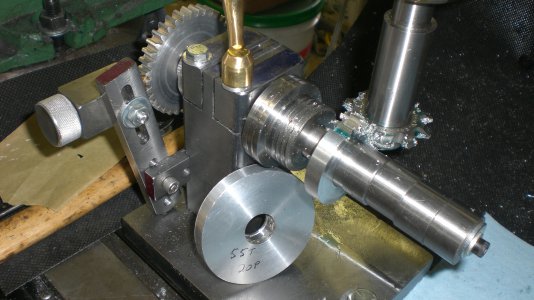
Here is a project I built. I was following along from a Harold Hall book.
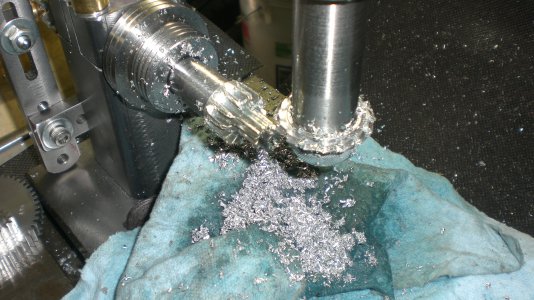
The base was a piece of grader bit. Not sure what composition steel it is but sometimes it is hard to drill. The upright is 2x2 and the spindle is one piece machined from 2" 12L14.
It has cast iron bearings that I press fit in rather than epoxying as the book states.
The spindle has an mt2 taper.
Many of the gears in the stack were cut on this head.
The indexing pin is forked and indexes between gear teeth or over a gear tooth to get 1/2 tooth increments(cut 40 tooth with a 20 tooth indexing, etc)
I made two mt2 arbors the one in it was supposed to be a 3/4,5/8,1/2,3/8 step arbor, but a brainfart on my part caused me to miss the mark for 5/8 so it has a long 1/2 step(was always gonna build a sleeve but have't yet)
The second arbor has a 1/4 dowel to hold gear blanks for 1/4 shaft size.
The spindle is square with the base so it can be indicated off the base to set it straight.
It was a fun project and is more ridged than my dividing head witch suprised me and may be because I have a chuck mounted on my dividing head.
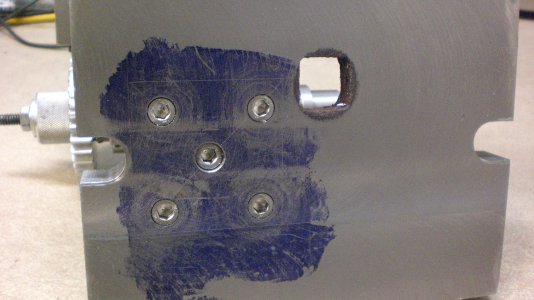
There are 5 1/4" bolts holding the base to the upright(included a pic of that...not sure why)
CIMG2090.JPGCIMG2091.JPGCIMG2092.JPGCIMG1989.JPGCIMG2002.JPG

CIMG2090.JPG CIMG2091.JPG CIMG2092.JPG CIMG1989.JPG CIMG2002.JPG
 
That is beautiful work Ray. I may copy that one.

"Billy G"
 
Back
Top