-
Welcome back Guest! Did you know you can mentor other members here at H-M? If not, please check out our Relaunch of Hobby Machinist Mentoring Program!
- Forums
- THE PROJECTS AREA
- PROJECT OF THE DAY --- WHAT DID YOU DO IN YOUR SHOP TODAY?
- Project of the Day Mega-Thread Archives
You are using an out of date browser. It may not display this or other websites correctly.
You should upgrade or use an alternative browser.
You should upgrade or use an alternative browser.
2015 POTD Thread Archive
- Thread starter jumps4
- Start date
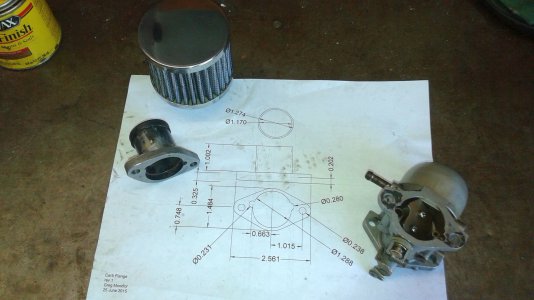
Today I took a break from my "Greg's French 75 mm Cannon" project. In support of my stepson's shade tree small engine repair, I made a custom carburetor - air cleaner adapter flange using a piece of 3/8" steel bar and a short piece of steel tubing. I guess this is first my "machinist for hire" job - hopefully I'll get $20 for it. And while still a CAD novice, I am getting almost adequate at it now on simple parts like this.

- Joined
- Dec 29, 2013
- Messages
- 284
I have the tormach super fly cutter, it is amazing. Gives great finishes.Mike you are not alone, I would love to find one that would make that nice of face on things.
- Joined
- Jun 15, 2013
- Messages
- 1,199
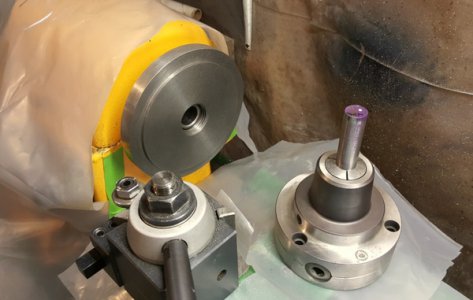
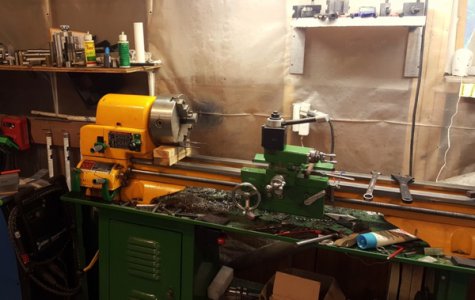
I got a used Bison 5C collet chuck, plain back mount, bought a threaded adapter from little machine shop, it showed up about 6.5in diameter. I also bought a Bison 8inch 3 jaw, im waiting for the cast iron slug to show up from speedy metals to do that one, the 8inch is a direct mount d1-6, so im gonna have to turn a taper on the cast iron to fit the chuck, the CI I bought is 7in oversize, so it will finish machine to 7inches diameter. I got both chucks for about 200 bucks off craigslist.
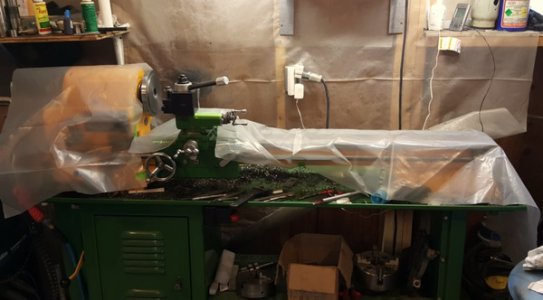
first picture shows the adaptor for the 5c on the lathe, and the plastic wrap
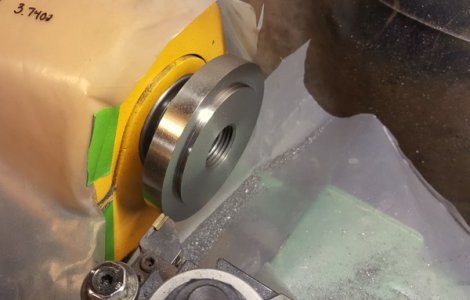
here is the chuck and plate, I had taken an initial od skim
here is where I started to fit the boss, I don't know anything about this tool other than its a Hertel brand, I just wanted to try it out
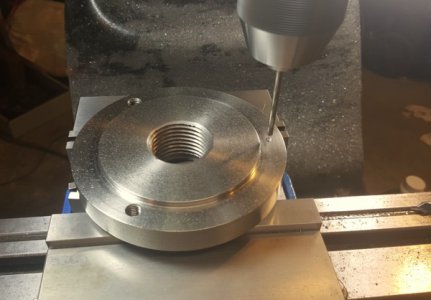
drilling and tapping the bolt holes
and done! I ended up with about .0006 runout, I checked the taper to a hardinge collet with some highspot while gripping a tool and it makes full contact, I clocked all three holes and its the same. I may at a later date redress the taper to get it a little better on my centerline, reason is I checked my original 6in 3 jaw and it has .0004-.0005 runout with the same end mill I was checking against.
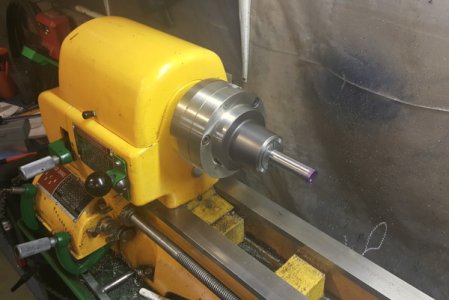
here is the 8inch Bison setup just to get idea of how it will ride this one out. it will have no hub length to keep the jaws as close to the bearings as possible. it will have about the same stickout as my 6in 4jaw does.
first picture shows the adaptor for the 5c on the lathe, and the plastic wrap

here is the chuck and plate, I had taken an initial od skim

here is where I started to fit the boss, I don't know anything about this tool other than its a Hertel brand, I just wanted to try it out

drilling and tapping the bolt holes

and done! I ended up with about .0006 runout, I checked the taper to a hardinge collet with some highspot while gripping a tool and it makes full contact, I clocked all three holes and its the same. I may at a later date redress the taper to get it a little better on my centerline, reason is I checked my original 6in 3 jaw and it has .0004-.0005 runout with the same end mill I was checking against.

here is the 8inch Bison setup just to get idea of how it will ride this one out. it will have no hub length to keep the jaws as close to the bearings as possible. it will have about the same stickout as my 6in 4jaw does.

- Joined
- Mar 10, 2013
- Messages
- 324
Ok had a couple minutes when I came home. The first pic and the right side of the second pic are the first shot with inserts as they came. Left side of the second pic is after turning two of the inserts. Each face received a 3 minute rubdown with Autosol polish. No wiper inserts available yet so not a fair comparison Chevydyl.View attachment 106198 View attachment 106199
I have seen this block in person really an amazing finish..
- Joined
- Aug 23, 2014
- Messages
- 932
Wow! I need to do that. Next time some friend wants to borrow a micrometer I'll hand him one of those.
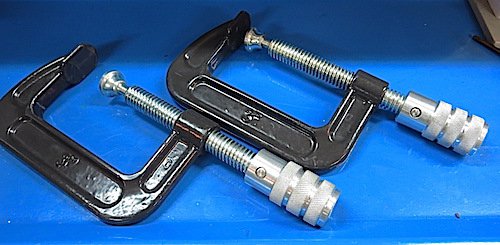
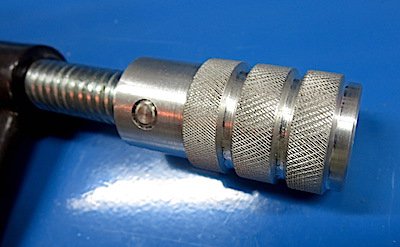
Wow! I need to do that. Next time some friend wants to borrow a micrometer I'll hand him one of those. Just kidding. I like the idea. Give a great feel for clamping delicate items. The knurling looks pretty darn good for a first time.I made knobs for a couple of c-clamps. It is my first attempt at knurling and the first project on my new PM1228.
They got progressively better from right to left.
View attachment 106365
View attachment 106366
- Joined
- Jul 9, 2014
- Messages
- 613
Frank it's possible that your tool isn't perpendicular to the work and it's only doing the half knurl, or your not perfectly on center
Chevvy ,
Doesn't the diameter of the work have to also be a set size in relation to the knurling wheels so that the indentations line up as the tool travels over the same part several times making the indentations a smidgeon deeper each time rather than a random size that give forth the " chattered " pattern look?
.
At least that was the conclusion I came to when I did my knurling using a " bump " knurler for my first attempt at knurling on a part came out similar to Frank's about a month ago .
I took great care to get the centre height set by using a safety razor blade in between the knurler wheels so that it aligned precisely with a single accurately scribed diametrical line on the end of the part being knurled .
To get that accurate line on the work piece , I locked the spindle & scraped a known to be accurate QCT across the end of the work piece when it was fixed up on the QCTP . Then I set things up by viewing from and at the tail stock level with a big back lit x6 magnifying glass on a swing arm , rotated the chuck 180 % and rechecked to find it still spot on.
Then I took the knurler QCT off the QCTP , put it back set it tight and rechecked it again for accuracy ..yep it was still spot on.
- Joined
- Jun 15, 2013
- Messages
- 1,199
Yes it does matter, but since franko asked in a post about diameter I'm sure he has that figured out, but in my own knurling attempts I have found that being just a little off perpendicular will cause that same look, I think, it's because only half of the knurl is making contact, while it could be both wheels are making contact, but only the leading edge, if that makes sense


