

-
Welcome back Guest! Did you know you can mentor other members here at H-M? If not, please check out our Relaunch of Hobby Machinist Mentoring Program!
You are using an out of date browser. It may not display this or other websites correctly.
You should upgrade or use an alternative browser.
You should upgrade or use an alternative browser.
Newbie and the Bridgeport
- Thread starter Ceej0103
- Start date
- Joined
- Dec 20, 2012
- Messages
- 9,422
If it is really gummy, then white scotchbright with very light pressure is occasionally required ...
I agree with Dabbler - use white Scotchbrite if you can. It won't remove metal. It is always best to start with the least abrasive medium and work up in coarseness only if you absolutely have to. I've even used a Mr. Clean magic eraser before and it sometimes works.
I would try Kerosene to get the crud off. If it is petroleum-based crud, Kerosene should soften it enough for the white pad to work.
- Joined
- Feb 14, 2020
- Messages
- 166
@Ceej0103, I use a stiff toothbrish and solvent to clean my ways. Cheap and effective. If it is really gummy, then white scotchbright with very light pressure is occasionally required - but only as a last resort time saver.
I agree with Dabbler - use white Scotchbrite if you can. It won't remove metal. It is always best to start with the least abrasive medium and work up in coarseness only if you absolutely have to. I've even used a Mr. Clean magic eraser before and it sometimes works.
I would try Kerosene to get the crud off. If it is petroleum-based crud, Kerosene should soften it enough for the white pad to work.
Thanks gents; since I don't have any white scotch brite and I've never seen it at my local stores (and I shouldnt got to them anyways during this time), I'll order some on Amazon and start with the toothbrush method.
- Joined
- Feb 14, 2020
- Messages
- 166
Day 5...
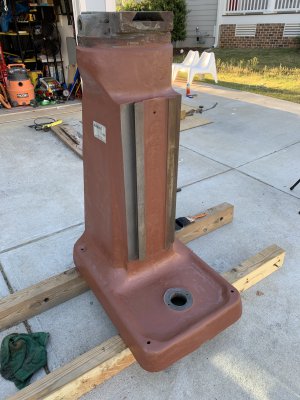
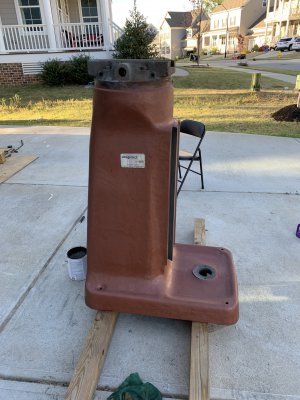
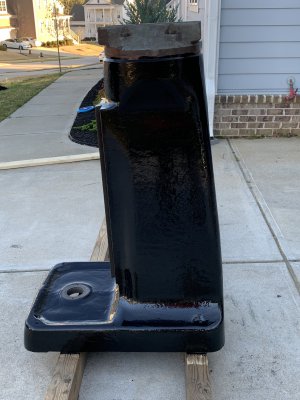
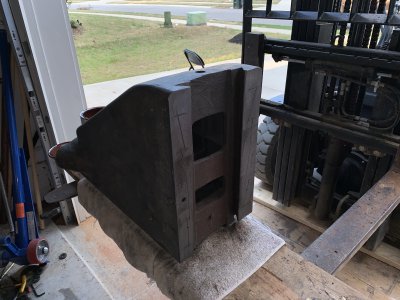
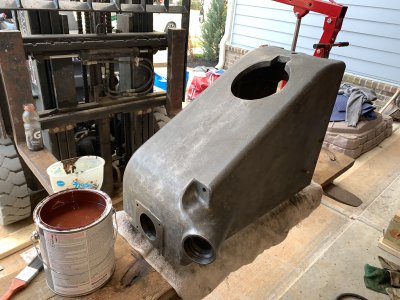
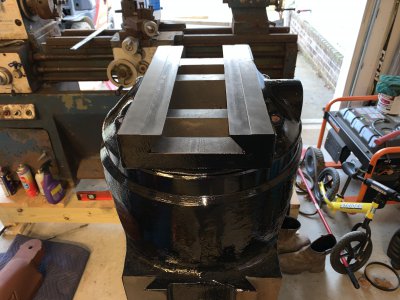
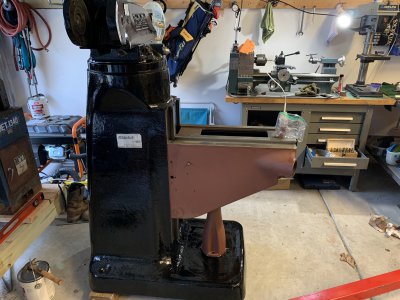
Got the column stood back up and spent the better part of 2 hours going over it with a wire wheel to clean off old paint. The top layer of paint went quick, but then I hit a layer of something further down that was somewhat gummy and tended to smear when the wheel hit it. I'm assuming maybe an oil-based primer they may have used or possibly the combination of an oil-based primer and maybe some body filler. Not sure if they used body filler/bondo on these things back in the day after manufacturing. Since whatever it was seemed to be stuck pretty good and has been for at least 30 years, I figured I would leave it. So it went down to about 50% bare metal and 50% whatever that first coating was.
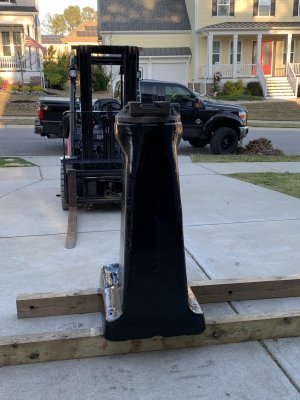
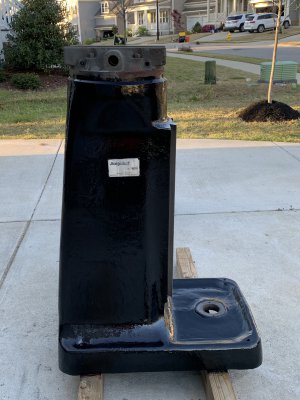
Hit it with a nice liberal acetone wash and then went over it with the oil based primer and then hit it with a coat of the gloss black. All in all I don't feel like I accomplished much, but I suppose this is the biggest part of the machine with the most painting prep work so I'll take that as a victory. Up next, after I use it to hold the column while I put it back in the garage, I'll remove the turret and get that going. It looks like a fairly simple part to restore with just the two blocks that lock the ram.
Got a long day of doing some framing work at an investment property tomorrow so Day 6 will come on Sunday. Goal is to get the turret and ram painted and ready to be mounted on Monday morning after the paint sets overnight.
Got the column stood back up and spent the better part of 2 hours going over it with a wire wheel to clean off old paint. The top layer of paint went quick, but then I hit a layer of something further down that was somewhat gummy and tended to smear when the wheel hit it. I'm assuming maybe an oil-based primer they may have used or possibly the combination of an oil-based primer and maybe some body filler. Not sure if they used body filler/bondo on these things back in the day after manufacturing. Since whatever it was seemed to be stuck pretty good and has been for at least 30 years, I figured I would leave it. So it went down to about 50% bare metal and 50% whatever that first coating was.
Hit it with a nice liberal acetone wash and then went over it with the oil based primer and then hit it with a coat of the gloss black. All in all I don't feel like I accomplished much, but I suppose this is the biggest part of the machine with the most painting prep work so I'll take that as a victory. Up next, after I use it to hold the column while I put it back in the garage, I'll remove the turret and get that going. It looks like a fairly simple part to restore with just the two blocks that lock the ram.
Got a long day of doing some framing work at an investment property tomorrow so Day 6 will come on Sunday. Goal is to get the turret and ram painted and ready to be mounted on Monday morning after the paint sets overnight.
Attachments
- Joined
- Feb 14, 2020
- Messages
- 166
Day 6...
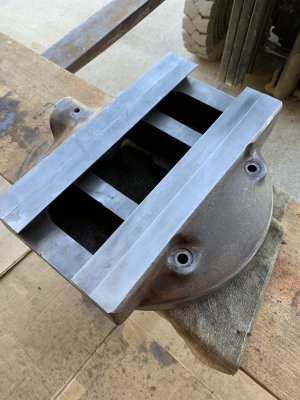
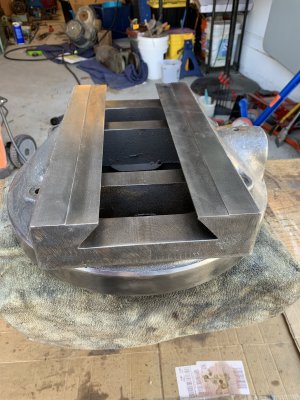
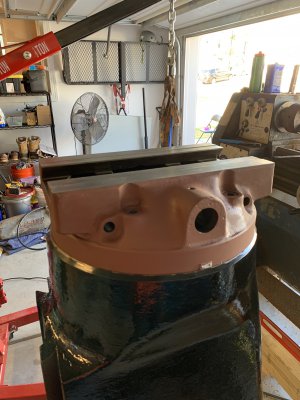
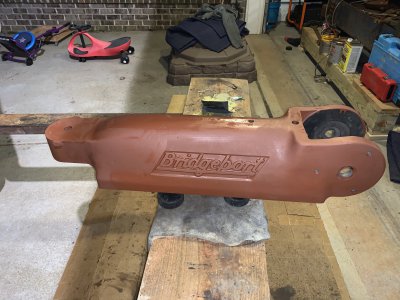
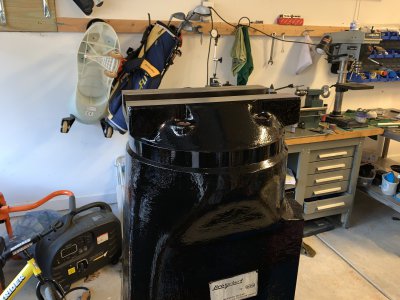
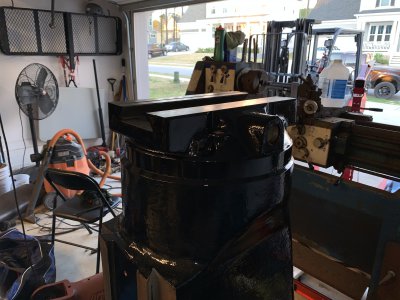
Didn't quite make my goal of having both turret and ram painted, but got them both primed. Like the column, another long day of wire wheeling and scraping to get them ready for paint. Luckily the paint of these parts was in real bad shape and I was able to knock about 50% of it off by just gently tapping it with a small hammer. Got the machined surfaces on the turret cleaned up pretty nice and they should be ready to accept the ram. Haven't done the ways on the ram yet so will probably tackle that before final paint since the primer is pretty resilient to being handled and place on a soft surface when I flip the ram. Going to paint the turret in place on the machine, once dried, I'll lift it back off, place the mounting hardware, and put it on for good.
Parts for turret and ram are ready to go. Pinion, bolts, worm screw, collar, blocks, all of it. So once that paint dries, those two parts are checked off the list.
I would like to break in to that knee tomorrow, but realistically I wont get after it until 3-4 in the afternoon and will have just enough daylight to finish up the turret and ram.
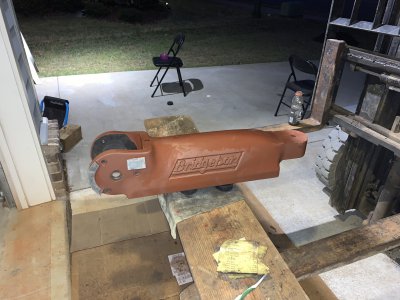
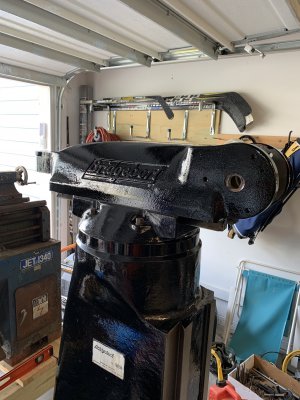
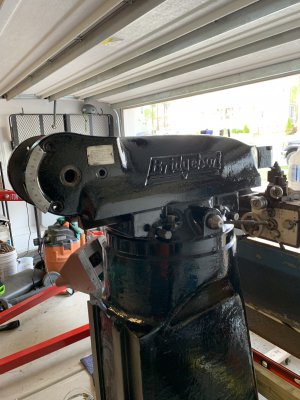
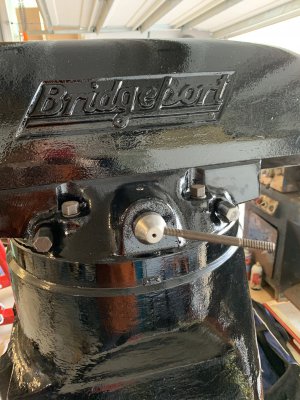
EDIT: After looking at the pictures of the ram, is it just me or does the Bridgeport logo actually look like it says Bridgebort. That's funny....never notice.
Didn't quite make my goal of having both turret and ram painted, but got them both primed. Like the column, another long day of wire wheeling and scraping to get them ready for paint. Luckily the paint of these parts was in real bad shape and I was able to knock about 50% of it off by just gently tapping it with a small hammer. Got the machined surfaces on the turret cleaned up pretty nice and they should be ready to accept the ram. Haven't done the ways on the ram yet so will probably tackle that before final paint since the primer is pretty resilient to being handled and place on a soft surface when I flip the ram. Going to paint the turret in place on the machine, once dried, I'll lift it back off, place the mounting hardware, and put it on for good.
Parts for turret and ram are ready to go. Pinion, bolts, worm screw, collar, blocks, all of it. So once that paint dries, those two parts are checked off the list.
I would like to break in to that knee tomorrow, but realistically I wont get after it until 3-4 in the afternoon and will have just enough daylight to finish up the turret and ram.
EDIT: After looking at the pictures of the ram, is it just me or does the Bridgeport logo actually look like it says Bridgebort. That's funny....never notice.
Attachments


- Joined
- Mar 16, 2020
- Messages
- 157
Never noticed the "Bridgebort" before. Had to go back to the graveyard and looked at a few, and they all have that.
Jon
Jon
- Joined
- Feb 14, 2020
- Messages
- 166
Day 7 and 8...
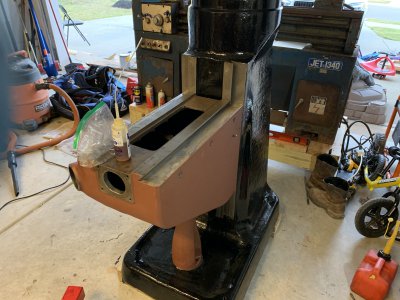
Didn't get around to posting my updates yesterday so here's yesterday and today. Yesterday I got the turret and was able to strip down the knee and get that primed. Found that using a hammer and dull chisel is far superior than the wire wheel for stripping the old paint. With light taps and a good chisel angle, the paint just flakes off and makes much less of a mess than all the paint dust. Took me about 2 hours to get the knee down to bare metal and then another 30 minutes to wipe it down with acetone and get it primed.
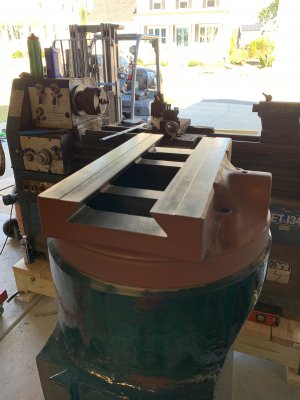
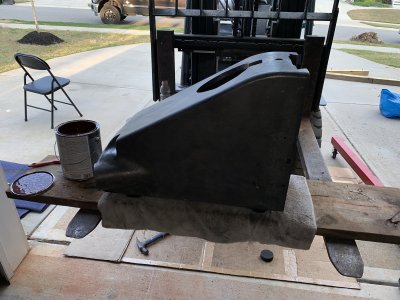
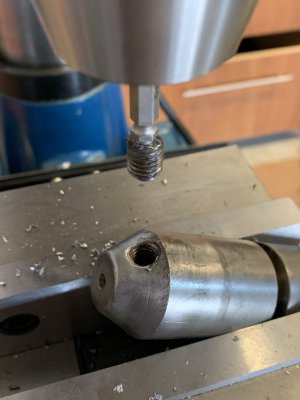
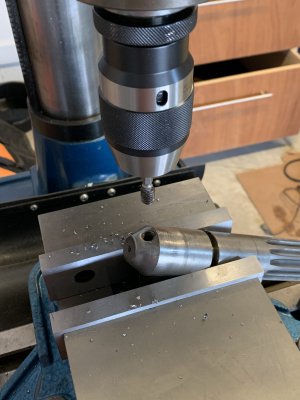
Today I lifted the ram and mounted it to the machine and then painted. I also tackled that pinion with the broken handle shaft in it. I'm a little embarrassed to say, but this was the first time I actually needed to extract a broken bolt from something. I went after it with a 5/16" endmill to knock down the jagged edges and give me a good flat to center drill. After center drilling, I put in a left hand drill bit and tried that trick to pull it out. It didn't budge. I remembered I had a cheap screw extractor set that I had on the shelf and pulled that out, chucked it up, and ran it down slowly in to the pilot through-hole I had just created with the drill bit. To my surprise, it backed out nice and easy. I threw a stud from my mill hold-down set in to the pinion as a temporary handle. I'll make a new one on my little lathe when I have some time. The ram moves nice and easy now.
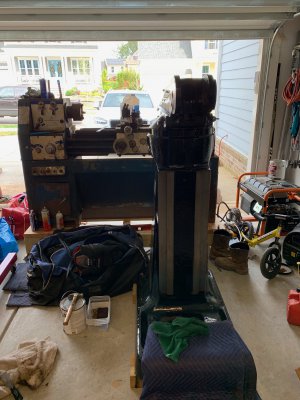
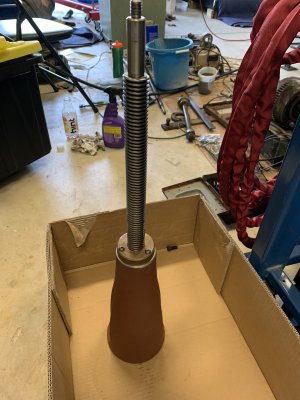
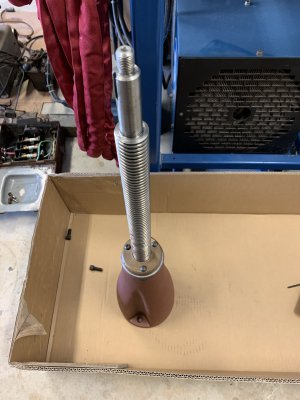
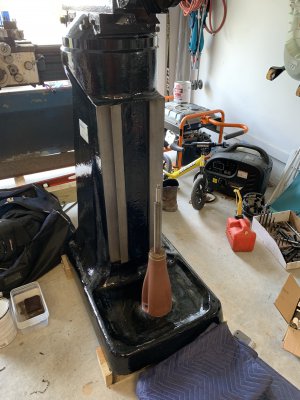
After that, I chased down the pedestal, elevating nut, and elevating screw. Got those all cleaned up, paint removed, primed the pedestal, and then installed the components. Mounted that to the column and was ready to lift the knee in to position. All went off without a hitch. Got the gib put back in the knee along with the bevel gear assembly. I'll do final gib adjustment once the saddle and table are back in place.
Next step....I think I'll do the saddle and table, and then move in to the oiler. The oiler is in rough shape, but when I removed it from the machine I was able to pump it without and lines attached and it pumped oil out so at least the pump is good. Need to get all the lines clear. I also broke the gear shaft clutch insert when removing it from the machine so need to get an order in to H&W for that. I found a few other parts I need also so will probably just add some oil meters to the order and just replace them. I'm sure they're gummed up good.
It's coming together. Soon I get in to the complicated parts to see if I can revive them. The oiler, DRO, power feed, and head. I'm not very confident that I can get the DRO back in to operation although one of the axis worked when I got the machine. I'm hoping the power feed will come back to life with some tinkering. It was DOA when I got the machine.
Didn't get around to posting my updates yesterday so here's yesterday and today. Yesterday I got the turret and was able to strip down the knee and get that primed. Found that using a hammer and dull chisel is far superior than the wire wheel for stripping the old paint. With light taps and a good chisel angle, the paint just flakes off and makes much less of a mess than all the paint dust. Took me about 2 hours to get the knee down to bare metal and then another 30 minutes to wipe it down with acetone and get it primed.
Today I lifted the ram and mounted it to the machine and then painted. I also tackled that pinion with the broken handle shaft in it. I'm a little embarrassed to say, but this was the first time I actually needed to extract a broken bolt from something. I went after it with a 5/16" endmill to knock down the jagged edges and give me a good flat to center drill. After center drilling, I put in a left hand drill bit and tried that trick to pull it out. It didn't budge. I remembered I had a cheap screw extractor set that I had on the shelf and pulled that out, chucked it up, and ran it down slowly in to the pilot through-hole I had just created with the drill bit. To my surprise, it backed out nice and easy. I threw a stud from my mill hold-down set in to the pinion as a temporary handle. I'll make a new one on my little lathe when I have some time. The ram moves nice and easy now.
After that, I chased down the pedestal, elevating nut, and elevating screw. Got those all cleaned up, paint removed, primed the pedestal, and then installed the components. Mounted that to the column and was ready to lift the knee in to position. All went off without a hitch. Got the gib put back in the knee along with the bevel gear assembly. I'll do final gib adjustment once the saddle and table are back in place.
Next step....I think I'll do the saddle and table, and then move in to the oiler. The oiler is in rough shape, but when I removed it from the machine I was able to pump it without and lines attached and it pumped oil out so at least the pump is good. Need to get all the lines clear. I also broke the gear shaft clutch insert when removing it from the machine so need to get an order in to H&W for that. I found a few other parts I need also so will probably just add some oil meters to the order and just replace them. I'm sure they're gummed up good.
It's coming together. Soon I get in to the complicated parts to see if I can revive them. The oiler, DRO, power feed, and head. I'm not very confident that I can get the DRO back in to operation although one of the axis worked when I got the machine. I'm hoping the power feed will come back to life with some tinkering. It was DOA when I got the machine.
Attachments
-
 IMG_2252.jpeg3.6 MB · Views: 32
 -
 IMG_2253.jpeg3.7 MB · Views: 30
 -
 IMG_2254.jpeg3.7 MB · Views: 32
 -
 IMG_2255.jpeg2.9 MB · Views: 32
 -
 IMG_2256.jpeg3.1 MB · Views: 31
 -
 IMG_2257.jpeg3.4 MB · Views: 30
 -
 IMG_2258.jpeg1.1 MB · Views: 31
 -
 IMG_2259.jpeg1.2 MB · Views: 27
 -
 IMG_2260.jpeg2.4 MB · Views: 26
 -
 IMG_2261.jpeg1.4 MB · Views: 26
 -
 IMG_2262.jpeg1.2 MB · Views: 25
 -
 IMG_2263.jpeg1.8 MB · Views: 26
 -
 IMG_2264.jpeg1.8 MB · Views: 26
 -
 IMG_2265.jpeg1.7 MB · Views: 28
 -
 IMG_2266.jpeg2 MB · Views: 31
 -
 IMG_2267.jpeg2.9 MB · Views: 34
 -
 IMG_2268.jpeg2.8 MB · Views: 37
- Joined
- Mar 16, 2020
- Messages
- 157
I was looking for the pics of your DRO and power feed, it was an Acu-Rite II correct? If it still has the old AR5 scales on it, those things are robust as all get out. I got a few working Acu-Rite IIs here at the shop with those awesome wood collet holders on it, if you need any parts or need to make sure something looks good.
I think you had an Align power feed on it, right?
I am diggin the black paint, big time.
Jon
I think you had an Align power feed on it, right?
I am diggin the black paint, big time.
Jon
- Joined
- Jan 2, 2014
- Messages
- 8,853
I remembered I had a cheap screw extractor set that I had on the shelf and pulled that out, chucked it up, and ran it down slowly in to the pilot through-hole I had just created with the drill bit. To my surprise, it backed out nice and easy.
Wow! A documented case of an easy-out actually working rather than just making the situation worse by lodging broken-off harden metal into the hole.
I think I can count on one finger the number of times I have heard about it working......including this case!
Great progress!
-brino
PS: this is only partially in jest, but my experience with them (of many different styles and manufacturers) is very poor.
However, I do not think I have ever tried one under power, except in a handheld drill.
- Joined
- Feb 14, 2020
- Messages
- 166
I was looking for the pics of your DRO and power feed, it was an Acu-Rite II correct? If it still has the old AR5 scales on it, those things are robust as all get out. I got a few working Acu-Rite IIs here at the shop with those awesome wood collet holders on it, if you need any parts or need to make sure something looks good.
I think you had an Align power feed on it, right?
I am diggin the black paint, big time.
Jon
Jon,
I'll check on the models for both of those pieces, but I think you're right on. Once I get them cleaned up a little I'll snap some picutres of what I'm working with. Do you know if it's easy to bench test the readers/scales? Does it need to be mounted to do that, or should I be able to just move the reader a little on the glass/magnet (not sure what they have) to see if it's picking up the movement?