2015 POTD Thread Archive

Yeah and just how gas hungry is it?

Will have to wait and see - has a 0.8mm welding nozzle as the 'injector' (not sure what the right word is), but operated well with my regulator wound right down to the low end - I don't have a gauge so not sure what the actual gas pressure is.
 
Yeah and just how gas hungry is it?
It is fairly gas hungry compared to a forced air type. However the benefit is the amount of heat it can produce without the need for electricity or other fuel source for a blower. The hardest part is getting the Venturi sized correctly with the gas port and air inlet size.
 
Will have to wait and see - has a 0.8mm welding nozzle as the 'injector' (not sure what the right word is), but operated well with my regulator wound right down to the low end - I don't have a gauge so not sure what the actual gas pressure is.
I used to use a welding gas regulator for these. eliminates the guess work.
 
Today, I fixed the hand-piece on our kitchen sink with my lathe. There was an inner rubber tube and a flexible outer metal jacket that connected between under the sink and the hand-piece. The flexible metal jacket broke off where it met the hand-piece which then weakened the inner rubber tube, and that burst... so I had to remove the bad parts and in doing so, I destroyed another piece inside ("good luck finding that replacement part", I thought)... so, I decided to turn a new coupler out of a piece of 2011. Sadly, I didn't think to take pictures of it, but it worked better than I had hoped! Of course I had to yell "Booya!"
 
Building a small furnace, primarily with the intention of having a go at casting aluminum, has been on my todo list for a while but never made it to the top. A friend recent decided he needed one too (for forging knives) so with a companion to help I finally got the motivation and we are going to have a go at building a couple out of 14kg LPG cylinders -horizontal for him and vertical or me.
Today's effort was to turn up the components to build the burners from design plans he had found on the Internet. Took most of the day but we got one finished and tested.
View attachment 94441

View attachment 94442

This burner is supposed to be the bees knees according to his research of forums etc on the subject, and I have to say I was impressed with its performance (but then I only have my small brazing torch as a reference for comparison).


That flame looks good enough for a project I have in mind ...hardening & tempering old hand forged steel cutting lathe tools using a big lump of red hot cast iron as the tempering heat source .... Most of the old tools I got with my ancient lathe have been ground & touched up so much that the tempering on the tip has all but disappeared .

Can you give or PM me the website details where you got the plans from please ?
Dave
 
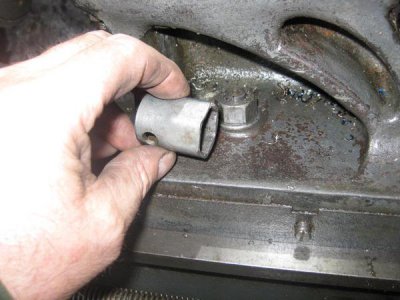
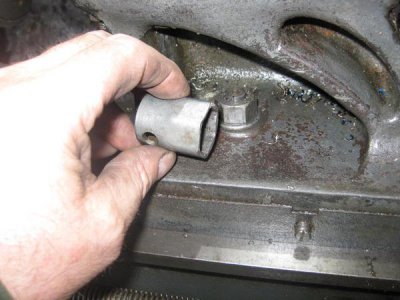
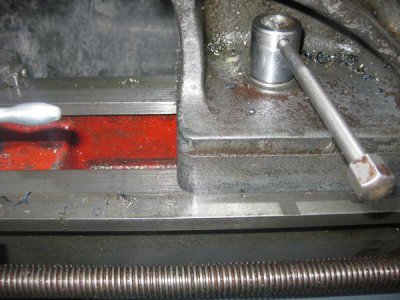
When I got my ancient lathe in August last year I found that the saddle spanner was a cut down spark plug box spanner . It was never satisfactory for like sods law sates if it can foul up then it will .

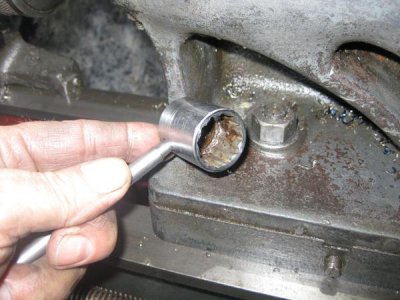
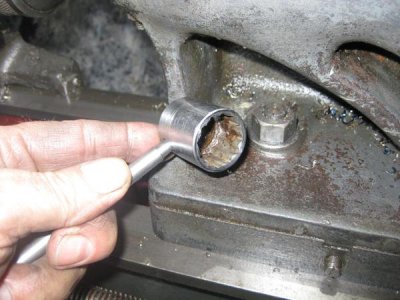
To undo the locked up saddle I usually had to use the spanner in two goes as you could only get a flat at a time movement across the saddle web before the wrenching bar fouled the web of the saddle . Solution to get an old never ever used extra deep bi hex ( 12 point ) socket wrench out my mechanica tool trolley , turn it down so it fits inside the web over the clamping nut & put the wrenching bar in it.

Well , that old socket was a quality chrome vanadium one ..it took four resharpens of the lathe tool before I got below the outer hard skin , then I used the 4 inch disk cutter to cut both ends off at the marked lines . I faced off the disk cut faces & then ruined a dot punch & four 6 mm titanium coated twist drills trying to make the wrench bar holes . I finally got my holes through the socket and turned the wrench bar down to fit then pened the end of the bar over so it can still rotate whist in the socket .
It works a treat there is plenty of room for a single undo or tighten stoke ..no more fiddling about every time I want to move the tail stock.

What the problem was .
IMG_5879_zps0b70fe39.jpg

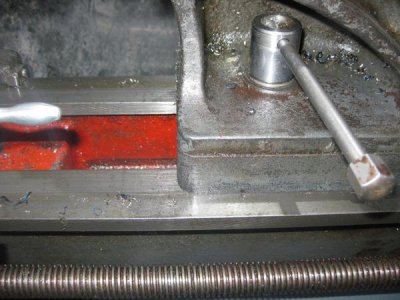
The turned down bi hex socket , note I champhered the inside of the socket not only to remove any burrs but also to ensure it slips easily over the saddle adjusting nut .

IMG_5880_zpsae91da1d.jpg

The final position .. " Job done " .


Ha ha did you spot the mistook .. It's been pointed out ... " I've used the wrong worm " a couple of times ,it should be tailstock not saddle


IMG_5879_zps0b70fe39.jpg

IMG_5880_zpsae91da1d.jpg
 
Last edited:
Dave,
Should that be the tailstock and not the saddle you are referring to?

Cheers Phil
 
It works a treat there is plenty of room for a single undo or tighten stoke ..no more fiddling about every time I want to move the tail stock.

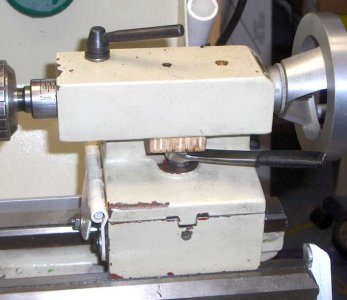
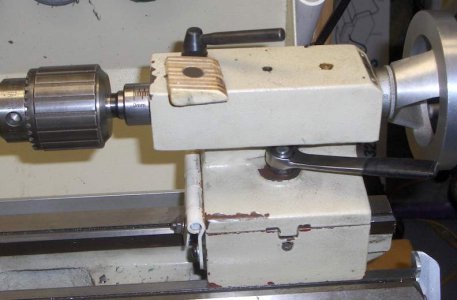
Great job! And if you want frosting on your cake, you might be able to whittle up something like what I used on my tailstock to keep the wrench from lifting off the nut. Note the magnet. Holds the wedge in place, but easily removed ...

kHPIM2930.jpgkHPIM2931.jpg


Durn! I hope it's distortion from your camera lens ... but that leadscrew looks very badly bent!:thinking:

kHPIM2930.jpg kHPIM2931.jpg

IMG_5881_zpsc9ae4ee9.jpg
 
Great job! And if you want frosting on your cake, you might be able to whittle up something like what I used on my tailstock to keep the wrench from lifting off the nut. Note the magnet. Holds the wedge in place, but easily removed ...

View attachment 94476View attachment 94477


Durn! I hope it's distortion from your camera lens ... but that leadscrew looks very badly bent!:thinking:
It's a distortion because if his screw is bent, so is everything else. look at the bed!
 
Another way is to fuse the wrench and nut. Then it is a cam lock tailstock.

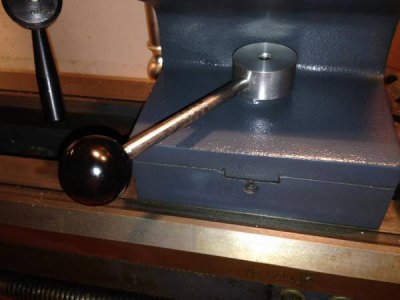
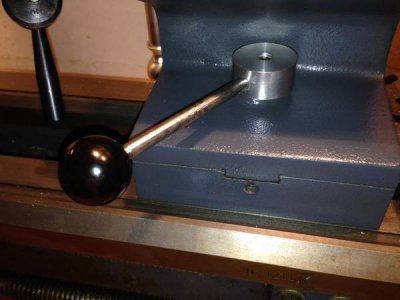
Make the nut first. Then tighten until tight. THEN mark where to drill and tap the handle so it tightens at the right spot. I used a 6 inch stainless steel bolt for the handle cutting off and threading one end for the ball.

photo-4.jpg

photo-4.jpg
 
Back
Top