2017 POTD Thread Archive

I loaded up some packages to be shipped out , reserved a Ford F250 truck to tow the camper to New York this weekend , went to AT&T to upgrade phone ( with no success ) , took more tools out of the Vidmars to sell , cleaned up the Blazer a bit , and then I just relaxed for 15 minutes .
 
I like having feedback, especially about machining, carpentry I pretty much have figured out:encourage:
View attachment 244388
That is the exterior, tyvek the top 5 foot, 30 lbs felt paper tucked in under, taped for the bottom 3 foot, than 7/16" durock screwed on. Stone and siding being ordered tomorrow.

View attachment 244389
Water board drywall going on all wall, this part of the shop was very dark, just having the drywall on the walls makes this part of the shop much brighter now.

View attachment 244390


I'm not sure that helps anyone else, it's been a fun project, I can't wait to get all the construction done so I can start playing with machines again...
Sorry to anyone offended , stubborn old men...
Why the purple ‘rock—are you worried about water in your shop?
 
It can't hurt, it's a bit more money, but not a significant amount.
My shop typically is very humid in the summer months, I am gluing frp to the drywall, so I prefer to spend a little bit to have a little peace of mind. The frp will help to trap moisture in the drywall.
I have a couple of dehumidifiers, but sometimes they fill quick and I don't get to empty them for hours. I am also looking to air condition the shop for the first time next summer, I'm not sure how that will work, so this is just added protection.

Rich
 
Rich, very interesting question. I bought a used, cheapo laser level to establish the grade at the one abutment I had reached with track laying. Then laid in and staked the track radius to the other end. Then back to the laser level to mark that same grade elevation at each stake point for the inner rail at each bent. The inner vertical posts for a trestle should lay directly under each rail, so I cut and erected all the vertical posts on the inner curve first. Then went back and made the verticals for the outer radius 1/2" higher than the inner posts, to establish superelevation. Once the cap timber was in place across the two inner posts, on each bent, I just measured the outer angled posts and eyeball fitted them to the sill and cap timbers. Then bolted up the cross bracing, etc.

The only really critical thing was getting a flush fit between the top and bottom angles of the posts and the sill and cap. Because the foundations I poured weren't real square and level on top, the sill timbers are canted a bit, and the posts needed some fitting to accommodate the unexpected compound angles that randomly showed up.

Overall the initial laser level base line on the one set of inner vertical supports established the level, horizontal grade all the way through the structure -around 40' overall when it gets finished.

One thing critical to maintaining acceptable coefficient of friction between train wheels and steel rail, is to never have a curved track and an uphill grade in the same stretch of track. For example, If you raise the grade on tangent track (straight track) to 2%, the train will loose around 90% of its draw bar pulling capacity, because of going up hill. Add a curve to the grade, and you can easily have a situation where the locomotive may not even pull its own weight. This is due to the excess friction on the side of the wheels caused by pressure of the locomotive against the side of the rail, as it negotiates the curve. So the curved rail on my trestle needed optimally to be dead level.

Tlenn
 
Cool, doing alittle backyard surveying, nice work. Nice explanation, I do apperciated it.

Rich
 
Ahaha, the little laser was a vast improvement over the water level bucket and hose Contraption i used to determine initial elevations.
 
MontanaAardvark About 10 inches long, and 2.5 dia The balls are just over 3/4 inch.
I it will be mostly used to make noise not shoot anything. Might scare the people as it is
 
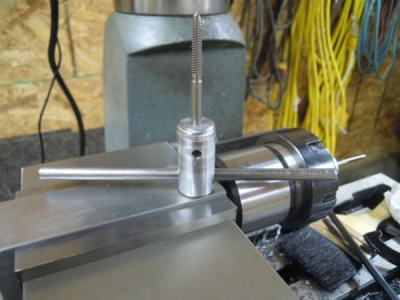
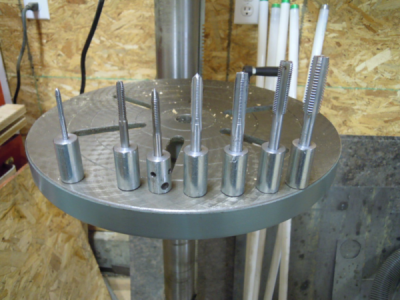
Made some tap holders based on something I seen in one of Harold Halls' books.

This one is for #10 taps and has a cone dimple on the underside so I can use my spring center to guide it.
1508377223967.png

Working on the rest but I need to order some more set screws to finish them.
1508377344828.png

There is an odball one in the pic, as this was the first one I made for a specific need. Then I decided to make one for each size and to make them a standard length. Might have to redo the oddball so it doesn't get a complex about being different. :)
 
Here's a project of several days and some firsts for me. Made a ball turner using the boring head. I didn't take any progress pics because I wasn't sure it it would even work. But to my surprise it worked very well albeit a little slow going, having to adjust the cutting depth after each pass. But I only needed it to make one ball so that was fine.

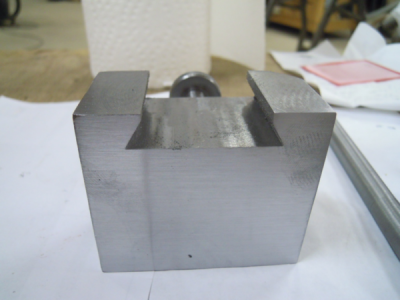
My first dovetail and it fit like a dream despite not taking any measurements. Just horse sh*t luck. When I thought I was getting close I stopped to check the fit and it had a very slight clearance. Sure glad I didn't take another pass before stopping to check.
1508378057612.png

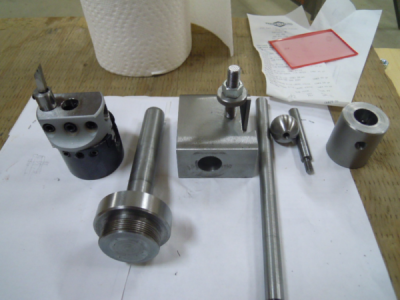
All the parts. I even made the shaft for the boring bar. You can see where I welded the threaded section to the shaft.
1508378160834.png

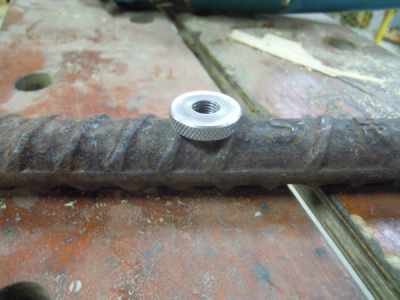
All this stuff was made from scrap yard materials of unknown heritage, except for the knurled nut. It was made from this stuff. Turned an ugly beast into a thing of beauty. Made 6 more since I was already set up for it and went through all the trouble of turning the rebar into something round.
1508378441761.png

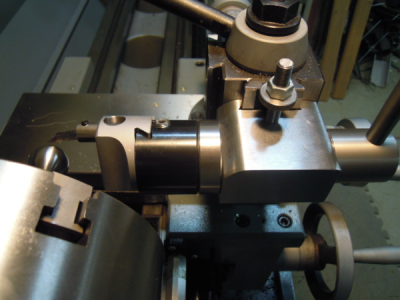
Here it is mounted to the QCTP. The curve in the tool holder is not by design, it just happened to be the shape of the material I had on hand.
1508378632052.png

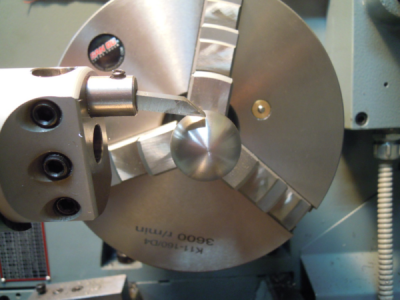
a close up of the cutting tool. I copied the cutting tool idea from one of our members posts (can't recall exactly who but credit goes to him). I just used square stock because I didn't have any round stock.
1508378834591.png

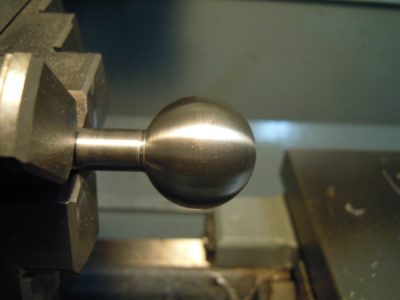
and of course the finished ball (1" diameter) for an upcoming tool rest project. My first ball and it's round to boot.:cheerful:
1508378759313.png
 
Back
Top