-
Welcome back Guest! Did you know you can mentor other members here at H-M? If not, please check out our Relaunch of Hobby Machinist Mentoring Program!
- Forums
- THE PROJECTS AREA
- PROJECT OF THE DAY --- WHAT DID YOU DO IN YOUR SHOP TODAY?
- Project of the Day Mega-Thread Archives
You are using an out of date browser. It may not display this or other websites correctly.
You should upgrade or use an alternative browser.
You should upgrade or use an alternative browser.
2018 POTD Thread Archive
- Thread starter 2volts
- Start date
Fabricated the hinges and welded them in place on the ramp parts I made earlier (https://www.hobby-machinist.com/thr...you-make-in-your-shop-today.67833/post-608343)
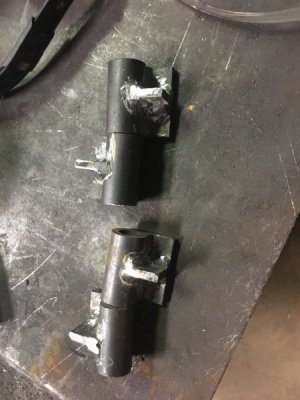
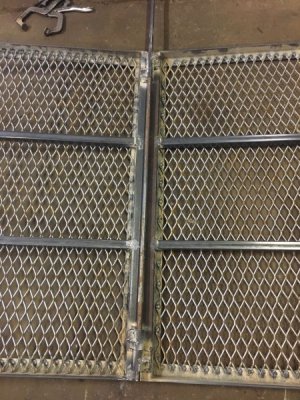
Some writeup on this is here: https://www.hobby-machinist.com/threads/making-a-hinge-for-my-trailer-ramps.72525/


Some writeup on this is here: https://www.hobby-machinist.com/threads/making-a-hinge-for-my-trailer-ramps.72525/
Last edited:
- Joined
- May 18, 2014
- Messages
- 75
fixed a fix this weekend.
Added a piece of stainless wire to the aluminium freehub on my new wheels, so that the cassette gears wouldn't chew into the soft metal. Didn't work.
https://www.hobby-machinist.com/thr...-in-your-shop-today.67833/page-20#post-604495
So I made a bunch of inserts out of O1, hardened them and cut corresponding pockets in the freehub. Had a bit of a snafu when I realised that I was cutting into the freehub threads, so I had to modify the inserts. First time cutting hardened steel with carbide, went ok thankfully.
Cutting the first pocket with my soon to be deceased new end mill. You can see the wear on the next spline along.

Test fit after the pockets were finished. Did a bunch of grinding after this pic to match the curve of the freehub body so the cassette would slide on
Its a little late now, but you only needed to do one steel insert to prevent the cassette from rotating and biting into the freehub body.
- Joined
- Feb 24, 2015
- Messages
- 1,382
- Joined
- Sep 2, 2013
- Messages
- 5,107
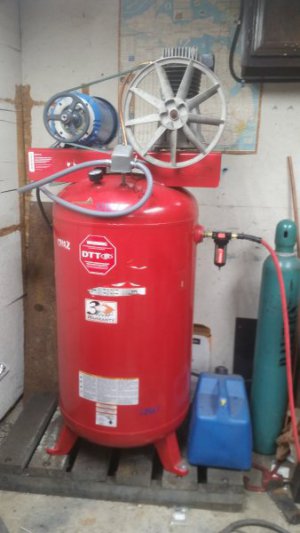
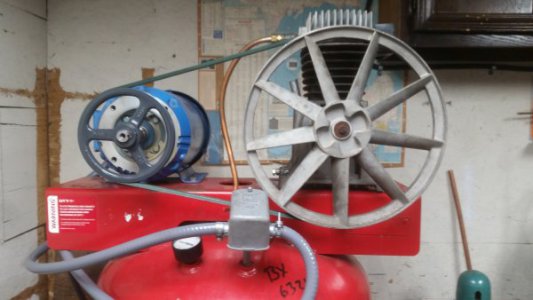
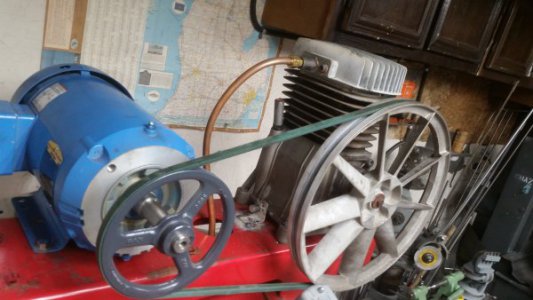
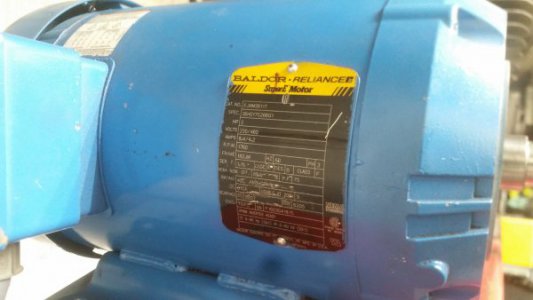
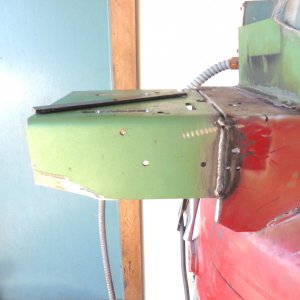
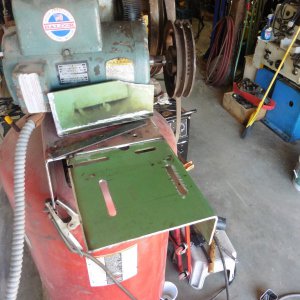
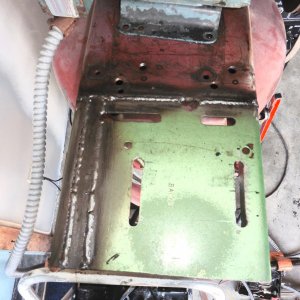
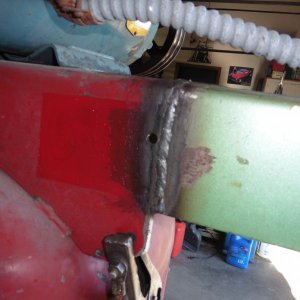
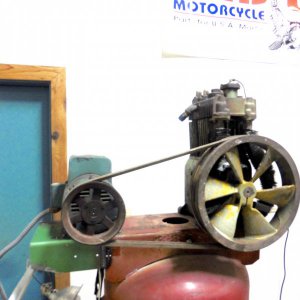
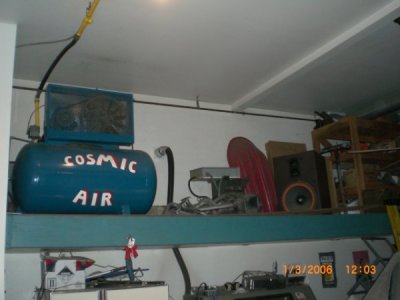
Got to play in the shop some today. Working on my Frankenpressor, cobbled from the remains of 4 different units. The Quincy pump came from my dads shop, where I saw it go up on the 20' wall almost 60yrs ago and it was still running fine when I took it down last year. It was powered by a 5hp 3phase motor and had two hundred# propane tanks for a receiver. Didn't have room in the trailer for the tanks and mounting setup so they stayed with the building. Switched over to a 5hp single phase Baldor motor I had, and then used a chunk of the mounting platform from yet another corpse after milling some slots in it. The pulley and belts are from my dads set up, and the tank is a freebie I picked up. Have a mag starter, and pressure switch coming and a little plumbing and wiring to do to finish up, and get it installed in the new shop. Might gussie it up like my existing shop unit, or maybe leave it like it is, stitches and all, as it will be living in it's own space attached to the outside of the new building. Cheers, Mike


- Joined
- Sep 28, 2013
- Messages
- 4,309
Its a little late now, but you only needed to do one steel insert to prevent the cassette from rotating and biting into the freehub body.
I did try that already, still didn't prevent the other splines getting worn. Maybe because all the considerable load (my legs + ebike motor) was enough to make the insert move, maybe because the previous insert wasn't hardened steel but stainless so was getting worn enough to let the cogs cut into the other splines. I don't really know. Either way, I didn't want to redo this in another 1000 miles or so (a bit less than a months riding), so overkill doesn't hurt. I took the cassette off the other day to replace a worn cog and most of the inserts are fine, with one showing a couple of dents/ impressions (might have not hardened it sufficiently). All of them show very faint marks in the coating, so they're each experiencing load.
Finally mounted one of the new fenders on my trailer. I opted for making some brackets to bolt the fender to, instead of welding it all over the place (I'm terrible at welding sheet metal).
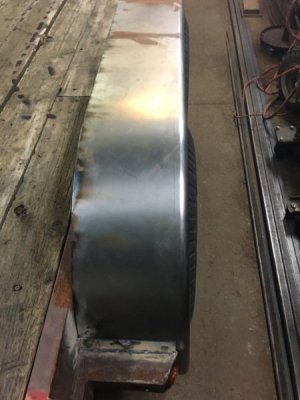
I didn't get it quite right, the fender is slightly tilted (top is too far in). It was hard to eyeball, as the trailer is at a slight angle due to the side being jacked up as the wheels have to come off to get the fender on, and it was pressed against the frame... I'll take out 4 of the 6 bolts holding it in place, make it level with all the wheels on the ground, then re-drill the holes to make it look right.
And re-affirmed by you don't get underneath equipment supported by jacks. I used a pair of floor jackets to get & hold each end of the fender in place (which worked very well, much better than my first idea of using wood blocks). But, one of the jacks will go down slowly when there isn't much weight on it (like this fender). The fender was wedged between the two brackets, the jack goes down on it's own, then I touch the fender and it falls down...
Mounted the other fender, did an absolutely terrible job of welding the skirt to the main fender, but it's on the fender straight.
It was too deep to get any clamps/vise grips along most of the skirt, should have done something like self-tapping sheetmetal screws to hold the pieces together while welding them. The worst parts were when I was holding the skirt against the fender, and while welding, I would weld a little too much on the skirt instead of right on the edge to also melt the fender (there 3/8" overlap between the two pieces, both are 16 gauge), and the skirt would melt all the way through and form a little ball of steel, which is now holding the skirt a little ways away from the fender...
It was too deep to get any clamps/vise grips along most of the skirt, should have done something like self-tapping sheetmetal screws to hold the pieces together while welding them. The worst parts were when I was holding the skirt against the fender, and while welding, I would weld a little too much on the skirt instead of right on the edge to also melt the fender (there 3/8" overlap between the two pieces, both are 16 gauge), and the skirt would melt all the way through and form a little ball of steel, which is now holding the skirt a little ways away from the fender...
Mounted a new jack on the trailer. I hate the jacks that aren't extendable (ie, have a pin you pull to slide the main shaft down most of the way, then only crank for a little bit), which the original one was. The end of the old one had to be cut off to remove the jack, as the tip of it had been bent from striking the ground while driving when it wasn't fully retracted.
I decided to make it clamp on instead of welded, as I'm still not particularly good at vertical and upside down welding. I welded a platform on the bottom of 1.25"x.025 angle iron (on both sides and underneath), with another piece of angle iron on the inside to form a hook so it can't slide off when a sideways force is applied to the trailer or jack, and the hinged 1x0.125 angle-iron on top with 3/8" threaded rod to clamp the jack in place.
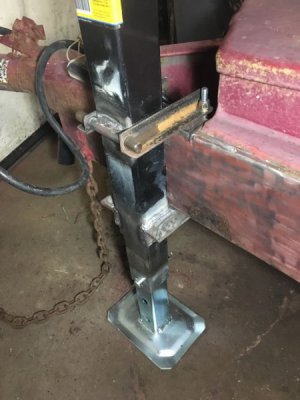
I decided to make it clamp on instead of welded, as I'm still not particularly good at vertical and upside down welding. I welded a platform on the bottom of 1.25"x.025 angle iron (on both sides and underneath), with another piece of angle iron on the inside to form a hook so it can't slide off when a sideways force is applied to the trailer or jack, and the hinged 1x0.125 angle-iron on top with 3/8" threaded rod to clamp the jack in place.

- Joined
- Nov 23, 2017
- Messages
- 1,191


