-
Welcome back Guest! Did you know you can mentor other members here at H-M? If not, please check out our Relaunch of Hobby Machinist Mentoring Program!
- Forums
- THE PROJECTS AREA
- PROJECT OF THE DAY --- WHAT DID YOU DO IN YOUR SHOP TODAY?
- Project of the Day Mega-Thread Archives
You are using an out of date browser. It may not display this or other websites correctly.
You should upgrade or use an alternative browser.
You should upgrade or use an alternative browser.
2018 POTD Thread Archive
- Thread starter 2volts
- Start date
- Joined
- Sep 28, 2013
- Messages
- 4,309
made some bushings for a benchtop centrifuge someone gave me a while back. Used to chew the ends off 15ml tubes, most likely because the tubes were a very loose fit and the tips were swinging into the centrifuge body. Took me a while as I annoyingly didn't have any tube the right size, so they had to be made out of solid. We'll see how they work tomorrow when I get time to play in the lab


also made a little "hat" for one of my alcohol burners, but I lost the pic for that. I have another one to do and I might annodise that one, just for kicks.
also made a little "hat" for one of my alcohol burners, but I lost the pic for that. I have another one to do and I might annodise that one, just for kicks.
After fixing the angle on the fender I installed a couple of days ago, I began work on fixing the toolbox on the trailer. The box uses 2 bullet hinges for the lid, one of which rusted in place, then broke off the lid, so it's only supported by one hinge now. I'm replacing both hinges, but need to remove the box from the trailer to do so. Unfortunately, the box was welded to the frame via 2 ~15 long pieces of 1.5x3/16" angle iron, that was mostly welded along it's outer edge to the frame, and similarly to the toolbox. I don't want to weaken the channel frame, so I used a bunch of cutoff wheels to cut the angle iron at the edge between the frame and toolbox. Then I cut the welds for the piece of angle iron left on the toolbox, but I'll leave the pieces of it on the frame (as it's really welded down, and I'll wind up damaging the frame to get it off).
Still have a bunch of work to do on it, cut off the old hinges and weld on the new, and clean up the box by removing the thick layer of bedliner the P.O. put on it (which is for the most part, REALLY bonded to the metal and really thick (between 1/8 and 3/16" thick) that is really hard to get off (an air chisel seems to work the best).
Still have a bunch of work to do on it, cut off the old hinges and weld on the new, and clean up the box by removing the thick layer of bedliner the P.O. put on it (which is for the most part, REALLY bonded to the metal and really thick (between 1/8 and 3/16" thick) that is really hard to get off (an air chisel seems to work the best).
- Joined
- Nov 23, 2017
- Messages
- 1,191
- Joined
- Nov 23, 2017
- Messages
- 1,191
Hope that health insurance is paid up
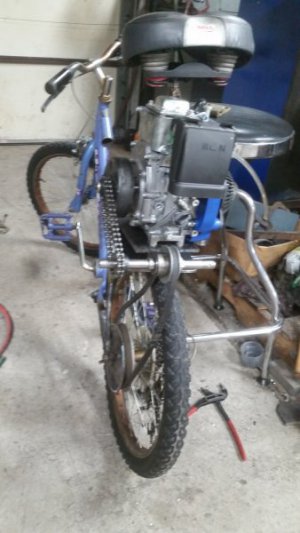
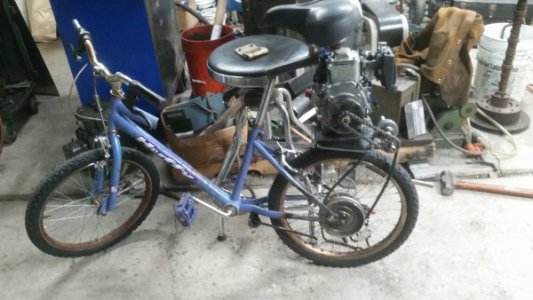
Don't worry this one is only 49cc. The last one was fast.... Got myself a new leg rod from the last one.... lol
Last edited:
Here’s my mag chuck off my surface grinder. When I got it the engagement lever for the magnet was a little stiff and floppy in the housing. I read up on rebuilding and thought why not. Upon disassembly I found the shaft support piece was split and th hole was egg shaped. Then the linkage piece that connects the rod to the magnet was also worn not letting the magnet make its full stroke to turn off/on.
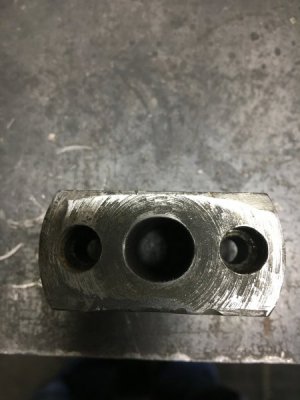
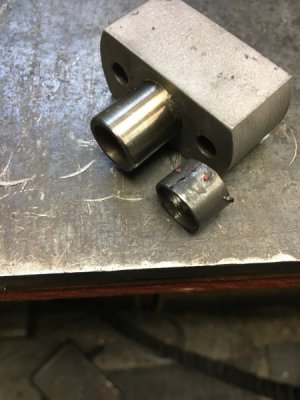
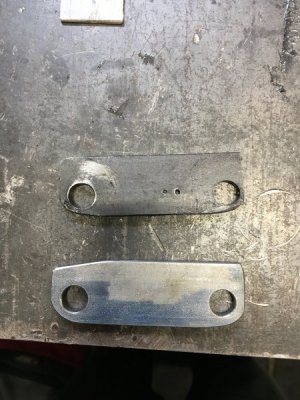
I first cut off the protruding part off the bushing then I bored slightly bigger and then made a bushing and presses back into support. Luckily the eccentric engagement lever ain’t worn so once bushing was fixed I reassembled the magnet to check the stroke of the magnet to make sure it engages and disengages fully. The linkage piece was worn and not to my liking. So I made a new one with a little thicker material and put more meat around the hol s so they don’t distort so easy.
I ended up sanding the underside of the top of mag plate so that the magnet had a smooth surface to slide on. When I assembled I put a light coat of grease between the magnet and top plate. I siliconed all three pieces of the chuck together so it will be sealed in case of coolant.
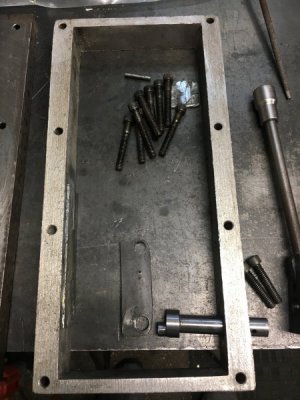
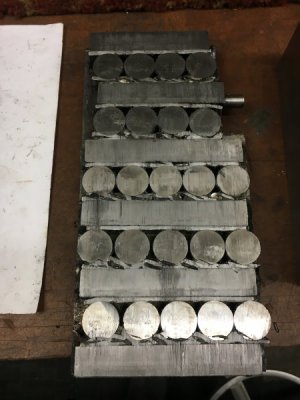
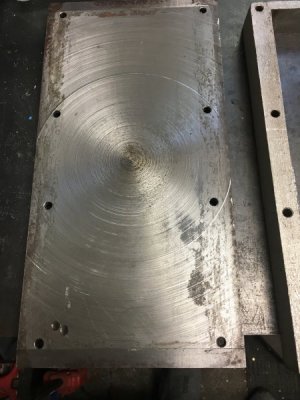
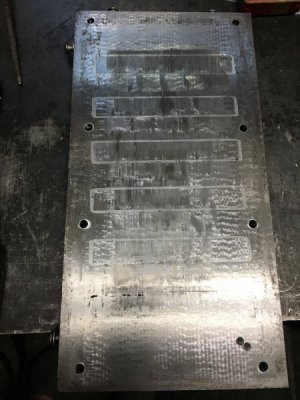
After reassembly the magnet moves very smooth. Idk if it’s just because I rebuilt it but it feels way stronger than I initially felt?? I stoned the table and Bottom of Chuck. I have yet to grind magnet waiting for more experience with unit to get it done correctly and not mess it up.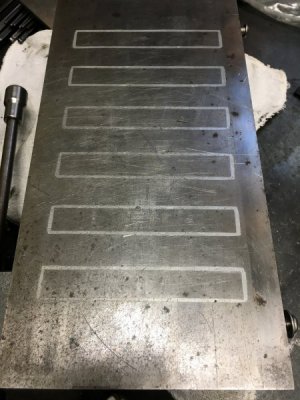


I first cut off the protruding part off the bushing then I bored slightly bigger and then made a bushing and presses back into support. Luckily the eccentric engagement lever ain’t worn so once bushing was fixed I reassembled the magnet to check the stroke of the magnet to make sure it engages and disengages fully. The linkage piece was worn and not to my liking. So I made a new one with a little thicker material and put more meat around the hol s so they don’t distort so easy.

I ended up sanding the underside of the top of mag plate so that the magnet had a smooth surface to slide on. When I assembled I put a light coat of grease between the magnet and top plate. I siliconed all three pieces of the chuck together so it will be sealed in case of coolant.


After reassembly the magnet moves very smooth. Idk if it’s just because I rebuilt it but it feels way stronger than I initially felt?? I stoned the table and Bottom of Chuck. I have yet to grind magnet waiting for more experience with unit to get it done correctly and not mess it up.

Don't worry this one is only 49cc. The last one was fast.... Got myself a new leg rod from the last one.... lolView attachment 275653
Yikes cover them legs back up the sun might burn them
- Joined
- Mar 26, 2018
- Messages
- 8,409
Today i did an oil change on my lawn mower, i was waiting for it to die so i'll buy a new one but those briggs engines are durable, this is the first oil change i've done in the 5-6 years i've own it and bought it second hand. First i fired it up and left it running for 15 min then prop it up with a bucket and used an 3/8 socket to undo the drain plug. I did make little mess because the oil was very hot and i only got 150ml out, and took 600ml so it was definitely low on oil, after that i also clean and change the diaphragm on the plastic carburetor and now runs like it should the rest of the afternoon i mow the lawn and pick up around the yard.
View attachment 272776View attachment 272775
I guess I am a bit OCD. I change the oil in my lawn mower once a year with synthetic oil.
It's a Honda motor going on 20+ years old now.


