-
Welcome back Guest! Did you know you can mentor other members here at H-M? If not, please check out our Relaunch of Hobby Machinist Mentoring Program!
- Forums
- THE PROJECTS AREA
- PROJECT OF THE DAY --- WHAT DID YOU DO IN YOUR SHOP TODAY?
- Project of the Day Mega-Thread Archives
You are using an out of date browser. It may not display this or other websites correctly.
You should upgrade or use an alternative browser.
You should upgrade or use an alternative browser.
2019 POTD Thread Archive
- Thread starter GoceKU
- Start date
- Joined
- Oct 31, 2014
- Messages
- 444
It looks like a two post lift, so take a little time to find your center balance point, and make or purchase a pair of adjustable height safety stands for the front and rear of your motor home. Cheers, Mike
Thanks Mike -
It's a 4-post lift; these GMC motorhomes have only two lift points and a 2-post lift doesn't extend far enough to reach both. Something in the motorhome design about the longitudinal frame members being in compression and trying to pick them up just anywhere on the frame is a no-no.
It has to be raised only at the front crossmember and the rear pivot point between the bogie axles. My original thought was to get a two post hoist but those more knowledgeable about GMCs convinced me to get a 4-post. I also got a 'rolling jack' accessory to be able to lift one end or the other for suspension and tire and wheel work. In for a penny, in for a pound.
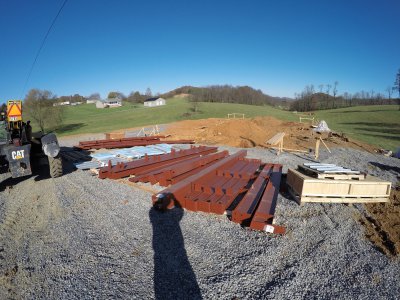
Spent my day rassling with heavy steel parts. It's about half assembled. Time for a soak in the hot tub. Aaaah
Stu
This has been a project I've been procrastinating on for awhile, working on it pretty infrequently, but finally have done it. I made a plow attachment for one of my mowers a couple years ago, and it's worked well. But, I forgot to use the skid feet for the plow, and it just floats along the ground under it's own weight, and whatever weight what it pushes adds to it. After 2 winter seasons, the wear bar has, well, gone past being worn out. The plow itself has been worn down to the bolt holes for the wear bar.
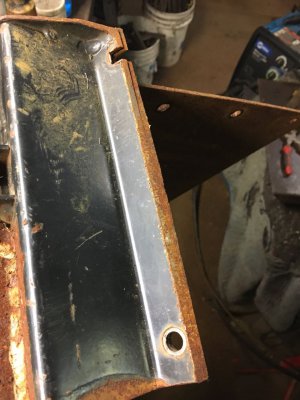
So, I bought a strip of 1/2" by 1/4" flat steel , welded it onto the edge, ground it flat, and then painted everything black (also finally painted the previous modifications to the plow I made, which was to make the end 10" or so removable, and some extensions to the plow so it holds more snow).
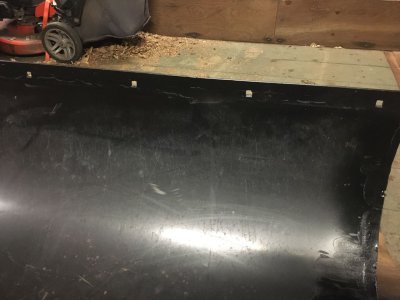
Tomorrow I'll hunt down the bolts for the new plastic wear bar I bought it, and install it.
Have to get cracking on it, as snow is on the way in the next couple of days...
And my mower-brush project is delayed, as somehow while I replaced the seal on the governor shaft for it's engine, one of the parts for the governor inside the motor decided to fail.

So, I bought a strip of 1/2" by 1/4" flat steel , welded it onto the edge, ground it flat, and then painted everything black (also finally painted the previous modifications to the plow I made, which was to make the end 10" or so removable, and some extensions to the plow so it holds more snow).

Tomorrow I'll hunt down the bolts for the new plastic wear bar I bought it, and install it.
Have to get cracking on it, as snow is on the way in the next couple of days...
And my mower-brush project is delayed, as somehow while I replaced the seal on the governor shaft for it's engine, one of the parts for the governor inside the motor decided to fail.
Nice. I like your oil cup.
I saw that too, so elegant! Much nicer than my small Goya bean can...
Tim
- Joined
- Nov 26, 2015
- Messages
- 4,799
- Joined
- Feb 1, 2015
- Messages
- 9,645
Yeah I want to know what it is good for.. Two pieces of anything layered with that stuff and clamped together and then the UV light cant get at it to cure it.... Am I right? I been in this world a while and I haven't ever heard of the stuff. I am very curious.
I have used the UV curing adhesive. It is similar to cyanoacrylate but not the same. Unlike cyanoacrylate, you can build up a thick glue line.
I have used it for bonding glass to PEEK. The PEEK was on the outside so I had four holes through which I could shine a UV laser. It cures in seconds. Obviously, it's not applicable when bonding opaque parts but if at least one of the parts is transparent to blue or UV light, it works. One popular use is for replacing the protective glass screens on cell phones. It has a low viscosity and will wick under the glass for a bubble free joint and the UV will cure the entire joint.
- Joined
- Feb 1, 2015
- Messages
- 9,645
UV curing adhesive comes in a variety of viscosities. The one that I used was less viscous than water. It does harden with age. My old applicators can attest to that. Any high energy radiation can cure it, cosmic rays being one source. It will gradually thicken as it ages until it is no longer usable.Bondic is not like CA glue or any other glue. It is viscous like maple syrup so it can be worked with to get in place and it can be put on in layers to build up and fill a void. It never hardens so there is no drying until you hit it with the UV light. Then sandable.
the example they use is repairing a plastic bow on glasses. In a few seconds it is very strong.
It came from dentistry where they use a similar product on teeth then cure it with UV. My wife says they also use it for false nails.
she uses it for making crafts. Putting things where she wants it then cure with UV in 4 seconds
It is true it won’t work between two surfaces if no UV can get to it.
you could google it to find out about it
i just made the ink well for it. So nice to have metal working equipment to just think something up and make it!
LocTite makes a cyanoacrylate with a UV initiator (4307) that will cure with both UV and water vapor.
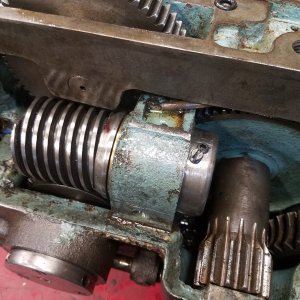
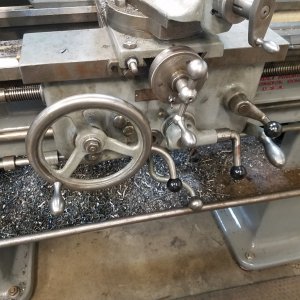
This morning I had to remove the apron from my Hendey. Yesterday I was trying to thread with it and the carriage locked up. Thankfully not while the half nuts were engaged. Apparently when I assembled it I didn't tighten a set screw enough and a collar came loose and was laying in the bottom of the apron. I don't know why I didn't replace the slotted set screw the last time. It's gone now. Put it back together and life is good. I may have to drop it again to turn the half nut lever 180. I have never liked the position it was in so I turned it 180. Seemed like it would be better that way, until I mounted the feed lever on th apron. Oops. It's kind of a tight fit with the half nut lever in that position. I decided to try it for a while the way it is. My back couldn't handle messing with that heavy casting again today.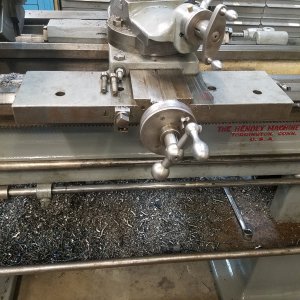


Installed the Z axis DRO sensor and magnetic tape.
The tape sits flush with the column in a dedicated casting groove. Neat feature, but combined with the poor sensor mounting concept it provided quite a challenge. Due to too much sensor<>tape clearance had to remake the mounting bracket so the sensor could ride closer to the tape surface. That nice tape groove forces the tape to sit further down away from the sensor.
Now I just have to repeat the process for X and Y.


Sent from my SM-A520F using Tapatalk
The tape sits flush with the column in a dedicated casting groove. Neat feature, but combined with the poor sensor mounting concept it provided quite a challenge. Due to too much sensor<>tape clearance had to remake the mounting bracket so the sensor could ride closer to the tape surface. That nice tape groove forces the tape to sit further down away from the sensor.
Now I just have to repeat the process for X and Y.


Sent from my SM-A520F using Tapatalk


