

-
Welcome back Guest! Did you know you can mentor other members here at H-M? If not, please check out our Relaunch of Hobby Machinist Mentoring Program!
- Forums
- THE PROJECTS AREA
- PROJECT OF THE DAY --- WHAT DID YOU DO IN YOUR SHOP TODAY?
- Project of the Day Mega-Thread Archives
You are using an out of date browser. It may not display this or other websites correctly.
You should upgrade or use an alternative browser.
You should upgrade or use an alternative browser.
2019 POTD Thread Archive
- Thread starter GoceKU
- Start date
- Joined
- Aug 20, 2018
- Messages
- 219
This weekend I did a bunch of, new to me, operations, and had to make a few different tools, in order to get to my end goal. So I started out deciding to make a tailstock die holder. I recently made a boring bar holder, posted earlier in this thread, and figured this would be a good project to do my first boring operations. Turned down some 2" 6061, knurled, and reamed (also a first for me) it, and finally got around to boring something.

Turned out very nice, at least for what I was expecting.
After making the body of the die holder it was time for me to turn my attention towards the tailstock arbor. I sat and thought it out, probably way longer than I needed to, and decided that I should turn it between centers, if I want it to be concentric. However, this is another thing I've not done before, nor was I equipped to do so, so i set out to make a couple of new tools...

I needed a straight shaft dead center, because the dead center I have is mt2 and my headstock is mt3, so I needed to hold it in the 4jaw. I also made a lathe dog, inspired by someone elses inquiry on this site as to "what this clamp is specifically for ", I didn't know, but after others responses, it made perfect sense, and I was going to need one.
Anyways, after making those tools, I was all set to turn down some .75" 12L14 to .500" and cut a mt2 on the opposing end.

It worked out great, and the die holder fit it perfectly! Slides and spins great, but I dont notice even the slightest wiggle. All in all, a great weekend in the shop, and I learned a ton along the way, thanks in large part to all of the great members of this site! Thanks for looking, and thanks for your help and inspiration!

-Wayne
Turned out very nice, at least for what I was expecting.
After making the body of the die holder it was time for me to turn my attention towards the tailstock arbor. I sat and thought it out, probably way longer than I needed to, and decided that I should turn it between centers, if I want it to be concentric. However, this is another thing I've not done before, nor was I equipped to do so, so i set out to make a couple of new tools...
I needed a straight shaft dead center, because the dead center I have is mt2 and my headstock is mt3, so I needed to hold it in the 4jaw. I also made a lathe dog, inspired by someone elses inquiry on this site as to "what this clamp is specifically for ", I didn't know, but after others responses, it made perfect sense, and I was going to need one.
Anyways, after making those tools, I was all set to turn down some .75" 12L14 to .500" and cut a mt2 on the opposing end.
It worked out great, and the die holder fit it perfectly! Slides and spins great, but I dont notice even the slightest wiggle. All in all, a great weekend in the shop, and I learned a ton along the way, thanks in large part to all of the great members of this site! Thanks for looking, and thanks for your help and inspiration!
-Wayne
- Joined
- Aug 20, 2018
- Messages
- 219
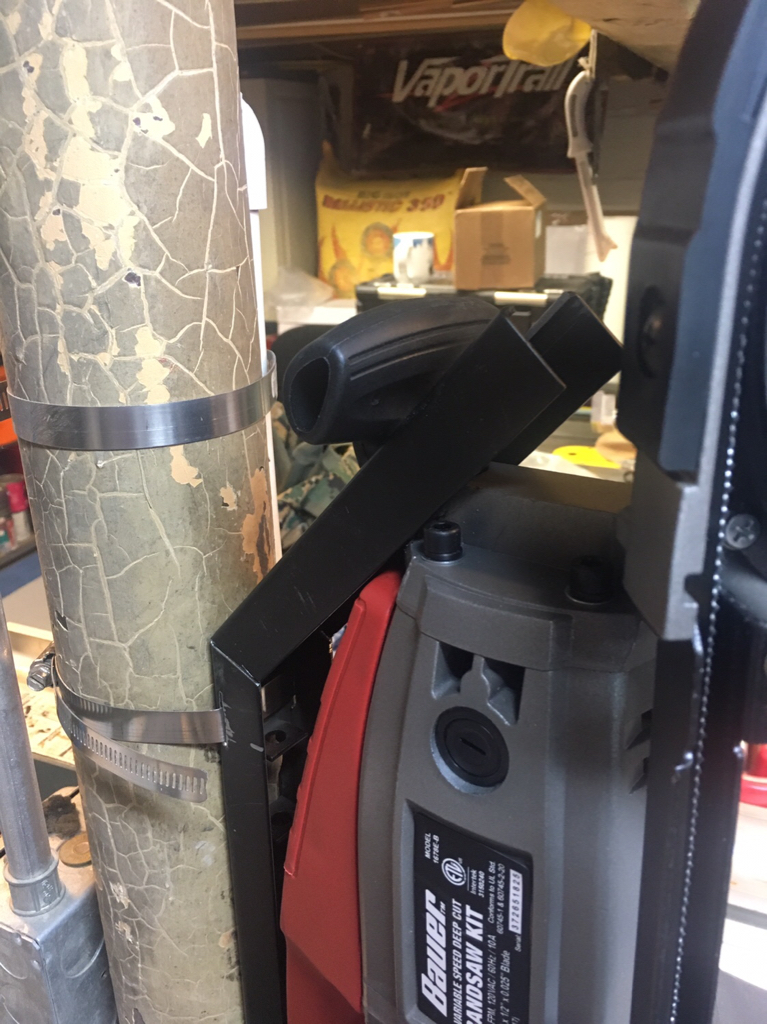
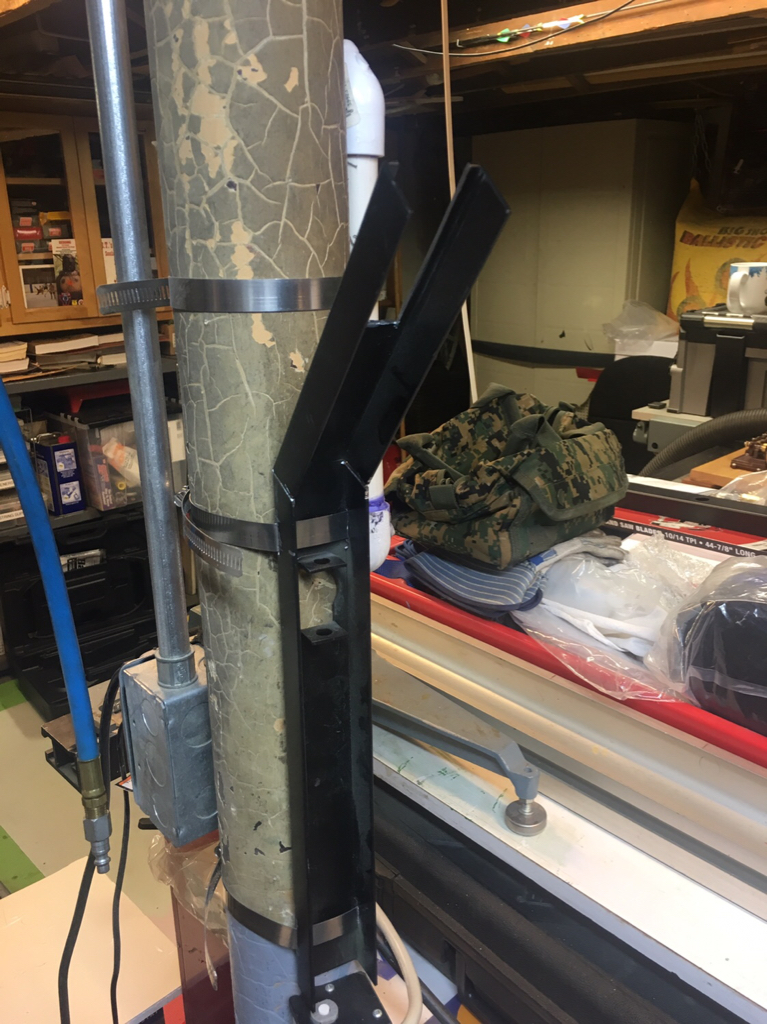
Neat idea! Almost wish I didn't already have a vert and horizontal bandsaw....almost!I made a vertical bracket and table for my Harbor Freight portable band saw. I can swap it back and forth in about 30 seconds and there are no modifications made to the saw.
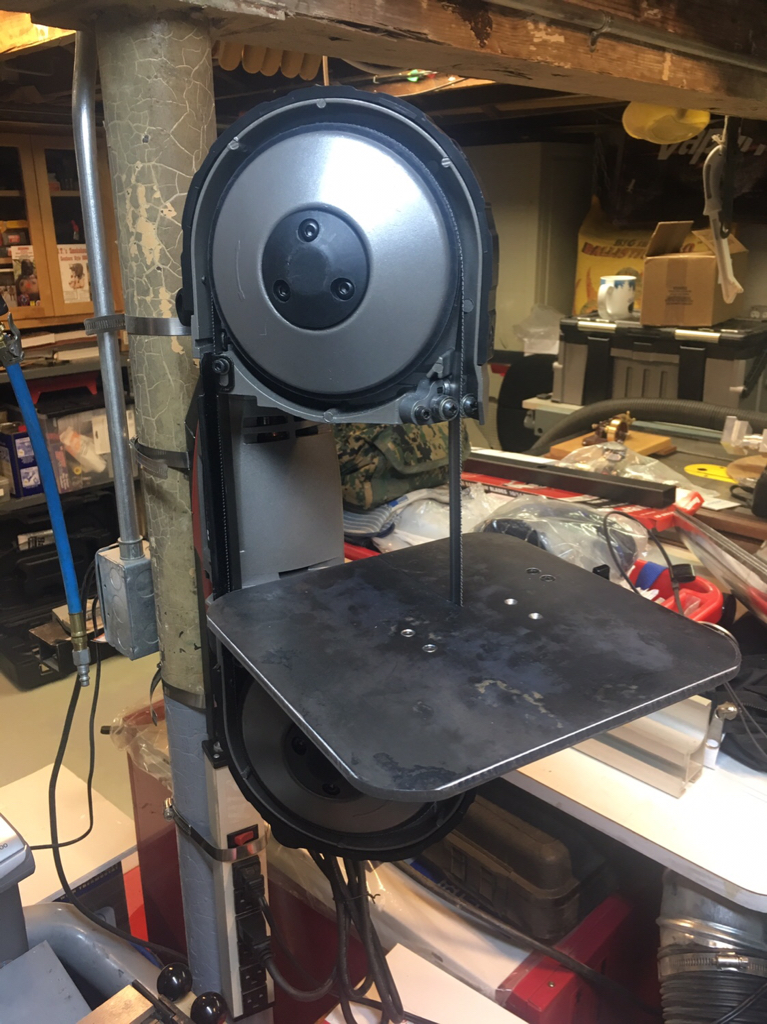
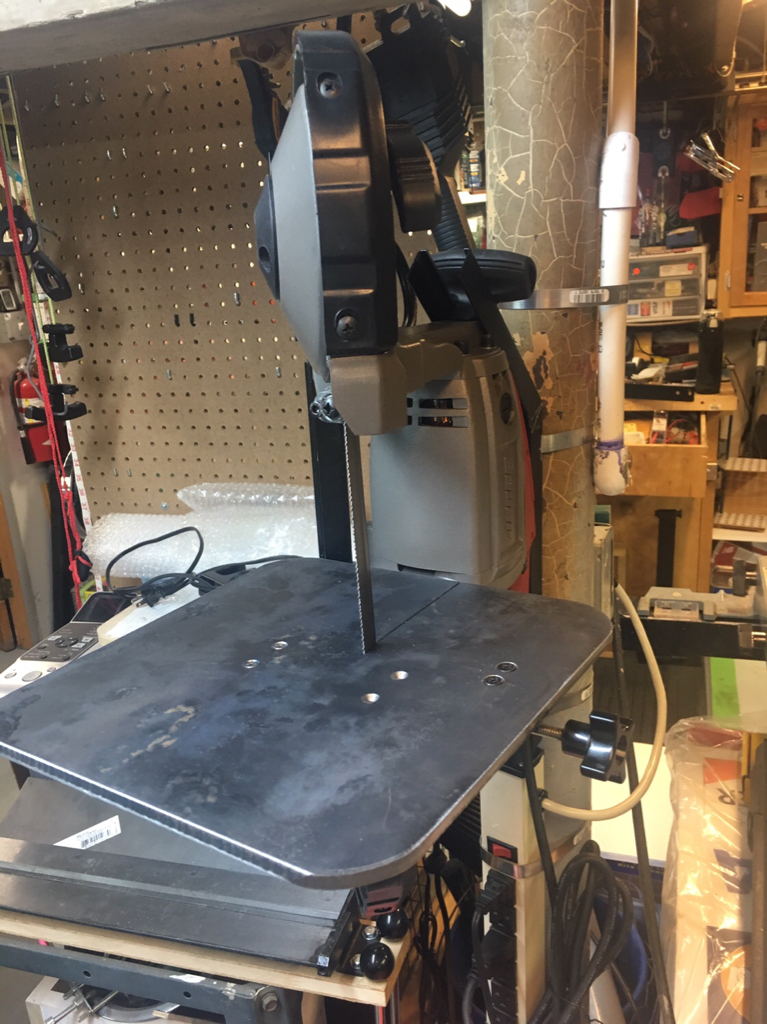
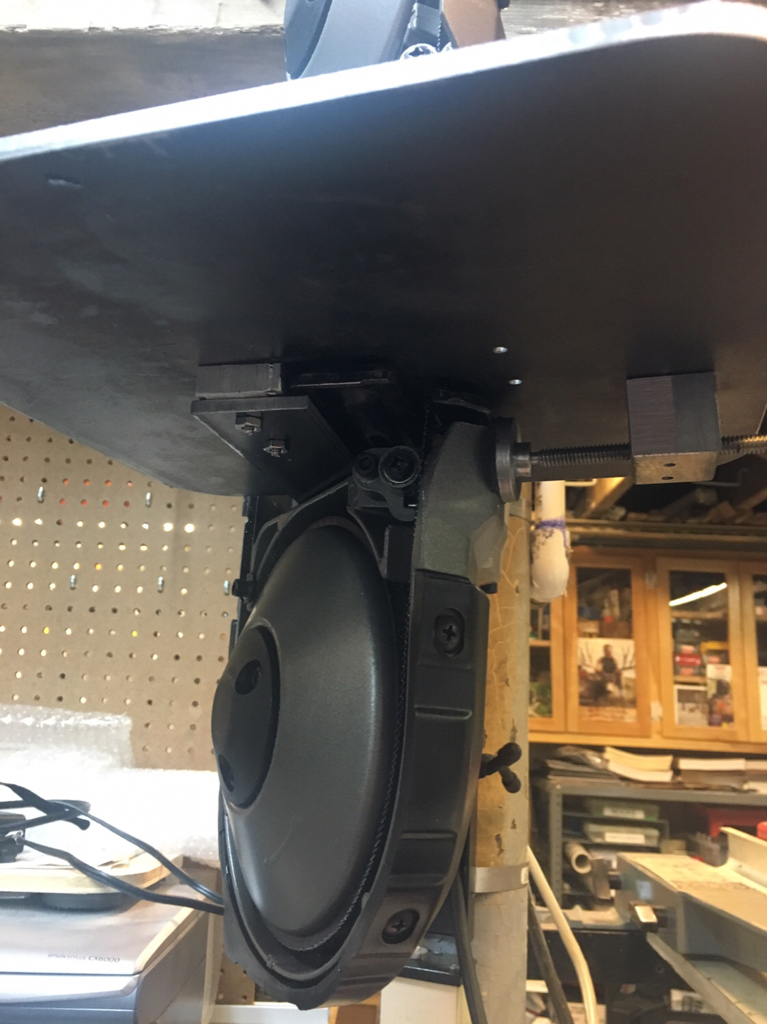
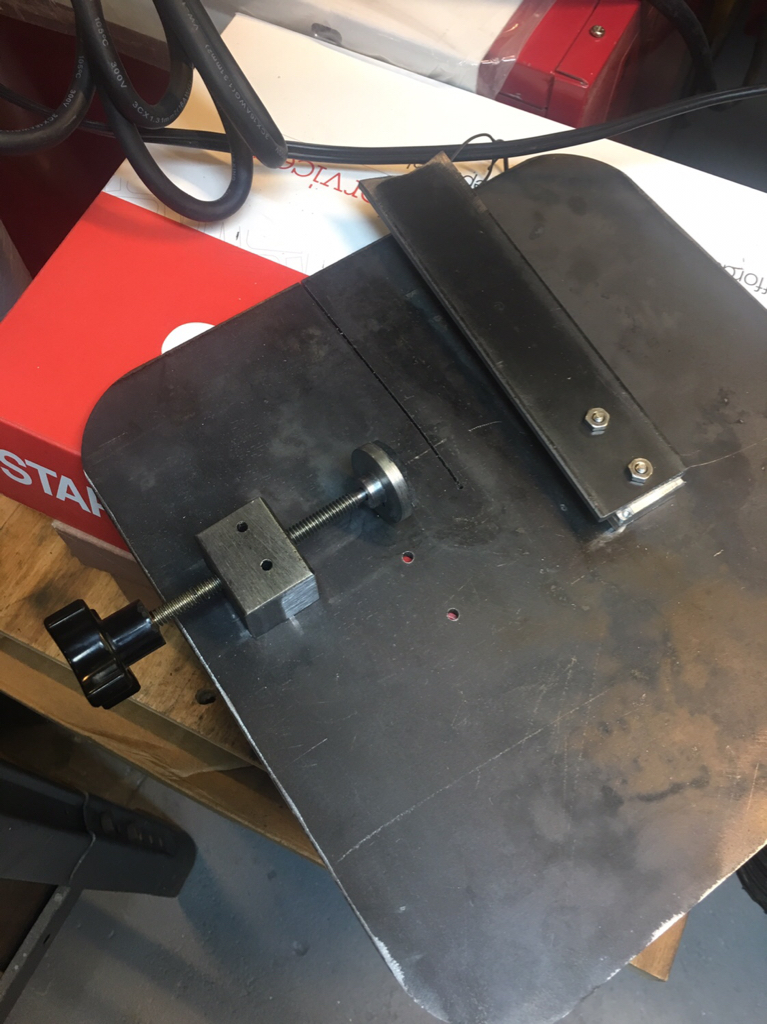
Sent from my iPhone using Tapatalk
")
- Joined
- Sep 5, 2013
- Messages
- 3,207
Another little clean-up project that has been sitting on my books for a long time. I hate to admit it, but I started this one all of fifteen years ago. Then parents started dying and estates needed to be settled, so here I am finally getting around to putting the thing back together.
It's a forge blower in case you haven't figured that out yet. Made by Canedy Otto, a "Royal" Western Chief from around the turn of the century (I think). No stand with it, and when I bought it there was some damage to a few of the screw bosses as well as a particularly offensive green and black colour scheme. The crank handle was also reduced to a stub and missing the ball counterweight. But aside from that, it seemed to work okay.
When I tore it all down the insides looked really good. Hardly any wear on the gears or shafts. And there was my first surprise: one of the gears was not metal. It's like a hard rubber, and after a bunch of head scratching I determined that this was what Canedy Otto called their "whisper quiet" gear train or something like that. Basically one synthetic gear intermixed with the regular gears to make a quieter running train. I can't put my hands on the ad where they talked about it, but I may still have it in a file somewhere. That's what happens when stuff drags out for so long.


My second surprise was the paint colour. I knew the green was wrong from the get go, but I wasn't prepared for the traces of burgundy with gold letter highlights that I found underneath it. But I guess if you were offering a model called "Royal" that'd be one way to make it distinctive. They picked out the fan, visible only through the side intake hole, in red.
Here's some of the body castings getting the new burgundy colour. There was enough original left for me to get a pretty good match, and even though in this picture it looks a little bright the colour will darken in as it dries.


The fan needed a bit of balancing I guess, so there's a small tab of lead riveted on to the end of one of the blades. You can barely make out faint remnants of the red paint around the rivet heads.

I happened to have this brass stopcock in my drawer of salvaged bits. It's not far off the proper vintage and a dead ringer for the oil drain cock that originally came on these blowers. 1/8" national pipe thread, it fits perfectly. For the oil filler cup on the top I ended up turning one up from scratch. Even though I'm not going to be filling the gear case with oil any time soon, I want everything to work like it should for anyone who might have it after me. Still haven't made myself a knurling tool yet so I just cut fine grooves around the top of the cap using the lathe. It goes pretty fast, especially in red brass.


I decided to repair the existing crank handle rather than making a completely new one. The original is cast and has an elliptical cross-section which I figured I could make easily enough on a small length but not so easily on a longer length. I was able to rough out a lot on the shaper, and the rest I took care of by hand.

After debating several methods of joining the new piece to the old crank, I opted to make a hollow sleeve to bridge the joined sections. I got a pretty good slip fit, then used JB Weld to hold all three together.


Turning the ball was a bit of adventure as well, actually that's not true, it was tedious more than anything. I really need to make a ball turning attachment sometime. And for the through-hole, lots and lots of filing.


And that's pretty much all she wrote. I turned a new handle from a scrap of black walnut I had lying around, put it all together onto a stand, and set it in my living room for now. I'll sell it one day, or give it to some deserving party when the time is right. The odds of me running a coal fire again where I live are pretty slim, and I have a new propane forge that I've never even fired up yet. So for the moment the Royal Western Chief is purely eye candy, but it's still better than TV!


As always, thanks for looking!
-frank
It's a forge blower in case you haven't figured that out yet. Made by Canedy Otto, a "Royal" Western Chief from around the turn of the century (I think). No stand with it, and when I bought it there was some damage to a few of the screw bosses as well as a particularly offensive green and black colour scheme. The crank handle was also reduced to a stub and missing the ball counterweight. But aside from that, it seemed to work okay.
When I tore it all down the insides looked really good. Hardly any wear on the gears or shafts. And there was my first surprise: one of the gears was not metal. It's like a hard rubber, and after a bunch of head scratching I determined that this was what Canedy Otto called their "whisper quiet" gear train or something like that. Basically one synthetic gear intermixed with the regular gears to make a quieter running train. I can't put my hands on the ad where they talked about it, but I may still have it in a file somewhere. That's what happens when stuff drags out for so long.
My second surprise was the paint colour. I knew the green was wrong from the get go, but I wasn't prepared for the traces of burgundy with gold letter highlights that I found underneath it. But I guess if you were offering a model called "Royal" that'd be one way to make it distinctive. They picked out the fan, visible only through the side intake hole, in red.
Here's some of the body castings getting the new burgundy colour. There was enough original left for me to get a pretty good match, and even though in this picture it looks a little bright the colour will darken in as it dries.
The fan needed a bit of balancing I guess, so there's a small tab of lead riveted on to the end of one of the blades. You can barely make out faint remnants of the red paint around the rivet heads.
I happened to have this brass stopcock in my drawer of salvaged bits. It's not far off the proper vintage and a dead ringer for the oil drain cock that originally came on these blowers. 1/8" national pipe thread, it fits perfectly. For the oil filler cup on the top I ended up turning one up from scratch. Even though I'm not going to be filling the gear case with oil any time soon, I want everything to work like it should for anyone who might have it after me. Still haven't made myself a knurling tool yet so I just cut fine grooves around the top of the cap using the lathe. It goes pretty fast, especially in red brass.
I decided to repair the existing crank handle rather than making a completely new one. The original is cast and has an elliptical cross-section which I figured I could make easily enough on a small length but not so easily on a longer length. I was able to rough out a lot on the shaper, and the rest I took care of by hand.
After debating several methods of joining the new piece to the old crank, I opted to make a hollow sleeve to bridge the joined sections. I got a pretty good slip fit, then used JB Weld to hold all three together.
Turning the ball was a bit of adventure as well, actually that's not true, it was tedious more than anything. I really need to make a ball turning attachment sometime. And for the through-hole, lots and lots of filing.
And that's pretty much all she wrote. I turned a new handle from a scrap of black walnut I had lying around, put it all together onto a stand, and set it in my living room for now. I'll sell it one day, or give it to some deserving party when the time is right. The odds of me running a coal fire again where I live are pretty slim, and I have a new propane forge that I've never even fired up yet. So for the moment the Royal Western Chief is purely eye candy, but it's still better than TV!
As always, thanks for looking!
-frank
- Joined
- Dec 15, 2018
- Messages
- 785
Nicely done Frank with that much effort it belongs in the living room.
I rebuilt a Thompson blower made in Grand Bay NB. Interestingly it had one brass gear in the train. The oil fill instructions on mine say "Fill With Good Oil" guess they didn't want the bad kind.
Greg
I rebuilt a Thompson blower made in Grand Bay NB. Interestingly it had one brass gear in the train. The oil fill instructions on mine say "Fill With Good Oil" guess they didn't want the bad kind.
Greg
- Joined
- Jan 28, 2011
- Messages
- 3,485
My weekend job was to replace both front wheel hubs on my 07 Cobalt. At least it did not snow on Friday and Sunday when I was doing the job. Took about 40 minutes per side. My only problem was my one extension for the impact gun was a couple inches too long, really needed a 4” not a 6” extension, but by placing the gun inside the engine compartment for the driver side all was good. No longer does the car make that horrible buzzing sound!
Pierre
Pierre
- Joined
- Jul 14, 2017
- Messages
- 2,448
Today i continued working on the Little Niva, and i think i've opened myself a can of worms, i know about the front panel rust issues and bad repairs, but the front wings except the upper lip looked good, but i decided to remove some cracking paint and found this mess. The passenger side is gone, every few inches there's a hole, the drivers side may be saved. But i may not be able to find replacement wings and cutting them from another rusty car may be too much work so i may be forced to do the same as the back wheel arches, tomorrow i'll phone around to see what i can find, is not the welding, is the body work after that i hate doing.


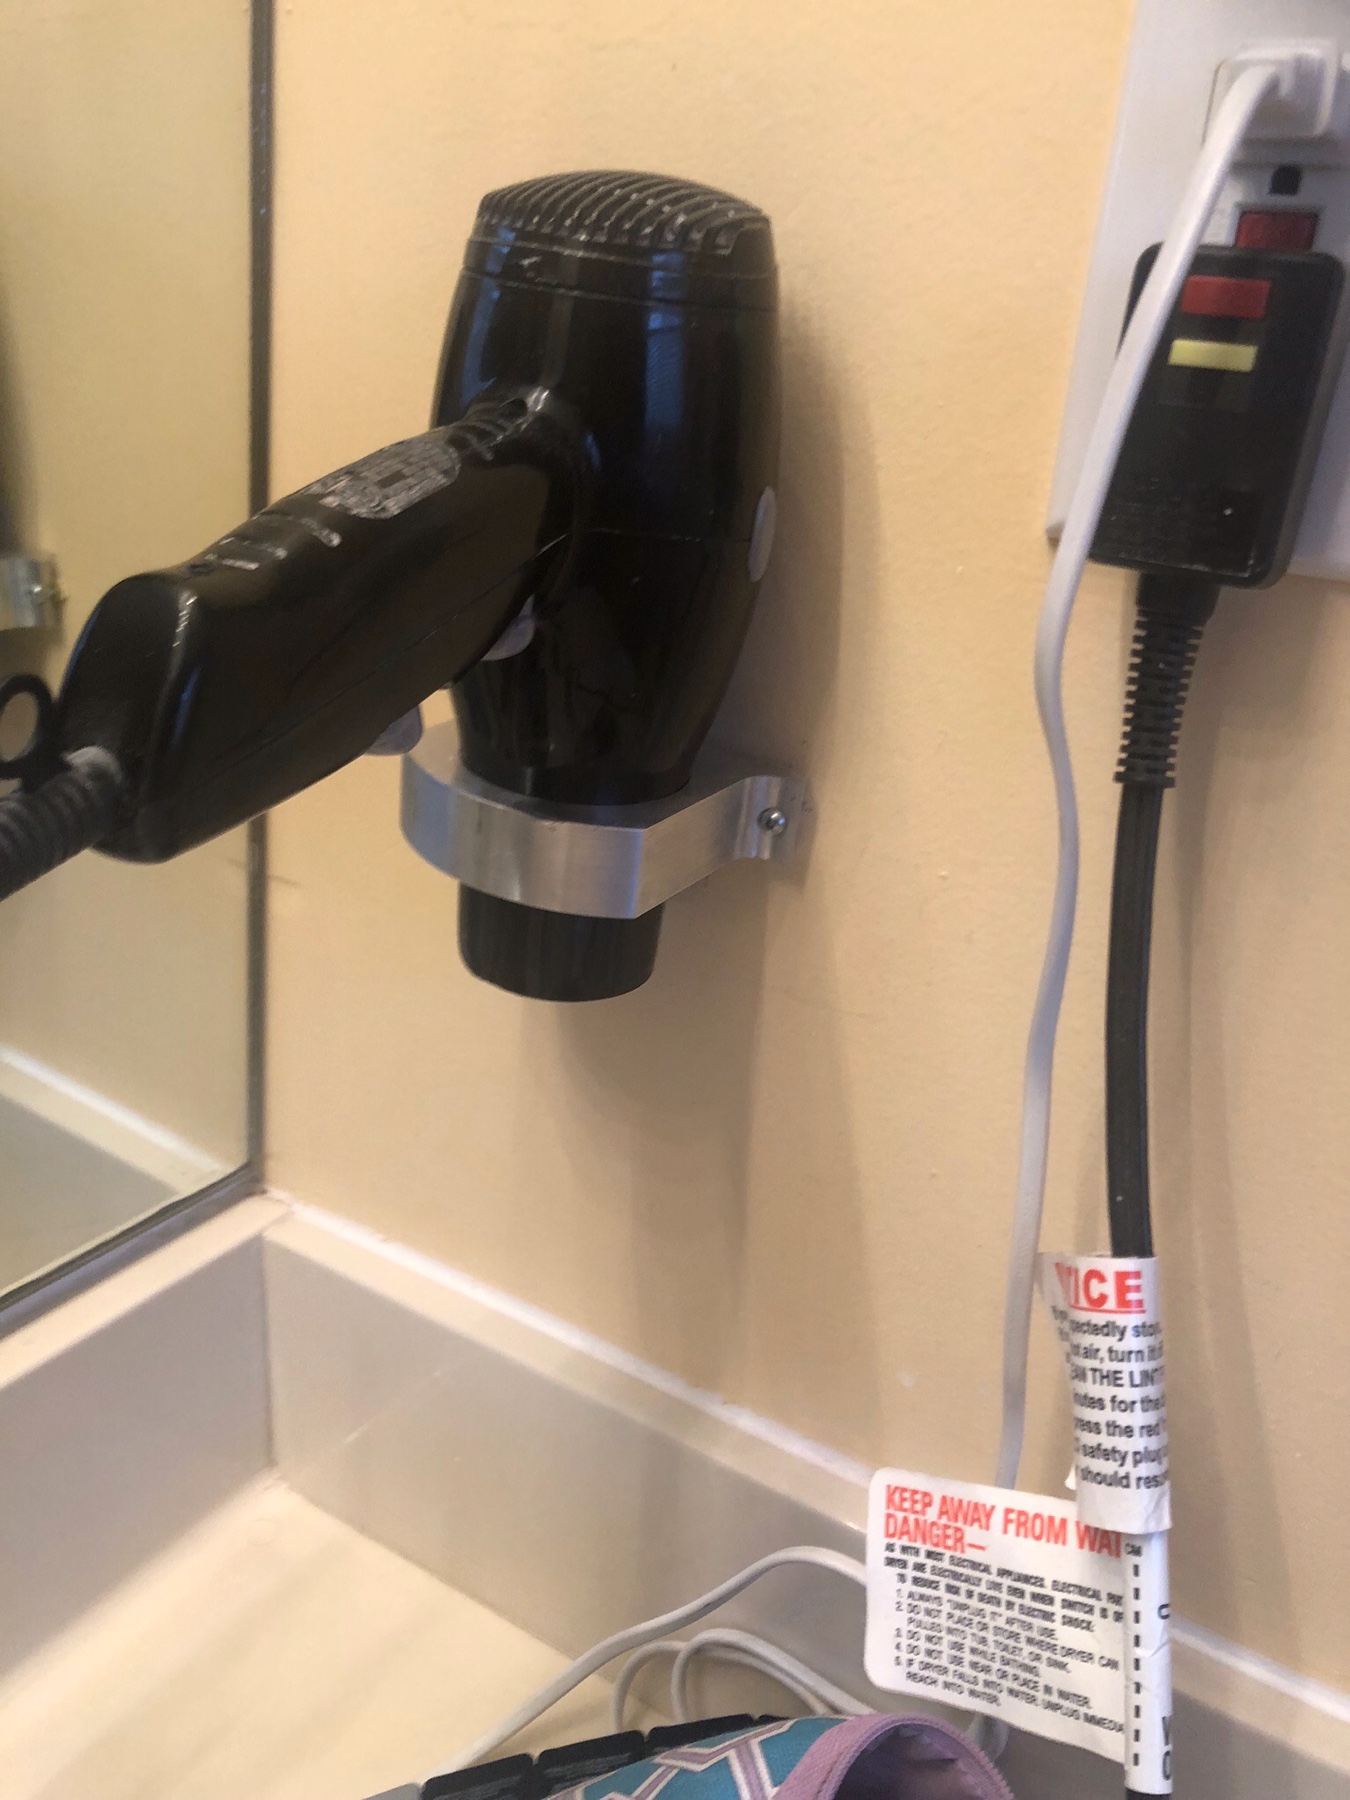
Finishing a simple project today. It be a while before it makes it into video. My sister in law wanted a wall bracket for her hair dryer and curling iron. She seen Chris’s hair dryer bracket and asked me to make her one for both.

 this is the one in our house
Sent from my iPad using Tapatalk
Sent from my iPad using Tapatalk