2019 POTD Thread Archive

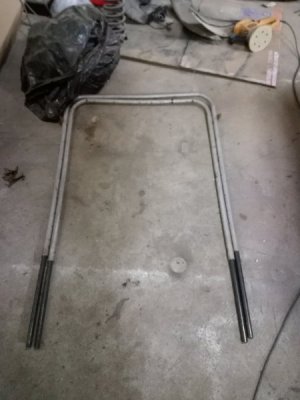
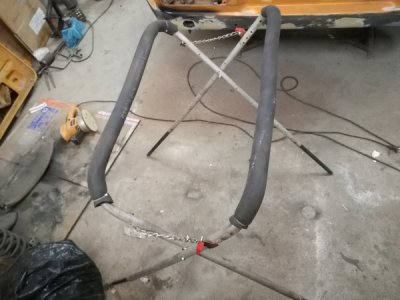
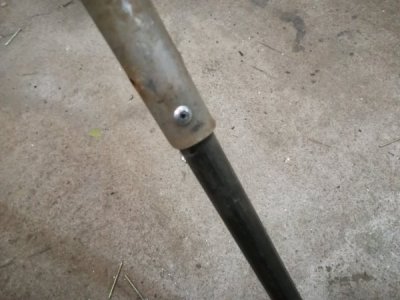
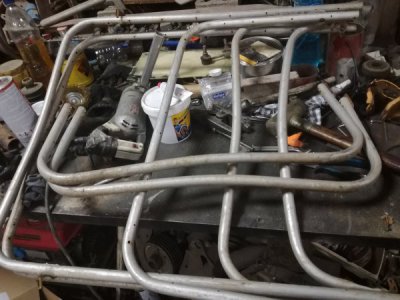
Today's project was to make me a work stand, couple of days ago i bought a aluminium foldable bed frame from a junkyard so today i grounded the rivets and disassembled it, then i cut couple of steel tubes to extend the legs also i shorten the top tube, i use pop rivets to hold everything in place except for the pivot points there i used bolts, i also installed chans and some insolation on the top. the weather is beautiful outside, so the plan is to use this stand to do some of the bodywork out side for the little niva.
IMG_20190429_202732.jpgIMG_20190430_194937.jpgIMG_20190501_113008.jpgIMG_20190501_113021.jpg
 
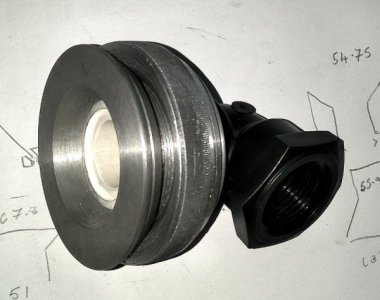
I found a large filter body with a tapered base for my aquaponics system.
Unfortunately the drain hole at the bottom of the taper is a non standard diameter.
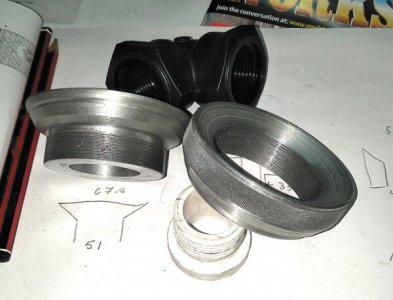
So I made a pair of screwed taper flanges from a couple of ally ingots I had laying around.
filter-screw1.jpg

Single point threaded at 1.25mm they will clamp the bottom of the filter using a soft rubber gasket.
The right angle fitting is as bought but the white inside one I had to modify a tad to provide sufficient thread to allow a very tight fixing.
filter-screw2.jpg
 
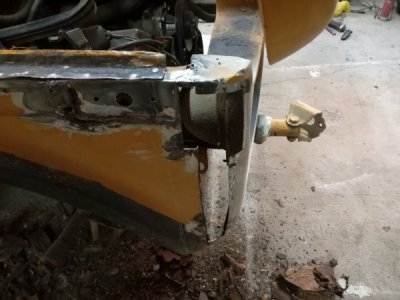
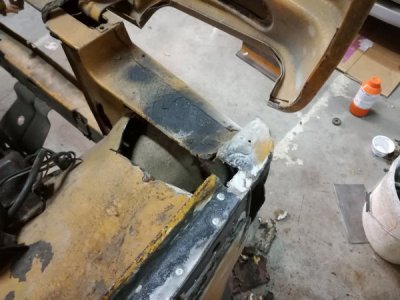
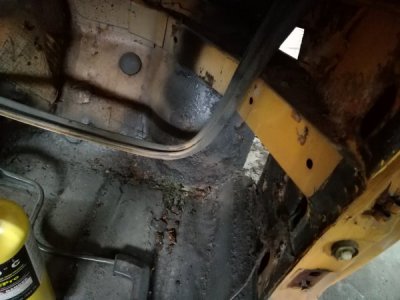
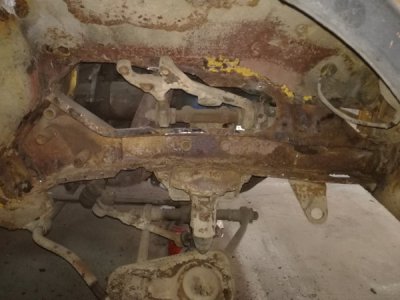
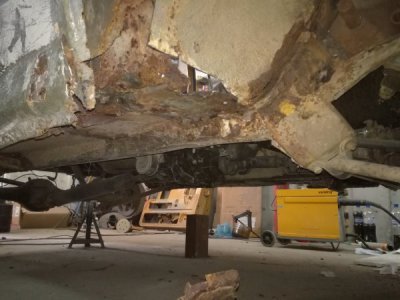
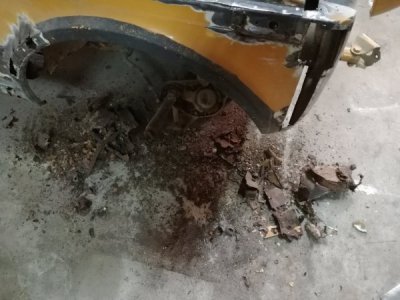
Today was one of those hard dirty day where i can taste the rust in my mouth and nose, started with the easy stuff, cutting the rust from the front wing then i cut the inner fender rust out that got me looking at the inside of the frame rail. And this the point where the fun started, here it had layer on top of layer of glue rusty metal and more paint and glue, the bolts ware completely covered over with new pieces of steel there was obviously couple of wannabe welders of which some preferred arc welding others glue, but to undo there work took me close to 6 hours, and future 2 more to cut out the rest of the rust, this side is much worse than the other, the shock mount was hold on with gravity and paint, the rust was so bad i had to cut in the floor and remove the brake caliper and move the steel brake lines, which have seen better days, you can see some of the rust that i have removed from it on the floor, i may have to make a sticker for the body that says Made in Macedonia instead of Made in Russia :grin big::grin big::grin big:
IMG_20190501_163801.jpgIMG_20190501_163807.jpgIMG_20190501_163746_1.jpgIMG_20190501_163832.jpgIMG_20190501_163851.jpgIMG_20190501_164024.jpg
 
I found a large filter body with a tapered base for my aquaponics system.
Unfortunately the drain hole at the bottom of the taper is a non standard diameter.
So I made a pair of screwed taper flanges from a couple of ally ingots I had laying around.

Single point threaded at 1.25mm they will clamp the bottom of the filter using a soft rubber gasket.
The right angle fitting is as bought but the white inside one I had to modify a tad to provide sufficient thread to allow a very tight fixing.
View attachment 293823

That's pretty cool! How do you calculate what the diameters of the blanks should be when you're making both the internal and external threads?
 
@GoceKU I watch a youtube video where a guy is restoring a ship called the "Talley Ho". It's called restoring because he is replacing everything on the ship piece by piece. Since everything is being gradually replaced, it's called a "restoration" even though there will be nothing original left when he's done. Seems like what you're doing here. :) Quite an incredible effort.
 
... i may have to make a sticker for the body that says Made in Macedonia instead of Made in Russia :grin big::grin big::grin big:
I seem to recall posting something like this a while ago. Your persistence and talent continue to amaze!
 
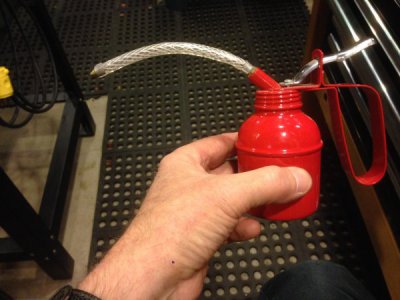
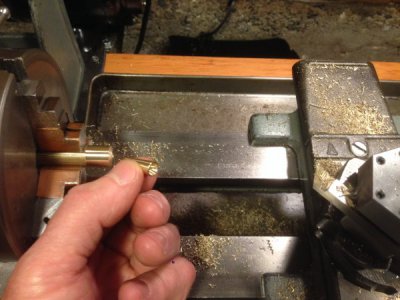
I like these little red oil cans, I have four of them. They're inexpensive (Princess Auto for like 5 bucks), small, but they work really nice and don't leak (unlike my more expensive gold coloured ones). The one thing I don't care for though is the tip, it's kind of blunt...

image.jpeg

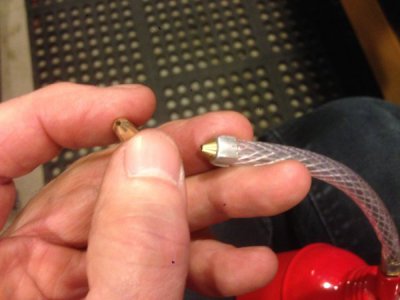
So I make new tips. I can do that, I have a lathe :) ....

image.jpeg

A number 55 drill seems to work well for the through passage, and conveniently enough the blunt original tip is close enough to 60 degrees that a centre drill works great and needs no further refinement. I taper my tip at 5 degrees each side, so ten degrees included angle. It's about 7/8" long when it's done...

image.jpeg

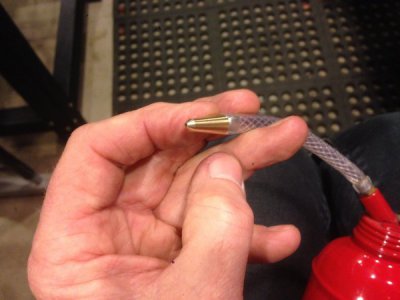
Then I glue the new tip I top of the old one with, what else, Red loctite. Works great!

image.jpeg

Thanks for looking!

-frank
 
That's pretty cool! How do you calculate what the diameters of the blanks should be when you're making both the internal and external threads?
As I work in metric its very easy.
First I turned down the part that passes through to the size of the hole and thread that at 1.25mm, rather fine but will allow a lot of force against the gasket just with finger tight.
Then added 1.25mm to the dia of the original "bolt" dia and then threaded the internal "nut" thread.
Because home cast material often leaves a rough surface I just gave it a quick spin on a wire brush and its a very smooth thread.
EDIT
I must have been tired when I did this.
I should have said subtract the thread pitch from the bolt dia and bore to that size then thread.
Because you have the first thread its easy to keep testing with that as you get close to size.
 
Last edited:
@GoceKU I watch a youtube video where a guy is restoring a ship called the "Talley Ho". It's called restoring because he is replacing everything on the ship piece by piece. Since everything is being gradually replaced, it's called a "restoration" even though there will be nothing original left when he's done. Seems like what you're doing here. :) Quite an incredible effort.
I hope this little niva dasen't take that long or cost me as much as Leo at Sampson Boat Co, rebuilding "Tally Ho"
 
Back
Top