-
Welcome back Guest! Did you know you can mentor other members here at H-M? If not, please check out our Relaunch of Hobby Machinist Mentoring Program!
- Forums
- THE PROJECTS AREA
- PROJECT OF THE DAY --- WHAT DID YOU DO IN YOUR SHOP TODAY?
- Project of the Day Mega-Thread Archives
You are using an out of date browser. It may not display this or other websites correctly.
You should upgrade or use an alternative browser.
You should upgrade or use an alternative browser.
2019 POTD Thread Archive
- Thread starter GoceKU
- Start date
- Joined
- Jul 14, 2017
- Messages
- 2,448
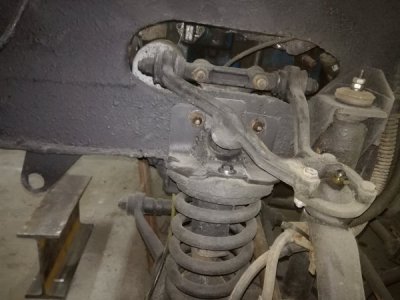
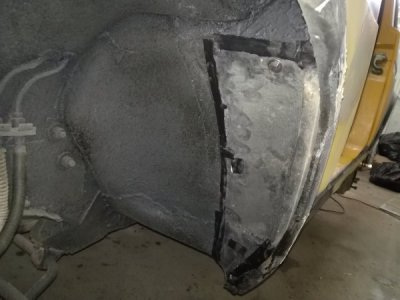
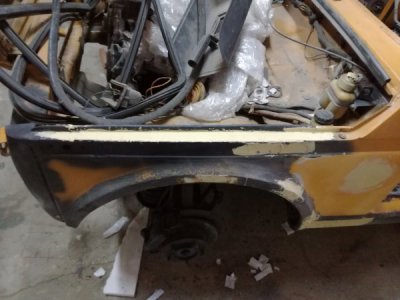
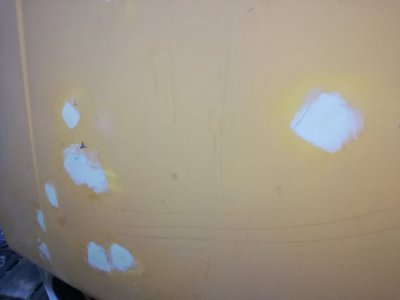
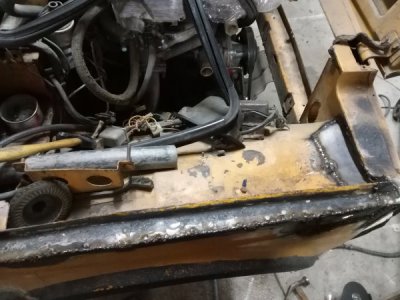
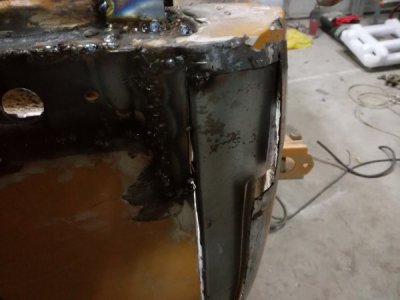
Last night i did pull an allnighter working on the little niva in the big garage, first i finished couple ting on the drivers side front, like installing the new upper bump stop mount, inner fender cover( factory steel one) i used couple more self tappers to attach it solid and apply some row rubber at the seams, i'll be installing plastic aftermarket inner fenders as well but after the body gets painted. Then i mixed some more body filler and applied it on the drivers side fender and the hood. Not wanting to wait for it to harden i started on the other side, at first i was going to weld up the upper seam of the fender and get back to bodywork, but i did continued working on it till the sun come out, i had to weld in 5 different pieces to fix the inner fender , then i made a small piece for next to the side indicator, welded it in and started making a patch panel for the front, this repair is difficult because the panel cervs in both directions, so after planing bending i started to fix it in place, i did used my new pliers to put a step in it for welding but at this point i was very tired and awake for close to 40 hours, so i'm going to sleep.


- Joined
- Nov 23, 2014
- Messages
- 2,609
POTD was making an arbor to do some testing at work on a lift gate strut assembly. We have a pretty good Tool Room, but they’re swamped so did this project at home.
Plastic ball socket end of a lift-gate strut. Needed to make
an arbor that screws into the end for a pull until it breaks test
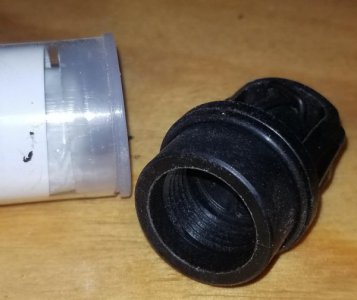
We’re going to be pulling on the end of a lift gate strut until ultimate failure. Plan is to thread an arbor into the plastic ball socket end of the strut and pull with a force gauge until something breaks.
First step was figuring out what the thread is in the ball socket. I did manage to check the thread with a thread gauge (1.5 mm pitch thread), and could caliper the diameter (18 mm), but used a product called PIG epoxy putty to make a splash of the inside of the ball socket detail. I started by giving the inside a shot of LPS 1 greaseless lubricant for a mold release. I’m guessing WD-40 would work as well or something similar. Cut off a length of putty, kneaded it, and mashed it into the socket using an arbor press to pack it out. Didn’t show it, but put a drywall screw into the putty and packed more around the screw for something to grab onto when unscrewing the splash.
Tight fit, but thread checked at 1.5 mm pitch
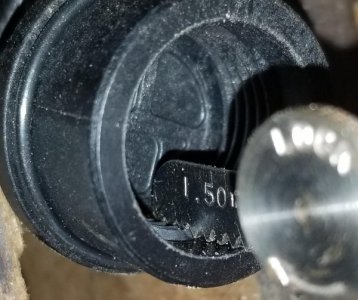
PIG epoxy putty used to make a splash of the strut end detail

Kneaded the putty, then mashed it into the detail with an arbor press
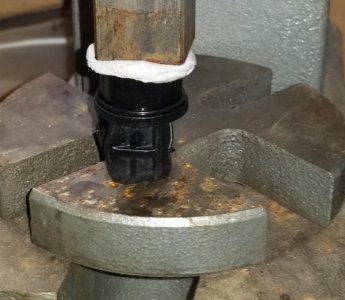
Stuck a drywall screw into the putty for reinforcement and
built up the area outside of the socket for something to grip
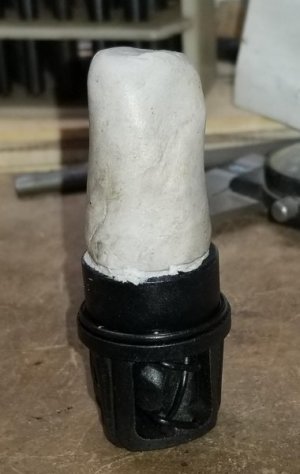
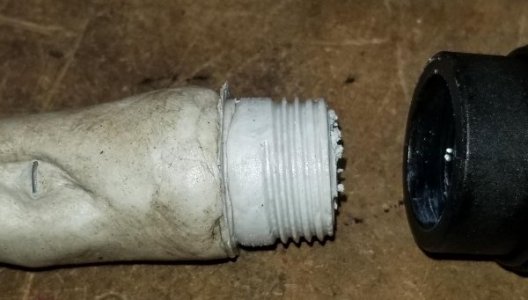
The putty took about 15 minutes to set up rock hard. It unscrewed pretty easily and did a really good job duplicating the inside of the socket. Confirmed the OD at 18 mm (~0.705”) and a thread pitch of 1.5 mm.
Used LPS 1 as a mold release. Epoxy splash unscrewed easily
and was a pretty accurate match of the internal thread.
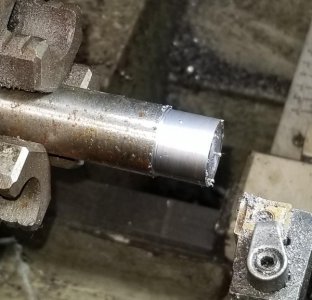
Chucked up a length of ¾” what I thought was CRS (turned out to be drill rod . . .), faced, turned to diameter and relieved the base where the thread would end. Chamfered the start of the thread.
face and turn to diameter
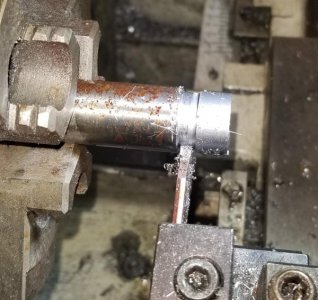
relieve base of threaded area
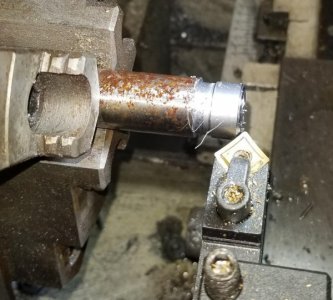
chamfer start of the trread
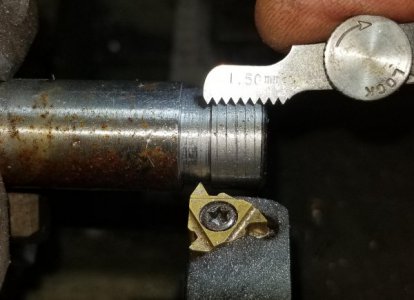
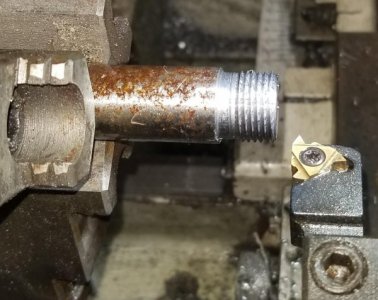
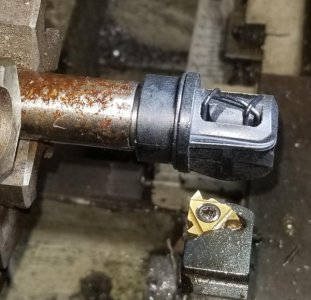
Did a scratch pass for the 1.5 mm pitch thread and verified with a pitch gauge. Then proceeded to single point thread the M18 x 1.5 mm pitch thread. I used the plastic strut detail to verify the thread.
Verified 1.5 mm pitch. Really like my G0709 lathe with a
universal QCGB. I can switch between English and metric
threading without fiddling with the quadrant gears. Just
have to remember to leave the half-nut engaged and
reverse the lathe for each pass.
last pass
verified the thread with the strut cap
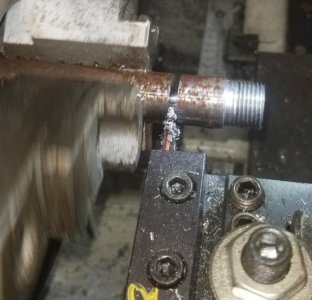
Parted off the arbor and flipped it in the lathe. Faced, chamfered the back side, center drilled, tap drilled and tapped a 5/16”-18 hole.
"Love" parting drill rod - lots of oil and low speed
flipped and chamfered
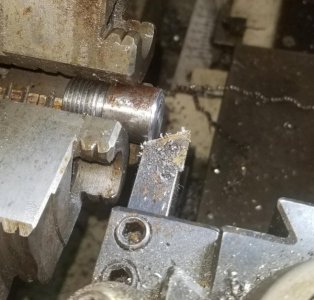
center drilling
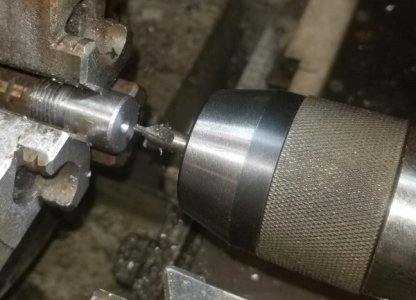
tap drill
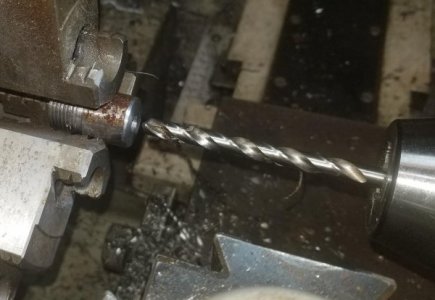
tapped a 5/16"-18 for an attaching bolt
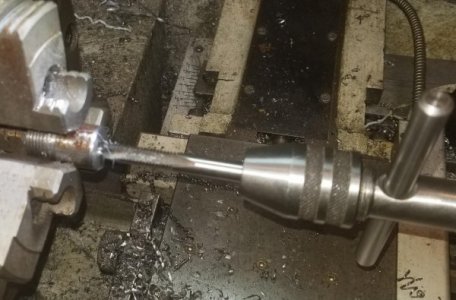
Plan is to bolt the ball stud that the plastic ball socket snaps to onto a fixture plate. Run a bolt through one end of a piece of steel rack tubing we have on hand with pre-drilled 1” spaced holes for a fulcrum point. Then bolt the arbor to the lever 4” from the fulcrum. Then bolt the force gauge (our gauge goes to 500 lbs.) 20” from the fulcrum. The ball socket is supposed to take a load of 4000 N or about 900 lbs. This set up will give us a 5 to 1 mechanical advantage so we’ll be able to put a max load of 2500 lbs. on the ball socket. I’ll shoot a photo of the set up when we start breaking things at work!
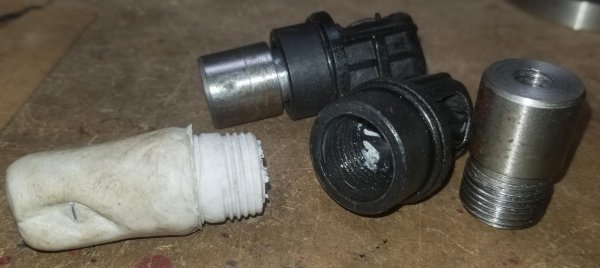
Finished arbors (made 2) and the epoxy thread plug
Thanks for looking,
Bruce
Plastic ball socket end of a lift-gate strut. Needed to make
an arbor that screws into the end for a pull until it breaks test

We’re going to be pulling on the end of a lift gate strut until ultimate failure. Plan is to thread an arbor into the plastic ball socket end of the strut and pull with a force gauge until something breaks.
First step was figuring out what the thread is in the ball socket. I did manage to check the thread with a thread gauge (1.5 mm pitch thread), and could caliper the diameter (18 mm), but used a product called PIG epoxy putty to make a splash of the inside of the ball socket detail. I started by giving the inside a shot of LPS 1 greaseless lubricant for a mold release. I’m guessing WD-40 would work as well or something similar. Cut off a length of putty, kneaded it, and mashed it into the socket using an arbor press to pack it out. Didn’t show it, but put a drywall screw into the putty and packed more around the screw for something to grab onto when unscrewing the splash.
Tight fit, but thread checked at 1.5 mm pitch

PIG epoxy putty used to make a splash of the strut end detail

Kneaded the putty, then mashed it into the detail with an arbor press

Stuck a drywall screw into the putty for reinforcement and
built up the area outside of the socket for something to grip

The putty took about 15 minutes to set up rock hard. It unscrewed pretty easily and did a really good job duplicating the inside of the socket. Confirmed the OD at 18 mm (~0.705”) and a thread pitch of 1.5 mm.
Used LPS 1 as a mold release. Epoxy splash unscrewed easily
and was a pretty accurate match of the internal thread.

Chucked up a length of ¾” what I thought was CRS (turned out to be drill rod . . .), faced, turned to diameter and relieved the base where the thread would end. Chamfered the start of the thread.
face and turn to diameter

relieve base of threaded area

chamfer start of the trread

Did a scratch pass for the 1.5 mm pitch thread and verified with a pitch gauge. Then proceeded to single point thread the M18 x 1.5 mm pitch thread. I used the plastic strut detail to verify the thread.
Verified 1.5 mm pitch. Really like my G0709 lathe with a
universal QCGB. I can switch between English and metric
threading without fiddling with the quadrant gears. Just
have to remember to leave the half-nut engaged and
reverse the lathe for each pass.

last pass

verified the thread with the strut cap

Parted off the arbor and flipped it in the lathe. Faced, chamfered the back side, center drilled, tap drilled and tapped a 5/16”-18 hole.
"Love" parting drill rod - lots of oil and low speed

flipped and chamfered

center drilling

tap drill

tapped a 5/16"-18 for an attaching bolt

Plan is to bolt the ball stud that the plastic ball socket snaps to onto a fixture plate. Run a bolt through one end of a piece of steel rack tubing we have on hand with pre-drilled 1” spaced holes for a fulcrum point. Then bolt the arbor to the lever 4” from the fulcrum. Then bolt the force gauge (our gauge goes to 500 lbs.) 20” from the fulcrum. The ball socket is supposed to take a load of 4000 N or about 900 lbs. This set up will give us a 5 to 1 mechanical advantage so we’ll be able to put a max load of 2500 lbs. on the ball socket. I’ll shoot a photo of the set up when we start breaking things at work!
Finished arbors (made 2) and the epoxy thread plug

Thanks for looking,
Bruce
Last edited:
BRUCE, I LOVE PIG PUTTY. THANKS.POTD was making an arbor to do some testing at work on a lift gate strut assembly. We have a pretty good Tool Room, but they’re swamped so did this project at home.
Plastic ball socket end of a lift-gate strut. Needed to make
an arbor that screws into the end for a pull until it breaks test
View attachment 293968
We’re going to be pulling on the end of a lift gate strut until ultimate failure. Plan is to thread an arbor into the plastic ball socket end of the strut and pull with a force gauge until something breaks.
First step was figuring out what the thread is in the ball socket. I did manage to check the thread with a tread gauge (1.5 mm pitch thread), and could caliper the diameter (18 mm), but used a product called PIG epoxy putty to make a splash of the inside of the ball socket detail. I started by giving the inside a shot of LPS 1 greaseless lubricant for a mold release. I’m guessing WD-40 would work as well or something similar. Cut off a length of putty, kneaded it, and mashed it into the socket using an arbor press to pack it out. Didn’t show it, but put a drywall screw into the putty and packed more around the screw for something to grab onto when unscrewing the splash.
Tight fit, but thread checked at 1.5 mm pitch
View attachment 293969
PIG epoxy putty used to make a splash of the strut end detail
View attachment 293970
Kneaded the putty, then mashed it into the detail with an arbor press
View attachment 293971
Stuck a drywall screw into the putty for reinforcement and
built up the area outside of the socket for something to grip
View attachment 293972
The putty took about 15 minutes to set up rock hard. It unscrewed pretty easily and did a really good job duplicating the inside of the socket. Confirmed the OD at 18 mm (~0.705”) and a thread pitch of 1.5 mm.
Used LPS 1 as a mold release. Epoxy splash unscrewed easily
and was a pretty accurate match of the internal thread.
View attachment 293973
Chucked up a length of ¾” what I thought was CRS (turned out to be drill rod . . .), faced, turned to diameter and relieved the base where the thread would end. Chamfered the start of the thread.
face and turn to diameter
View attachment 293974
relieve base of threaded area
View attachment 293975
chamfer start of the trread
View attachment 293976
Did a scratch pass for the 1.5 mm pitch thread and verified with a pitch gauge. Then proceeded to single point thread the M18 x 1.5 mm pitch thread. I used the plastic strut detail to verify the thread.
Verified 1.5 mm pitch. Really like my G0709 lathe with a
universal QCGB. I can switch between English and metric
threading without fiddling with the quadrant gears. Just
have to remember to leave the half-nut engaged and
reverse the lathe for each pass.
View attachment 293977
last pass
View attachment 293978
verified the thread with the strut cap
View attachment 293979
Parted off the arbor and flipped it in the lathe. Faced, chamfered the back side, center drilled, tap drilled and tapped a 5/16”-18 hole.
"Love" parting drill rod - lots of oil and low speed
View attachment 293980
flipped and chamfered
View attachment 293981
center drilling
View attachment 293982
tap drill
View attachment 293983
tapped a 5/16"-18 for an attaching bolt
View attachment 293984
Plan is to bolt the ball stud that the plastic ball socket snaps to onto a fixture plate. Run a bolt through one end of a piece of steel rack tubing we have on hand with pre-drilled 1” spaced holes for a fulcrum point. Then bolt the arbor to the lever 4” from the fulcrum. Then bolt the force gauge (our gauge goes to 500 lbs.) 20” from the fulcrum. The ball socket is supposed to take a load of 4000 N or about 900 lbs. This set up will give up a 5 to 1 mechanical advantage so we’ll be able to put a max load of 2500 lbs. on the ball socket. I’ll shoot a photo of the set up when we start breaking things at work!
Finished arbors (made 2) and the epoxy thread plug
View attachment 293985
Thanks for looking,
Bruce
- Joined
- Mar 2, 2013
- Messages
- 895
Nice write up bruce.
The ongoing modifications to my pm1440gs lathe.
The left side gear/pulley cover has been off the lathe for over a year. I never liked the barn door that PM installed for acces to the spider. Looked too clumsy to me. I removed it today and welded in a new 16ga. piece of crs. Drilled a 2 1/4" hole with a holesaw. I need to make some simple dies to finish off the look.
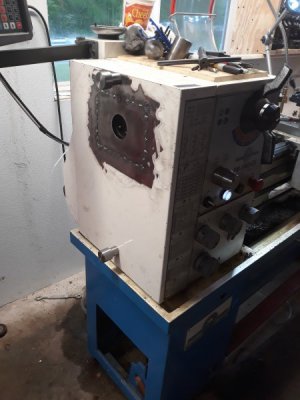
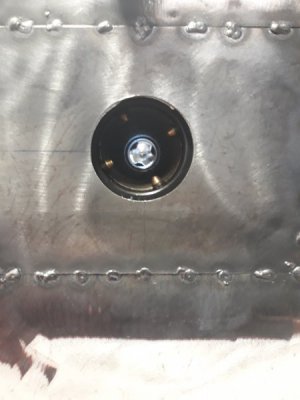
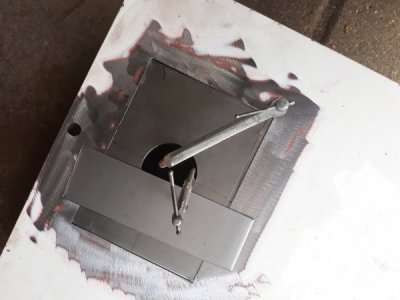
I also cutout the back of the same cover, I had made some modifications to the motor mounts, this pushed the motor back some so I needed to make sheetmetal modifications.
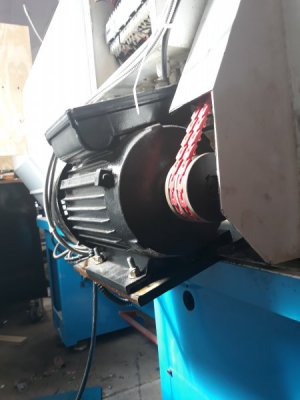
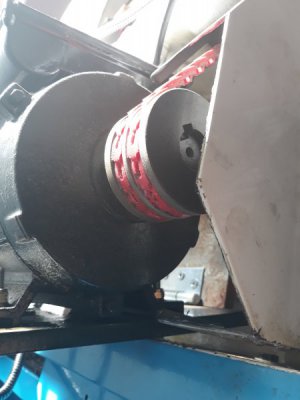
I whipped up a couple of new screw downs to hold the cover on, the originals were not to my liking. Ymmv.
Nice to have the cover on, even if it is only temp.
I'm hoping this model works well when I finally convert over to 3phase in the not too distant future.
Rich
The ongoing modifications to my pm1440gs lathe.
The left side gear/pulley cover has been off the lathe for over a year. I never liked the barn door that PM installed for acces to the spider. Looked too clumsy to me. I removed it today and welded in a new 16ga. piece of crs. Drilled a 2 1/4" hole with a holesaw. I need to make some simple dies to finish off the look.


I also cutout the back of the same cover, I had made some modifications to the motor mounts, this pushed the motor back some so I needed to make sheetmetal modifications.


I whipped up a couple of new screw downs to hold the cover on, the originals were not to my liking. Ymmv.
Nice to have the cover on, even if it is only temp.
I'm hoping this model works well when I finally convert over to 3phase in the not too distant future.
Rich
- Joined
- Jan 31, 2016
- Messages
- 11,492
Just got back in from the other plant . Had to rip some carpet off that was adhesived to a cement floor . I've never broke a sweat at work as bad as I did in the past 90 minutes , and not planning on ever doing it again ! 

- Joined
- May 9, 2014
- Messages
- 415
Just got back in from the other plant . Had to rip some carpet off that was adhesived to a cement floor . I've never broke a sweat at work as bad as I did in the past 90 minutes , and not planning on ever doing it again !
As a one-time Facilities guy, I can relate- my least favorite job.


