2019 POTD Thread Archive

Started on another household project. Needed to fly cut this thin piece of aluminum just for appearances. It was a bigger to get solid in the mill vice. I ended up using another piece of aluminum and a couple of jackets to support the center
e2a5638916f70140de7adda7b7f43a1f.jpg


Sent from my iPhone using Tapatalk
 
That should give you a good jump on next winter. Nice to have oak to burn. Was always spruce, and aspen for me back when I used wood. The oak should go a lot further. Cheers, Mike
 
Not machine related, and pretty much wore me out. Finished cutting my firewood today. 24 inch blocks of oak get real heavy at the end of the day.
View attachment 295548

Greg
Hi Greg,

I feel your pain . . . Ibuprofen helps, 800 mg is a prescription dose or 4 over the counter 200 mg pills, ask me how I know . . . To me, the worst part of heating with wood is the task is never done. Get all of your wood cut for the year, and you get to do it all over again next year.

I finished up today with "Woodstock 2019", got the last of mine cut, split and stacked for this upcoming winter. We burn between 7-9 full cords a year (9+ this year . . .). I'd like to think I've gotten a little smarter over the years (been supplementing our propane heat with wood since 1991), do the same amount of work each year, but spread it out much more that 60 is just around the corner.

Michigan got hit with the emerald ash bore a few years ago which pretty much wiped out all of the ash trees. We live on 64-acres with ~50 of it wooded, mainly dead ash, hard maple, walnut, cherry and some elm (lots of dead standing elm).

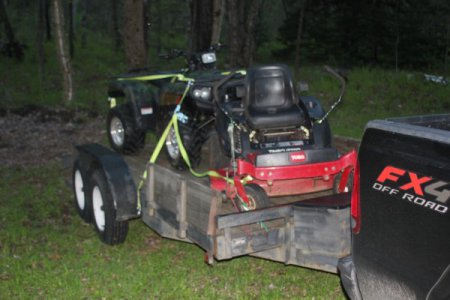
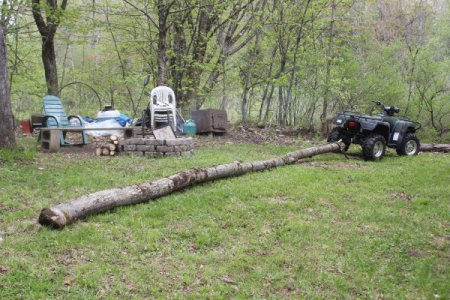
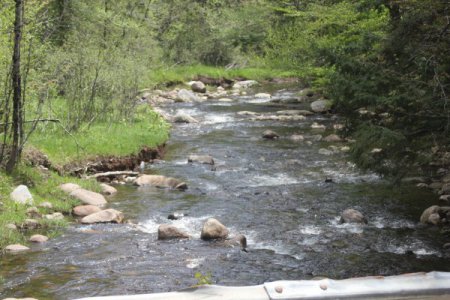
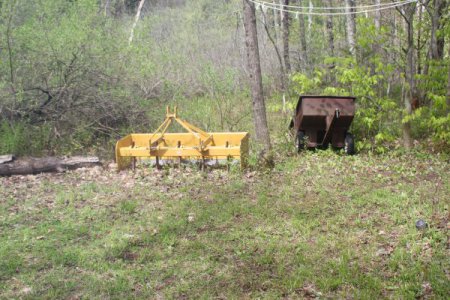
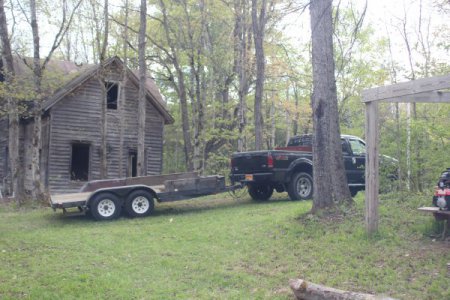
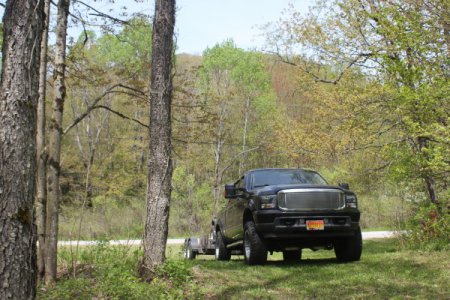
I hit the woods in September with a satellite map of our property and look for downed trees (do most of my cutting in late fall, early winter). If there are dead standing trees, paint them with fluorescent orange or green paint and mark them on the map. Kinda tough to tell in the winter if a tree is live or dead with no leaves, hence the paint job. I cut with a Stihl Farm Boss, go out with a quad and 3' x 5' trailer and run 2 - 4 tanks of fuel through the saw, then call it quits for the day. Stuff that doesn't need to get split hits the trailer and gets stacked. Yes, I'm anal, I count tanks of fuel through the saw to know when I've cut enough for the next year. Usually takes 26 - 32 tanks of fuel through the Stihl (did 33 this year). I also touch the chain with a diamond bit in a Milwaukee M12 die grinder in the field. Also carry two fresh chains and an extra bar for when (not if) I pinch the bar in a tree).

Already looking forward to "Woodstock 2020" . . .

Bruce


Main storage space in our barn. 40' x 8' high, 2 rows; one additional row 24' x 8' high or a little over 8 full cords. My wood pile as of May 26.
20190526_100946.jpg

All done (for this year . . .) on May 28.
20190528_110542.jpg

Walk-out basement area, another 1 1/2 full cords
20190528_120659.jpg

Garage with another full cord
20190529_110349.jpg
 
Not machine related, and pretty much wore me out. Finished cutting my firewood today. 24 inch blocks of oak get real heavy at the end of the day.
295548

You have a great looking helper there , I have a few I take up to camp for moral support . I find it relaxing to be in the woods and working the wood , but you are correct sir ……………………….by the end of the day I am POOPED ! :cool:
 
POTD was before my "Woodstock 2019" endeavor pictured above. I cut wood during the late fall, early winter. Usually mark the areas where I've cut wood with hunter's orange ribbon tied into branches before splitting in the spring. I also mark the spots on a satellite map of our property. The undergrowth starts coming up in the spring; I've lost cut wood before under the foliage. I usually split wood using our Massey 35 farm tractor with a splitter on the 3-point. Well, the old girl was giving me issues this spring so bought a 25-ton splitter.

I use a Honda quad for roaming the property. The quad has a storage basket on the back which necessitates longer tongues on whatever gets hitched up. So POTD was extending the tongue of the new splitter.

The splitter uses 2" square tubing for the receiver. I happened to have a piece in my junk pile about 2' long which was perfect for the job. Plan was to weld a couple of 1/2" x 2" pieces of CRS to the tubing which would bolt to the splitter's receiver bolt holes. Then bolt the receiver to the extension.

I used a transfer punch to mark the receiver holes on the extension. Drilled those in the tubing, and used the same holes to transfer punch the locations onto the CRS. Bolted the straps to the splitter with some 1/4" washers for shim to give some space for removal of the extension. Clamped the extension tube in place and broke out the Lincoln buzz-box.

Next step will be a coat of Krylon now that "Woodstock 2019" is over. Thanks for looking,

Bruce


Transfer punching the extension tube receiver holes to the side straps
20190526_162128.jpg

Drilled the side strap holes for bolting the extension tube to the splitter
20190526_164555.jpg

Clamped up extension tube and side straps prior to welding
20190526_171316.jpg

Extension welded up and bolted in place
20190526_174052.jpg

Ready to go!
20190526_174452.jpg

Will be retiring the Massey 35 with the splitter on the 3-point.
20190527_092215.jpg
 
Another POTD before "Woodstock 2019". We have a 3' x 5' trailer for hauling with the quad. I used a pin to latch the trailer to the back of the quad. We bought a splitter that requires a ball, so modified the trailer tongue for a hitch receiver.

Started by removing the steel bar stock welded to the trailer tongue. Used a questionable carbide end mill to cut the E6013 welds from around 20 years ago. I have no affiliation with the company, use a brush applicator from www.designetics.com in OH for my cutting oil. I recall the bottle, brush and a screw-on funnel for easy filling was around $6. Have a bunch of these around the shop.

I had a piece of 2" square tubing available for the hitch receiver. Held the tubing with the receiver staged in place in a vise and transfer punched the hole locations. Drilled the tubing on the drill press, and welded the 2" tubing on top of the trailer tongue. Bolted on the receiver and good to go.

Thanks for looking,

Bruce


Old trailer hitch was a pin dropped through the quad's ball receiver.
20190526_100958.jpg

A resharpened 1/2" carbide end mill from eBay cutting through the old welds
20190526_101936.jpg

Cutting oil brush/bottle from Designetics. Works really well, they have many different applicator brushes available.
20190526_103030.jpg

Transfer punching the hitch receiver holes to the 2" tubing.
20190526_104909.jpg

Welded the 2" tubing for the hitch receiver on the trailer tongue
20190526_112320.jpg

New hitch in place
20190526_113647.jpg

Ready to haul some wood!
20190526_154709.jpg
 
My little piece of heaven . 45 acres up in Adirondack Park . No where near enough , but it's a start . :) When I can , I take the Kubota FEL up for the heavy work , but that makes for an expensive trip .
 

Attachments

  • IMG_0124.JPG
    IMG_0124.JPG
    43.7 KB · Views: 36
  • IMG_0150.JPG
    IMG_0150.JPG
    86 KB · Views: 35
  • IMG_0151.JPG
    IMG_0151.JPG
    70.7 KB · Views: 35
  • IMG_0138.JPG
    IMG_0138.JPG
    50 KB · Views: 35
  • IMG_0262.JPG
    IMG_0262.JPG
    69.2 KB · Views: 35
  • IMG_0172.JPG
    IMG_0172.JPG
    83.4 KB · Views: 38
  • IMG_0176.JPG
    IMG_0176.JPG
    68.6 KB · Views: 37
  • IMG_0188.JPG
    IMG_0188.JPG
    74.7 KB · Views: 38
  • IMG_0237.JPG
    IMG_0237.JPG
    82.2 KB · Views: 36
  • IMG_0230.JPG
    IMG_0230.JPG
    70.3 KB · Views: 36
  • IMG_0222.JPG
    IMG_0222.JPG
    44.1 KB · Views: 35
  • IMG_0204.JPG
    IMG_0204.JPG
    63.6 KB · Views: 40
  • IMG_0205.JPG
    IMG_0205.JPG
    74.1 KB · Views: 40
  • IMG_0125.JPG
    IMG_0125.JPG
    62.7 KB · Views: 39
Back
Top