2019 POTD Thread Archive

Hey you do own a machine besides a welder :p

Nice work! what kind of lathe is it? and what's the size of those brake rotors?

My lathe is a stanko 1k62 you can see more about it in my intro post here: https://www.hobby-machinist.com/threads/new-member-from-kumanovo-macedonia-europe.60652/ , The rotors are probably 266mm in diameter, i've turned much bigger in the past, but with them being so cheap ill reader replace them then machine them, i still do it in emergencies.
 
I did this a couple of weeks ago. Just posted the video today. The bushing in our patio table was messed up.


Sent from my iPhone using Tapatalk
 
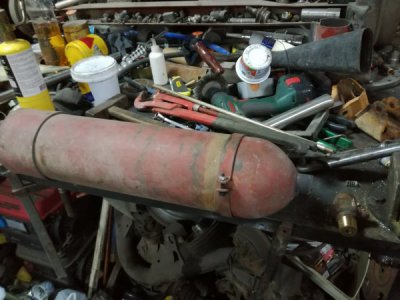
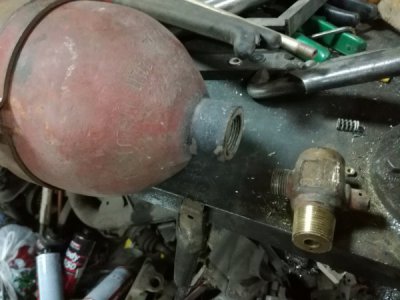
This morning as i was putting away all the heavy thing i used to weight down the Little Niva, i decided to get the broken valve of this CO2 tank off, i've tried before but could not hold the tank in place, so i welded a strap to my bench and used a clamp at the back. For the valve i grabbed it with my big pipe pliers and put all of my 115kg and it would not move, so i got the propane torch out and heated the steam of the tank, what ever sealer was used back in 1963 on it was still holding and after constable effort with a extension pipe and all my weight it unscrewed, simple task took more than an hour.
IMG_20190528_194445.jpgIMG_20190528_194449.jpg
 
The horizontal band saw got a bit of overdue attention. The hole for the main locking bolt through the "fixed jaw" was somewhat bigger than the 1/2" bolt so I turned a small plug, MIG welded it into place and redrilled the hole to be a nice snug fit for the bolt to pass through. The edge of the plug is just visible. Then I set the fixed jaw to the blade using a square and the good old "hairy eyeball" and locked it down.
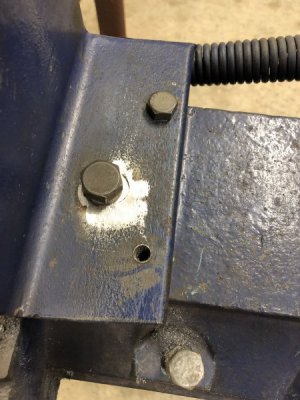
295785

I needed to cut a short length off a 4" diameter round.
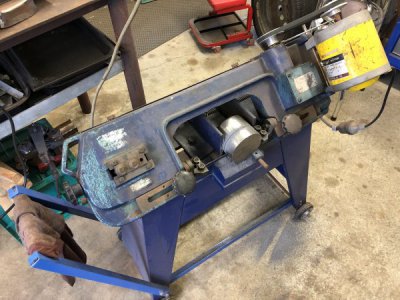
295786

It took a bit over 70 minutes (using a 6 tpi blade)
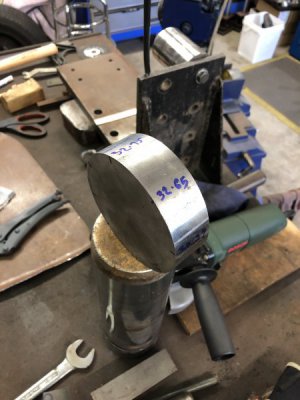
295787

I measured the thickness at 8 points.

32.75, 32.65, 32.39, 32.60, 32.75, 32.52, 32.90, 32.94
max minus min = 0.55mm or 21 thou

I am happy with that.

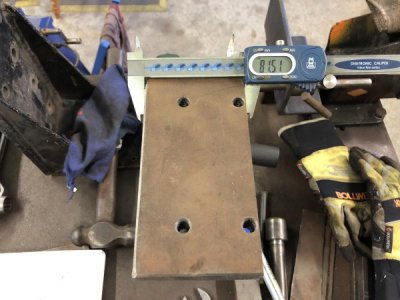
I also cut a 1" thick piece of flat at almost max capacity of the saw.
That took about 50 minutes.
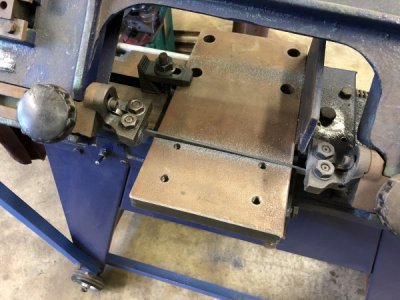
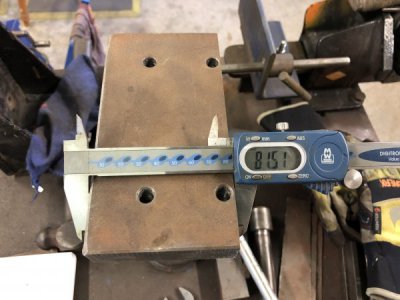
295789

295790295791

That came out spot on at 81.51mm!
Perfectly parallel.

By my reckoning it is set for square just right!

The next thing to sort out is the down force when cutting, it definitely cuts better with some extra fingertip pressure.

Also, it just has a single pulley, and I haven't done the sums yet to work out what speed it is actually cutting,
I have a big bucket of old pulleys, I'm sure there are some options if need be.

Anyway, for the $120 I paid for it a few years ago, I am more than happy with it.

Pete
 
Ye're a better man than I am, Ginga Din! I'm usuallu happy to get within about 15 thousandths on 2" stock! Now that you have the fixed jaw located, you might want to drill through the jaw and the table below with a suitable size drill, and stick in a pin of some kind (dowel, nail, drill rod, whatever). That way, if you ever have to adjust the "fixed" jaw for an angle cut, you can get back to your sweet spot.
 
rebuilt my old desktop PC that my eldest was using. It was a 10-11 year old AMD system that I built when we were in Australia (I think). A while back the PSU failed, so that got replaced. Then it just went dead, so I figured that the motherboard had gone. No funds to fix it, so she got my wife's old laptop instead.

Fast forward to a few weeks ago and someone round the corner put an old Dell desktop tower on the curb (yay for walking the dog). Hoofed that back home and opened it up - turns out that it had an Intel quad core CPU, 4GB RAM and a newer wifi card. Hoping that it had a dead PSU, I swapped the guts into my old PC and it fired right up. Only downside was that I didn't have the bracket to use my nice CPU cooler on the Intel chip (different sockets and mounting hardware) as it must have disappeared some move ago.

Rummage in the scrap bin
attachment.php


bit of jigsaw and file work, plus some cheeky threading turning a 6-32 thread into an M3x0.5 thread
attachment.php


screwed into a holder to drill/tap/face to length
attachment.php


standoffs in place
attachment.php


heatsink mounted
attachment.php


everything back together
attachment.php


even found an antenna for the wifi card off eBay for $6, works a treat!

also fixed up the bird poo and leaf sweeper for the pool as the handle broke. Hopefully she won't break the 3/4" alu rod it now has!
attachment.php
 
had itchy feet but didn't want to get stuck into the next project, so figured I'd cross this one off the list. The work envelope of my Grizzly 6x26 is pretty small (6 Y x 15 1/2 X x 13 1/2 knee). Most of the time that's not an issue as most of the stuff I do is pretty small too, but every so often I could do with a few extra inches (phnar phnar). There's space between the table ends and the saddle at both ends of the X travel, but the table ends hang a little below the bottom of the table. With a wee bit of machining I could free up some travel.

Not much needed taking off the bottom on both sides (couple of mm at most) and the same for one side of the bearing housing. The other needed a fair size notch cut out to clear the bottom of the saddle dovetail
attachment.php


back of table with the extra travel
attachment.php


front of table with the extra travel
attachment.php


the power feed trips are set with around 3/8 to 1/2" travel to spare, just in case. Measured up the travel and it now comes to 18 1/2", up from 15 1/2", which is a handy increase. Doubt I'll need it much, but nice to have it if I do.

Next big project for the mill is to make a riser block to increase knee travel - there's plenty of extra dovetail, just can't use it. Have a nice 4 1/2" thick by 6" round piece of steel (hollow, looks like a drive wheel from a belt grinder) that's been waiting for the time to work on it.
 
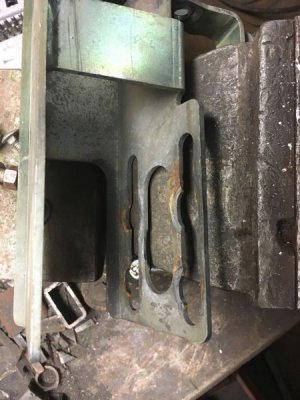
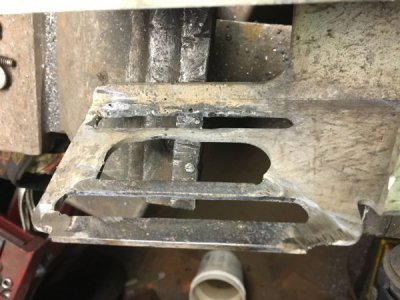
Noticed the "tensioner" for the blower I have mounted on my mower (fabbed up earlier this year), was almost popping out of the slots it is supposed to be sliding in

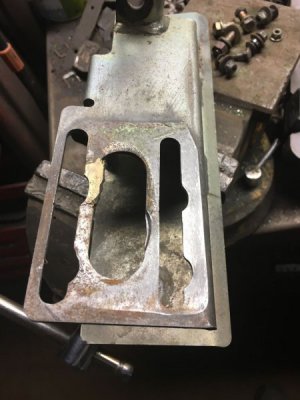
Before pics:
IMG_1432.jpgIMG_1433.jpg

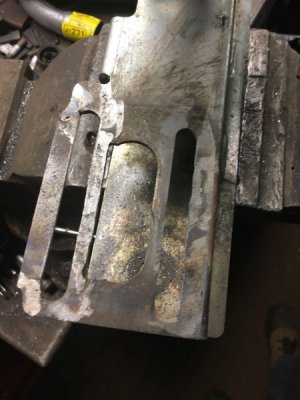
Don't have a pic of it, but a plate with an idler bolted to it slides back and forth on this, with 4 bolts going through that plate, and through the two outside slots in the pictures, with a spring pushing the plate to one end of the slots, providing tension. You can see where the 4 bolts have worn the slots due to vibration while the blower is running. Actually, there are 4 bushings of perhaps iron or maybe graphite, that I would think are supposed to wear instead of this weldment, so it's just $10 or so for 4 new bushings that are easy to replace, vs an $115 weldment... But no, the 4 bushings are near-new in condition, and this is the second time I've had to repair this weldment.

Patched up:
IMG_1435.jpgIMG_1434.jpg

I'm thinking I need to fix this setup in a more permanent way, by bolting the sliding tensioner to this weldment so it can't move (so no more wear and tear on this part), and making a pivoting-style idler mounted on the mowing deck as the tensioner.
 
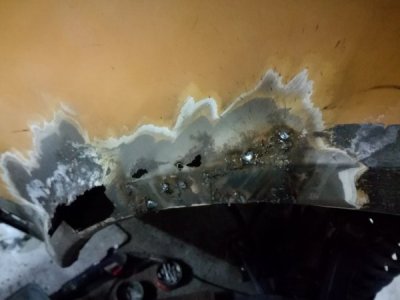
It is pretty late but i decided to get the last of the rust repair done, this is the start of the repair i cut the repair square and make a new piece to weld in, i've started to weld in the pieces deeper so i don't need to hammer them down.
IMG_20190528_205036.jpg
 
Ye're a better man than I am, Ginga Din! I'm usuallu happy to get within about 15 thousandths on 2" stock! Now that you have the fixed jaw located, you might want to drill through the jaw and the table below with a suitable size drill, and stick in a pin of some kind (dowel, nail, drill rod, whatever). That way, if you ever have to adjust the "fixed" jaw for an angle cut, you can get back to your sweet spot.


Good thinking 99!

Thanks.
 
Back
Top