2021 POTD Thread Archive

Having acquired a set of KWIK-SWITCH quick change tool holders for the mill (reported on in “bought today” thread) what to do with them. There was really only one space left I could see, over the mill ram. So I made a plank carrier and swiveled it off the otherwise unused lift hook attach point. In storage, it tucks back over the ram, in use it swings out for access. Seems to work as intended.758B1929-1248-4BC2-80C8-3AA89EC5ED91.jpeg69695E9B-F85D-4F1B-A640-7A04C03C4548.jpeg
 
Still making space;

Amazing what can be done once the gubment desk is removed(haha)....sorry,too hard to resist.

My building bud found a 5$ Kreg tool at the flea last Saturday morning. We found a cpl places in framing where they actually make sense,albeit with high grade 3" screws. Found this,and instead of tossing it,gonna let my bud watch it.

20210809_080601.jpg
 
But found a metric ton more cool stuff. 1942 Winchester 62A owners manual in a stupid old Brownells catalog. Along with a 1930's Brown&Sharpe catalog,and a Starrett from the early 70's. All to be relocated to loading room.

Found a 3/4" copper,coil. Was leftover from new HVAC install 15? years ago. Gonna sweat male adapters on and use it as an inline hillbilly chiller,for spraying my "stuff". Throw it in a cooler with ice water.

Oh yeah,once the desk got gone,it exposed some dead serious shelf space. On the shelves was the old articulated desk lamp. It's now living very peacefully on the back of a '47 Wade 8A,happy in it's retirement. I swear,been looking for another one of these lights for 10+ years. They used to be free? Now it's where it's sposed to be.

20210809_080311.jpg
 
OK,last one;

Bought this engine off Ebay to get the head. Have most of the pieces of the,valve grinding setup,ready to go. Just need to pop this off. Anyway,while yes I gave up a little hard won new space,the dang engine was living under the infeed extension on a really nice shaper in the cabinet shop.

Once the head's off,the rest can go to the race shed. Which is where the old desk ended up. Not putting the junky RAS on it. That needs to "go" like,can't stay here. But the desk makes some sense as a catchall table when I work on the bikes(motorcycles). 10X nicer than what was there. That was trash.... these gubment desk tops are just begging to be ground into submission with 20210809_084702.jpgcutoff wheels. Hole hog a 4" hole and you can use welding clamps and make it a disposable Kreg table? Leave it outside on your builds. Once it leaves here,we'll either shoot holes in it or use it as furniture down by the river.
 
Nothing spectacular but this is my first small dovetail. It was a learning curve. I am used to cutting larger dovetails with my RNR cutter at 1850 rpms. That does not work with a 1/2 cutter. I buried the first one into the material and broke it. Slow and steady was what worked the second time. Oh the dovetail is 5 inches long.
dovetail.jpg
dovetail2.jpg
 
Nothing spectacular but this is my first small dovetail. It was a learning curve. I am used to cutting larger dovetails with my RNR cutter at 1850 rpms. That does not work with a 1/2 cutter. I buried the first one into the material and broke it. Slow and steady was what worked the second time. Oh the dovetail is 5 inches long.
What is an RNR cutter?
 
Bought a block of small neodymium magnets a year or so ago. Used 6 of them today to make a cutting guide for my plasma cutter torch. Hoping it will eliminate the need for clamping on flat surfaces. Used a piece of 1" angle, and milled one leg down to 9/16" to accommodate the plasma tip. Then milled six slots in the 1" leg for the magnets. Tack welded a strip of flat strap on the inside of slotted leg, and drilled, and tapped 6-32 to retain the magnets. Looks like it just might work. Mike

IMG_20210809_164201049.jpgIMG_20210809_171436728.jpgIMG_20210809_171444009.jpgIMG_20210809_172235054.jpgIMG_20210809_172244220.jpgIMG_20210809_180836989.jpg
 

Attachments

  • IMG_20210809_162919058.jpg
    IMG_20210809_162919058.jpg
    3.2 MB · Views: 17
to test the new burner
I need to make a new burner for oil. I've been firing on propane. I want to get my furnace hot enough to rapidly melt copper. What fuel are you using? My cores are often either too weak or too hard. Sodium silicate, sand and CO2. I bought some stuff from a foundry supply to reduce the hydrogen bubbles, it sort of works but not as well as I had hoped.
 
This actually took a couple days, but I completed it today. At the end of last month I bought the die filer that Ray Bahr (@rbahr) advertised on the forum. He was able to disassemble, pack and ship it to me in 3 boxes, the last of which I got on 8/3. Unfortunately, the repair on the base (which Ray had mentioned in his ad) did not survive the trip. Not that it was in any way Ray's fault. He did a great job packing the parts, even lining the boxes with plywood. The heavy box with the base was just handled too roughly in transit. When I told Ray about the mishap, he even offered a partial refund, to pay for the material for a new base. I thanked him, but told him I already had something on hand.

What I used for the new base was a largish chunk of 3/4" MIC-6 aluminum tooling plate I'd salvaged from a piece of equipment HP had discarded many years ago. The aluminum was easy to saw to size (LOVE my new table saw!) The die filer body casting is open on the bottom and depends on the base to seal it off. Because the tooling plate was holey I cut a chunk of 1/8" aluminum to go between the casting and the tooling plate.
kHPIM0838.jpg

I stuck felt pads Ito the bottom of the tooling plate, to provide a bit of vibration damping.
kHPIM0857.jpg

Next, I made a new motor mount bracket. The original was a bit stiff and did not allow enough wrench access for the mounting bolt heads. In addition, it held the motor in a fixed axial location, even though the motor pulley has two grooves (for 350 or 450 strokes/minute). The new motor mount allows the motor to slide axially and keep the belt straight in either position.
kHPIM0856.jpg

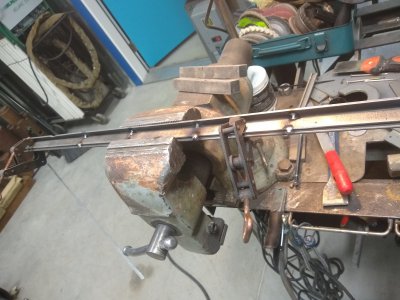
These shots show the "finished product" from the front, with the belt cover on and off.
kHPIM0853.jpg
kHPIM0854.jpg

The T-wrench is for tightening the file clamp.
kHPIM0855.jpg

The other wrench is needed for now because the clamp screws for the file backup roller and the work hold-down have plain nuts on them. The filer originally had knurled knobs in these two places, and I plan to make some in the next few days.

Thanks again, Ray!
 
Back
Top