Anyone Know About Friction Welding? AKA Making a New Vise Screw

Here is another approach to the issue.

Neither the big end of the screw or the handle look to be very pretty.
Let's call the big end of the screw "the hub" (random name).
Make a new hub, but make it in two pieces. Leave some OD stock for final turning after welding.
One piece is the portion nearest the screw, with the retaining groove. Make it about .25" short of the hole for the handle. ID thread it through (or bore it through) for the new screw (tight fit). Chamfer both the hub part and screw and weld the he11 out of them.
Face off the hub/screw weldment end and chamfer the hub OD for welding to the other part of the hub.
Make the other part of the hub long enough to finish the hub length and chamfer it for welding.
Weld.
Turn the hub OD and face to finished dimensions.
Cross drill the new hub for a new handle.
Beautiful!
 
Two notes: it's not clear that this is an acme thread, it may be necessary to custom-cut a
screw to fit the replacement nut if it's 'square' thread. If the old handle
has to be fit to a new threaded section, boring a tapered hole and tapering
the threaded piece will make a good large-contact-area surface that could be
heated to braze or silver solder nicely. Kiln-type brazing would be ideal;
that kind of joint can be trusted to hold the axial alignment.
 
Use your government issue FBI South Bend!
Ha you remember! I actually don't use that lathe much and I'm thinking of selling it. This project is a job for the Clausing Colchester!
 
Here is another approach to the issue.

Neither the big end of the screw or the handle look to be very pretty.
Let's call the big end of the screw "the hub" (random name).
Make a new hub, but make it in two pieces. Leave some OD stock for final turning after welding.
One piece is the portion nearest the screw, with the retaining groove. Make it about .25" short of the hole for the handle. ID thread it through (or bore it through) for the new screw (tight fit). Chamfer both the hub part and screw and weld the he11 out of them.
Face off the hub/screw weldment end and chamfer the hub OD for welding to the other part of the hub.
Make the other part of the hub long enough to finish the hub length and chamfer it for welding.
Weld.
Turn the hub OD and face to finished dimensions.
Cross drill the new hub for a new handle.
Beautiful!
Thanks,
That's an interesting approach, it certainly would work. I will remake the "hub" & handle so I can leave the original intact.
 
Two notes: it's not clear that this is an acme thread, it may be necessary to custom-cut a
screw to fit the replacement nut if it's 'square' thread. If the old handle
has to be fit to a new threaded section, boring a tapered hole and tapering
the threaded piece will make a good large-contact-area surface that could be
heated to braze or silver solder nicely. Kiln-type brazing would be ideal;
that kind of joint can be trusted to hold the axial alignment.
It appears to be be an Acme ⅞" 5 TPI, though it is pretty worn out so I cannot be 100% sure. I ordered the section of threaded rod so I'll find out soon enough.
Funny, I was just of thinking about brazing it but I wasn't sure if it would work well, you might have tipped the scale to making that my plan B. I do have a small kiln/furnace but I can't fit the part in there, at least not without modifications!
 
From what I have seen concerning friction welding, the chuck holding the stationary part has to be able to instantly release the stationary part when the weld is accomplished. It also takes a good sized motor to be able to generate enough frictional heat to reach welding temperatures.
I was wondering about that, though from what I've seen on YouTube, nobody uses a releasing holder in the tailstock, as long as the lathe has a brake, it seems it can work. But yeah, I'm sure that's how its done in a production environment. I have a 5 HP gear-head lathe so power shouldn't be an issue.
 
I get that. I often do things Unconventional ways just because it's less boring. I am curious to see your friction welding result but my prediction is that unless you have a fairly large (by hobbyist standards) lathe you will find that the amount of pressure required to friction weld something of that size is more than you'll be comfortable Subjecting your lathe to.
Yep I never want boring, as clearly illustrated by my former penchant for psycho women... Now that I kicked that habit, I need more excitement in the shop!
I do have an industrial lathe, 13" Clausing Colchester, so power shouldn't be an issue.
 
FWIW,

If you decide to try the brazing route, Silicon Bronze filler wire has a fairly high tensile strength (near that of mild steel...~250MPa), but has a melting point roughly 1000 degrees lower than steel (~1,970 F). We use it to attach UHSS to mild or HSS - the lower melting range keeps the UHSS from losing strength due to heat affects in the collision repair realm. Lots of cars now have UHSS components in the 1500 - 1900 MPa range that cannot be comprimised when welding back into the vehicle.

Look for CuSi-3 or Cu-Si-A filler wire. (3% Silicon content) Any decent welding supply will carry it (Or a well equipped local body shop will have it in .030" MIG wire form) No flux required or desired, just heat enough for capillary action to do the rest. (Has to be CLEAN tho!)

edit: added note about cleaning
 
UPDATE:
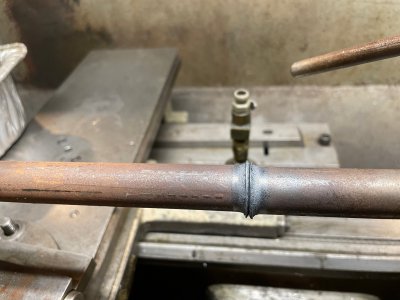
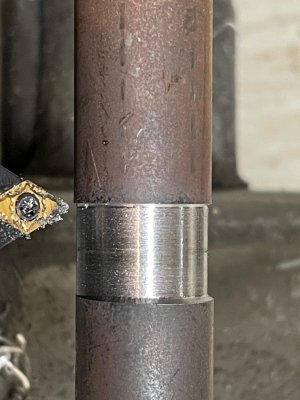
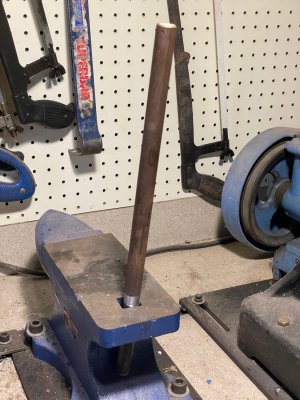
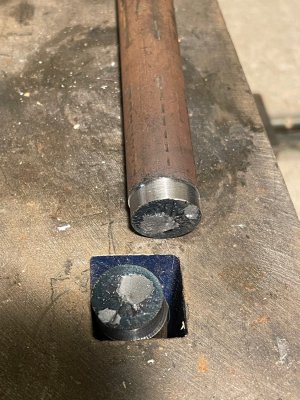
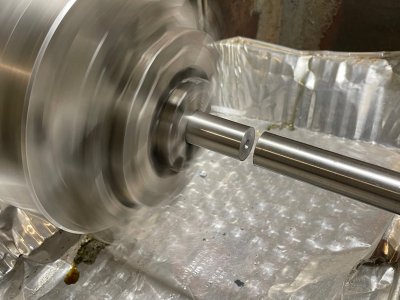
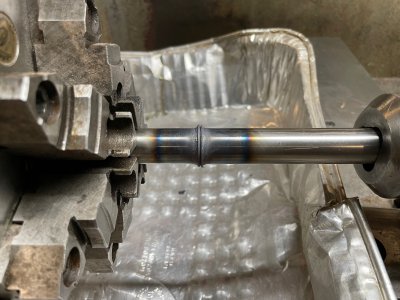
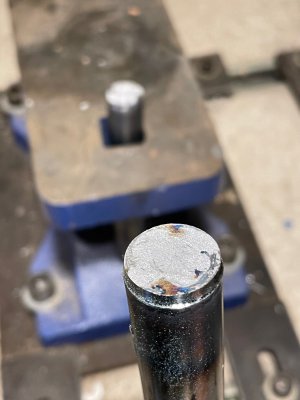
I did a few tests, first with some .75 unknown steel bar, I think it may have been leaded as it cut like butter but isn't good for welding. Even so, I did manage to get it to weld, though it snapped apart without too much force. The process created a lot of chatter and was hellaciously noisy. The halves weren't well aligned after the weld either. I theorized that might have been due to the center of the bar not heating up as quickly as the outer part as there is less surface speed there. So on my next round of tests I drilled a small dimple in the center of the halves. It worked better but it still was trying to go out of alignment. I also tried some W-1 drill rod but it snapped even easier. I think it hardened and was very brittle, perhaps some post annealing would help.
Anyway, when I get the section of threaded bar I'll run some tests with the actual material. I think if I make a recess in the new hub will keep the screw aligned. We shall see...


IMG_3789.jpegIMG_3792.jpegIMG_3793.jpegIMG_3794.jpegIMG_3799.jpegIMG_3802.jpegIMG_3807.jpeg
 
That's a better result than I ever managed. Not something that would hold up to the demands of the application, but who knows; maybe with a few tweaks to you process (I have no suggestions, sorry) you can get a usable result!
 
Back
Top