Beauty in The Beast: Webb 5BVK Barn Find/Conversion

Would it overload my VFD to steel 24V from it?
Yes, that 24V supply on the VFD is only good for about 100mA. Fine for the VFD control circuit, but not for anything else.

My plug in power supply gives me 30 - which moves the access at a reasonable top speed - and seems to control slow movement pretty nicely too.
I'm not sure how you have that wired up to your Z axis, but I think it would work fine on the X and Y also. As you suggested, a selector switch.
 
Well, the stand(s) are ready.
I appreciate the good input and challenges.
Was helpful.

I have a truck with a trailer parked out front, and tomorrow is D Day.
Knuckles are cut.
Back is sore.
Beer is cold.

To end my night, I had a tiny metal splinter find its way in to my foot.
I'm sure I'm not the first...
The damn thing was almost invisible to the eye - but not to the mind. Ouch.
Unable to see it like a normal splinter - I pulled out my $30 electronic microscope.
Do you guys have one of these?
I use it for everything - they are - incredible.
When I start milling - I will use it to show some detail - and you guys can tell me what I am doing wrong.
Smooth surfaces look like the moon surface.

Below a few pictures on the eve of pick up for your viewing pleasure.


Current face milling technique:View attachment 367413


Face mill tools. I have a bunch already.View attachment 367414

And of course - the rolling stand(s). Just about complete.
Plan is to cut some angles on the leveling feet extensions/ prime/ install.
View attachment 367416
Charlieman,
What did I miss? What are you fabricating> It's looking really good.
Nice welding table. Certi-flat?
 
I'm not sure how you have that wired up to your Z axis,
My quill is powered with it's servo.
The knee is powered with my back...
I assume that if I want powered Z for CNC in future - we will add some form of standard external Z powered axis servo.

Will shoot another little video if/when successful with operation.
I have some basic tools on the way as noted - so I might be able to actually drill something.

Then it's DRO. I'll cue that up here for feedback, before I start taping stuff in place.
 
@Charlieman22

Been following your progress. Looking real good. I am amazed at the progress you have made in such a short period of time.

Great job! :clapping:
 
Charlieman,
What did I miss? What are you fabricating> It's looking really good.
Nice welding table. Certi-flat?
Thanks!
It's a certiflat - good eye. It's been super nice to work with.
Bit of a gateway drug to the milling machine I think.

This whole adventure started because I did some welding on my prized Vespa motor cases.
Prized Vespa below - any excuse to post a pic...
I went to get cases milled - and almost ended up buying the guy's milling machine... ¯\_(ツ)_/¯
Rabbit hole entered - ended in me finding this mill for free.

Welded up some rolling independent stands - prior page - to carry this beast - and then rolled it in the garage.
Team here (largely Jim and Extropic) have been trying to help me get my swimming legs.

All sorts on the fab list.
Currently working to make the mill function as manual - and then will determine CNC options in future.
Fabrication list includes some custom parts for the sidecar connection on scoot (note that the scoot can lean independently of the sidecar).
I built the frame to allow this - and works great - but my tools have improved and I have it on my radar for a slicker execution on finish/fit for next round.
@Charlieman22

Been following your progress. Looking real good. I am amazed at the progress you have made in such a short period of time.

Great job! :clapping:
Thank you! Hungry to make this thing work - though my pesky paying job(s) have really been in the way!
BTW - 5 Hobby Machinest stars for your correct assertion that the frames would be stable without a connecting mount.
Credit where due!

Below - gratuitous posting of vespa project.
Coming soon: Actual milling how-to questions!
Thanks all.

IMG_6510 5.JPG
 
My quill is powered with it's servo.
I meant I'm not sure how your quill axis is wired up. Since the quill axis is normally the one that the computer controls, we just call that the Z axis. Where the knee is the ''knee axis''. If you noticed my software, the DRO display has X, Y, Z, K(nee), and R(otary). The rotary axis is the 4th axis and can be oriented to function as a A, B, or C axis. The A axis is the rotational component of the X axis, the B axis is the rotational component of the Y axis, and the C axis is the rotational component of the Z axis.
The knee is powered with my back...
I assume that if I want powered Z for CNC in future - we will add some form of standard external Z powered axis servo.
I have a Servo brand power feed on my knee, saves the back :)

Then it's DRO. I'll cue that up here for feedback, before I start taping stuff in place.

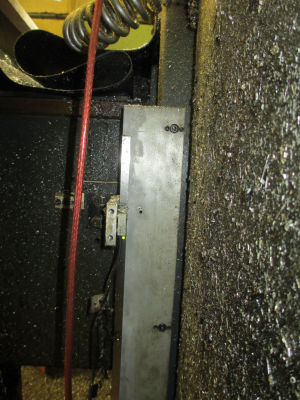
My knee axis, note the location of the jack screws next to the mounting bolts, the orientation is important. Made from 1/2x2 1/2'' aluminum.
1623348790414.png

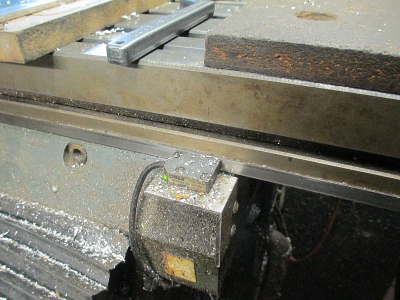
My X axis
1623348859106.png

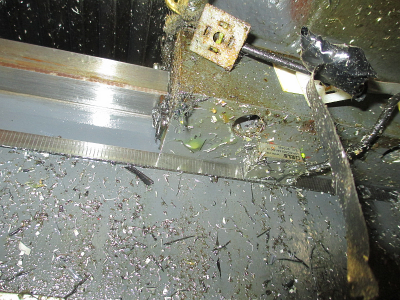
My Y axis
1623348920604.png


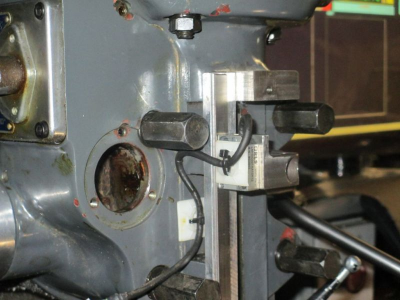
And the Z axis (quill)
1623348993927.png

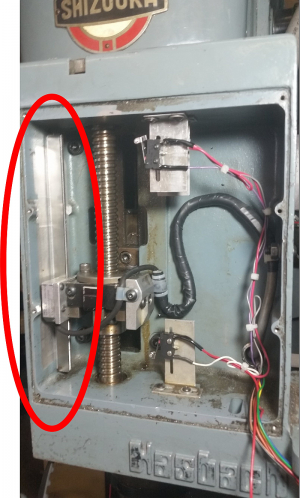
And another Z (quill) axis that is a little closer to your machine.
1623349110210.png
 
Good primer on DRO.
Lightbulb went off on Z axis (final shot).
Will look in that area for opportunity for mine.

Y axis is a little hard to decipher local of photo.
But I get basic gist.
Magnetic tape appears to have peal and stick feature.
I'll acetone wipe machine before applying.

Stainless metal strip - which appears to cover tape? - is less obvious for adhering.
Can you walk me through the very basic steps of applying tape and stainless cover?
I'll do a layout and post for critique before install of readers/tape position.
 
Speaking of CNC and motion control, this article just popped up in my inbox. Does a pretty good job of describing the theory, down the deep dark hole we go :cautious: https://www.codeproject.com/Articles/863257/Simple-Software-for-Optimal-Control

Yes, it is peel & stick. Alcohol might be a better choice, any residue won't damage the sticky stuff. The stainless cover is also peel & stick. You can also use alcohol to wipe the mag strip before applying the cover tape.

My mill has a nice machined (but painted) surface on the knee casting, below the Y saddle, so I just stuck the tape there. The read head is just attached to the bottom of the Y saddle. It's been working fine for about 7 years. Your machine is probably similar, same manufacturer, Topwell in Taiwan.

Mount the heads first.

Locate the maximum travel points relative to the read heads. Cut the tape to length first, your maximum travel plus an inch or so on either end.

Then use your fingers as a guide to center the tape on the read head. Peel a little bit of the backing paper, stick the tape, move the table a bit, rinse/repeat.
 
Back
Top