Clausing 4904 refresh

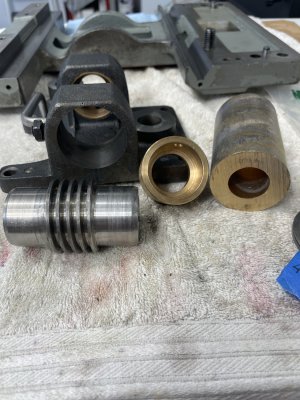
Started disassembly of the apron
C5288511-0EFB-4FEF-AC66-9E9E109B765C.jpeg
Exterior parts cleaned up and ready for paint removal

26AE4D7D-92AE-4C5B-9E65-DAFBD4A705D4.jpeg

Apron comes off with four bolts from the top of the saddle. There are two locating pin's also.
Lead screw can be pulled through from the left to remove now.
C7326F18-483B-421D-BB38-1FF2BBDF152F.jpeg
Lots of cleaning ahead
B9CA2D49-C782-4E78-AB54-99C9D0F23E0D.jpegB982A8E0-34A2-4F6A-8F5C-F81993F52240.jpeg
 
Lightly worked some of the raised areas on the cross slide with Arkansas stones.
Overall surface is in much better shape so good enough for no.
6C7D3E59-C3E7-4287-920C-F2F10CC12D7D.jpeg
 
Few notes on the various apron assemblies
The pin on the end of the cross feed engagement lever is mushroomed at end to retain it.
No way to disassemble with out creating a bit of additional work. I just let it be and taped around things.
14178629-2A2E-43F7-BBCD-F1A20662022D.jpeg

There were thrust washers that were not on the parts diagram so attempted to document and keep together in the correct order.
E24E8E52-0FDD-4CF9-9519-E0950A0D97B8.jpeg6A1E4513-EF6B-4AC1-AA39-365E60714DAB.jpeg
F7706016-8453-44E8-8E5F-DB2D8E82B12F.jpegA437678D-040E-4C38-9333-A27623EB2C6D.jpeg

Nut holding the clutch plates together were slightly beyond finger tight so reasonably easy to get apart for cleaning.
31760A98-4214-46A2-9A47-81CC87A5A33D.jpeg

D0015178-12FF-47B8-98FD-CECD7B2813E2.jpeg
 
Last edited:
Worm bearing
95449127-3F34-47CB-ABFE-8C60FF5B32CE.jpeg
Worm, worm bushing and casting.
Worm, worm bushing and worm bearing have seen better days. Collectively there is about .012 of play on both ends.
D9827092-ACA9-49A5-9BA1-BA6FD688E382.jpeg

Clausing has the worm and bearing, bushing is discontinued.
tech support provided a copy of the original drawings for the bushing.


00000001 2.jpg

Got a 3" length of 660 bronze along with other needed bushings from McMaster-Carr
B3E2AA88-4E6B-4BBA-91F1-EA1A199A4512.jpeg
 

Attachments

  • 82AAE369-1B1B-4607-8D7F-23715B8B5988.jpeg
    82AAE369-1B1B-4607-8D7F-23715B8B5988.jpeg
    322 KB · Views: 5
New Worm, worm bearing and key from Clausing. Need to turn the new bushing then start reassembly.
5A485129-1EF1-4ADE-9FBA-D3163F6A96E4.jpeg
Onto the next phase of refurbishment :) Cabinet, motor, mount and c-drive assembly
C2998106-ACD0-4BEC-BE3C-E096976336B9.jpeg
85D22A38-871F-44C5-A74C-B89FC4AF5D96.jpeg
c-drive bearings were shot and NOS sourced from e-bay6C3B0A78-A29C-4A53-9384-37AF87F72E9A.jpeg30B97232-F660-4EA3-A77D-F3536A08E700.jpeg
Cleaned up with new bearings installed.14B1696E-59C2-4A6A-9D35-37CF76249460.jpeg
 
4904 model was 3 phase from Clausing. At some point (1999) it was retrofitted with a single phase Leeson as a point of reference
28AA0B00-3BC6-46C4-AC03-5DAEE1AF53EA.jpeg

Cabinet interior, there are two guide pins that align the door when closing. You can see one on the bottom right with a rusty foam pad. Frame is tapped for these.
C1412495-8374-47A3-BCCD-98073C1C1383.jpeg

Motor mount assembly
5482E1E6-5512-4ED6-8DA5-C148C6D59742.jpeg
 
More cleaning, paint work on the motor cabinet and parts. Pulled the badging and scrubbed the cabinet down.

80D86EFC-5667-400A-99E0-99114C6C44AA.jpeg

3E2538A7-3EB7-47B3-91B8-D61D2AEE73D9.jpeg
2DF561B7-49EA-4531-9545-4D601B3AADC6.jpeg
Various mount and drive parts ready to go back together 643A43DA-CAFD-43F7-8F54-F674F78C43AC.jpeg
And more to be painted F374A090-97F2-4648-9CC4-FD110E64C9A9.jpeg
 
Finished turning the worm bushing and got the assembly back together.
New worm and worm bearing from Clausing
84AE37EF-0F4E-4929-A42F-1E79AFAC8CB8.jpeg

A9EB68B5-5D32-4831-B27F-7147FCAB6B7C.jpeg
Inset the bushing a couple thousands to take up for wear on the end of the housing that the worm rides against. Other than that came out like new!
762424C1-DC19-4602-B726-19405C8F104A.jpeg
 
I’ve enjoyed following your progress. Looking good. Do you have a plan as to when you want it useable by?


Sent from my iPhone using Tapatalk
 
Back
Top