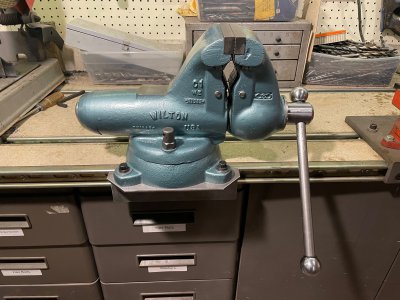
So I bought a vise years ago that I thought was worthy of the effort to clean up. I love old vises, but I generally just fix whatever issue caused it to be sidelined and use or give them away. I thought a Wilton 300 was worth a little more effort. So there’s 3 pics here. As found, stripped, and then painted charcoal gray. I’m going to mill the “anvil” still. But in my opinion, my rattle can paint job is garbage. This is three light coats. Other than not using a rattle can, is there something obvious in the image that points to a mistake in application? I think I’m going to strip it and just clear coat it instead. Any suggestions? Should I have bondoed and sanded? That seemed silly for a tool that seemingly exists to be tortured. Anyways I think it looks ten times better without paint at all. All suggestions/criticism welcome. Just looking for opinions I guess.
It's actually a Wilton C0 rather than a 300. The 300 has 3" wide jaws and no pipe jaws. Yours has 3.5" jaws and pipe jaws.
I think it looks fine, but people get very particular about vise paint. A couple of things are going on here. For one, it's a casting with irregularities and grain, then the paint has a fair amount of gloss to it, and that makes every little thing more obvious. Some folks will sand/smooth/fill and then paint to get them looking like the fender on a new car and I think it looks terrible because it makes them look like they're carved out of plastic, but some people love them. The newer vises are painted with a hammered paint that makes all the irregularities blend together and that's probably what you're used to seeing.
For the folks asking about color, it varied with the era. After restoring 100+ Wiltons I have owned or handled them with original paint and stickers going from the very earliest made in 1941/1942 to brand new. All have been some variation of green. Nobody is 100% certain of the exact color as even a vise with original paint and stickers will be subjected to fading due to age and UV or chemical exposure, but they're still always some kind of green. The earliest vise on up through the 1960s had a green/grey/blue kind of color that is very, very hard to match. I've taken an original vise from that era to a paint shop and they matched it, but it was $30 for one rattle can, so I only did two vises with it.
I have actually had vises from the same year that had original paint and stickers and the paint color was obviously different and fading wouldn't seem to have been a factor because the stickers looked pretty much the same. I suspect Wilton probably had more than one source of paint, and since they're vises, not cars, a little variation in the hue didn't bother them.
Starting in the 70s they switched to the modern hammered Verde Green and have stuck with that. They've gone a little lighter/heavier on the hammered level at times, but I think that could also just be who's running the paint operation at the time. If you do a couple of quick, light coats you get very little hammered effect, but if you go really heavy almost to the point of running it will be much more hammered.
There is actually a current paint color I found to replicate the early color, but I won't openly post that information. Sadly, there are a handful of guys buying older Wiltons, restoring them carefully, applying reproduction Wilton stickers then artificially aging them and selling them as original survivors on eBay for outrageous amounts. They always get the color wrong, often get the sticker size or variation wrong, and one other thing I can spot that I also won't tell anybody about. Funny thing, the same handful of guys keep finding "original" paint and sticker vises that are 75 years old!
Lots more info on vises and Wiltons on my website:
www.mivise.com


 Hm............I wonder if