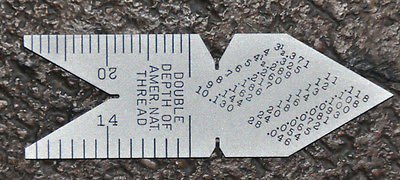
First threads!

Very nice for your first thread. My first attempt was nowhere as good. I had the compound set to the wrong angle and had other issues.

I agree with Liljoebrshooter. Cutting finer threads is less stressful on you and your lathe.

And definitely cut a gutter or groove to end your cut. Much less stress that way.
 
Assuming your tool is 60º, and your are between 29.5 and 0 to the work, your thread should be fine. In that angle range, its the tool, not the angle that makes the thread.
 
Your threads will not be 60 degrees, but no matter, you were practicing the operation.

The thread angle depends entirely on your cutting tool, not the angle of your compound. Having the compound at angles other than 29.5º or 30º just means more stress on the tool, which leads to nastier looking threads.


I had a few minutes today so I tried my hand at single point threading.

That's quite a milestone. It really wasn't as hard as you imagined, was it? Please explain your setup.

Turned out spot on according to my thread checker.

Explain how you checked your thread. What was your goal? Did you use the three wire method, or a thread micrometer? Cutting a thread is easy... Getting it correct, not so much.

I’m not sure why the first couple of threads look so crummy when the balance look semi-ok.

No support at the end. Center drill the end and use a center to increase the rigidity of your work. Also, aluminum isn't a very good material for your first threads, because a lot of grades of it are too gummy. Use some scrap steel stock (with a good cutting lube, like Oakleys). You also shouldn't be turning to a shoulder. Turn a flat area beyond your thread area and practice with that.

I got a bit muddled when I didn’t count my turns back out on the cross slide so I just went to the end and put the tool against the work and reset to zero and backed out again.

I use a pencil to mark a line on the cross slide where the compound sits, topped with a "V" to indicate the correct zero starting point. Don't depend on yourself counting the turns correctly in the heat of battle. At the end, it easily wipes off.
 
The thread angle depends entirely on your cutting tool, not the angle of your compound. Having the compound at angles other than 29.5º or 30º just means more stress on the tool, which leads to nastier looking threads.

That's quite a milestone. It really wasn't as hard as you imagined, was it? Please explain your setup.

Explain how you checked your thread. What was your goal? Did you use the three wire method, or a thread micrometer? Cutting a thread is easy... Getting it correct, not so much.

No support at the end. Center drill the end and use a center to increase the rigidity of your work. Also, aluminum isn't a very good material for your first threads, because a lot of grades of it are too gummy. Use some scrap steel stock (with a good cutting lube, like Oakleys). You also shouldn't be turning to a shoulder. Turn a flat area beyond your thread area and practice with that.

I use a pencil to mark a line on the cross slide where the compound sits, topped with a "V" to indicate the correct zero starting point. Don't depend on yourself counting the turns correctly in the heat of battle. At the end, it easily wipes off.
Hmmm my setup, I used a threading insert, ran in back gear because I wanted it to go slowly till I had some sense of what was going on.
The usual, scratch pass, back out wheel back to the start, rinse and repeat.

When I say I checked my thread, I mean that it matched the pitch. It was looking sketchy when I started for some reason, almost like I didn't hit my mark on the threading dial and did the second pass off-pitch if that pakes sense.

Thanks for the tips, I'll give them a whirl. Maybe today I can give it another go.
 
I use pencil marks too for a quick reference. Not only for threading but also for boring. For threading I mark the cross slide. I also have a stop for the cross slide that I sometimes use. Back the cross slide out as far as you want to. Then move it in until it hits the stop. For boring I make a mark on the bed that will line up with a wiper at the end of the cut. This just a visual aid. If I have to have precision I use a carriage stop.
 
One thing I'd suggest (since you didn't say it!), I set up dial indicators EVERYWHERE when I'm cutting threads! The dials are nice, but are no replacement for a good dial indicator.

First, put one on your ways against the carriage, this makes it WAY easier to 'stop' at the right place. I haven't had GREAT luck with cutting threads without the undercut (where the thread 'just stops'), but this indicator gives me the best results.

Second I put one on my cross-slide ways against the cross-slide. This allows me to make sure I get back to my zero spot, because messing this up even just a little can bisect/mess up threads pretty bad. I have actually discovered that I have a thread stop, so I used that the last time instead with good results.

Third, from the cross-slide to the compound (against a flat surface) measuring perpendicular to the ways. This gives you a great idea about the depth of cut and total depth of cut. The nice part is that this isn't susceptible to any other movements.

Another thing I'll suggest: HSS. Grab some bits and grind them. When I first started cutting threads, I did the Carbide inserts, however the instant I switched to HSS my cuts improved 10 fold. HSS has 3 advantages:
1- You can make them sharper than the carbide since you're grinding them yourself! This gives you a better chance against chatter.
2- HSS normally runs at about 40% of the RPMs of carbide. This means you can run the spindle at a much slower speed. I personally thread cut at my lathe's slowest speed when I can for exactly this reason!
3- HSS is WAY more tolerant of being run at below its speeds/feeds. Carbide I found wants to be at a specific RPM, HSS is much more forgiving.
Thanks @ErichKeane, I plan to grind an HSS tool. This was really a "I have some spare time, let's see if I can do this from memory"
One of my first mill projects will be a carriage stop.
I'm having trouble picturing a cross slide indicator mount. Can you post a pic of yours?
 
Thanks @ErichKeane, I plan to grind an HSS tool. This was really a "I have some spare time, let's see if I can do this from memory"
One of my first mill projects will be a carriage stop.
I'm having trouble picturing a cross slide indicator mount. Can you post a pic of yours?
I'm not out in the shop today, but I usually just put a magnetic back dial indicator on the ways (it helps that I have pretty giant ways since it is a big lathe). however, I found this one: https://www.homemodelenginemachinist.com/attachments/crossslideindicator-jpg.34673/
I wouldn't bother with the 2nd piece of metal and just indicate directly against the slide itself.

I put mine on the 'operator' side right up against the front of the cross-slide, but I have quite a bit of the cross-slide ways visible when cutting. On bigger ones, I use a dial indicator on a mag-base and put it on the top of the apron (off to the side).
 
Back
Top