How to thread stainless

A lot depends on the thread pitch you're cutting, the tool you're using and your familiarity with the thread cutting process. It isn't difficult and will get easier with practice.

I will defer to David Best with regard to carbide tooling. In general, however, the smaller the thread, the fewer the number passes required to cut them. There are charts available from the manufacturer of your insert that gives you guidelines on depth of cut per pass, the number of passes required and so on.

With HSS, the relief angles under the cutting edge actually matters, as does your method of infeed. If you cut straight in instead of using the compound then both flanks are engaged simultaneously and the potential for rubbing is increased unless your relief angles provide clearance for the helix angle of the thread you're cutting. For smaller threads under about 16 tpi, I have found that 15 degrees of side relief is more than enough to avoid excessive rubbing due to the helix angle of the thread but there is still usually some burring. In contrast, when feeding in with the compound only the leading flank is doing most of the cutting and the following flank is doing a clean up. I find that with this type of tooling and my usual 15 degrees of relief, there is almost no rubbing and the threads are much cleaner. This is one reason why I prefer a HSS tool; I get to control the relief angles. To be fair, no way would I rely on HSS in a production situation; I would be using a Carmex BLU insert for that.

As for technique, each of us has our own way of doing things. When using a HSS tool, I normally start with a scratch pass with a 0.001" depth of cut to make sure my gearing is right for the thread I'm trying to cut. If the pattern is correct then I'll make a 0.009" depth of cut and make a full pass. For my next pass, I cut the depth of cut to 0.005" deep and see how the tool is cutting. If the pass is clean and without burrs then I'll usually take one or two more passes at 0.005", then I usually step down the depth of cut until I am at 0.001-0.002" per pass. The reason for this is because as you go deeper, the amount of cutting edge greatly increases; to keep heat and cutting forces under control you have to reduce your depth of cut or you'll start tearing the material or work harden it.

Look up how to estimate your total depth of cut and how to use the thread dial indicator. I have to run out soon so I'll leave it to you or others to take it from here.
Thanks, Mikey, it’s much appreciated. People don’t help out too often anymore. This is the most helpful bunch I have had the pleasure of communicating with.
 
How do you grind your tools accurately like that.

Easy. I use a good belt sander and I've paid my dues by grinding a LOT of lathe tools. It isn't hard to do but it does take some practice. Some guys just prefer not to grind tools and that's fine. Luckily, there are HSS and carbide inserts available that will get you up and running quickly. Again, David Best has just published a book on inserted tooling and I encourage you to have a look at it or at least communicate with him.
 
Thanks, Mikey, it’s much appreciated. People don’t help out too often anymore. This is the most helpful bunch I have had the pleasure of communicating with.
You're welcome, Sir.

HM is special, and the staff and members work hard to make it so. If you have questions, ask and someone will step up. We have a LOT of knowledgeable members and a number of pros, too, so someone will know the answer. To get the most from the forum, ask questions and interact with the members and I guarantee that you will grow faster and enjoy the forum more.

What I find especially nice is that we get to watch our members grow from newbies and novices into experienced, confident hobby machinists. Many of the respondents to your questions will be those guys who were in your shoes not that long ago. It is very, very cool to see!
I’m talking to both of you. He coincidentally completed I project I only dreamed of doing with my machine. He has given me the confidence to go ahead and attempt it with my lathe.
 
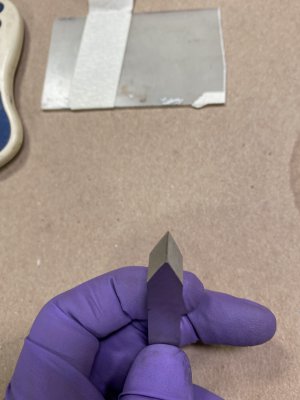
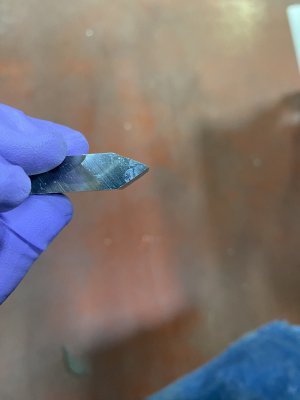
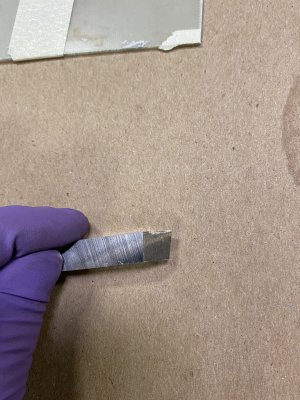
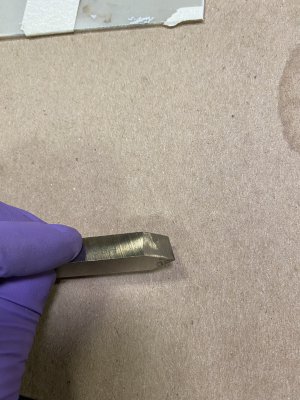
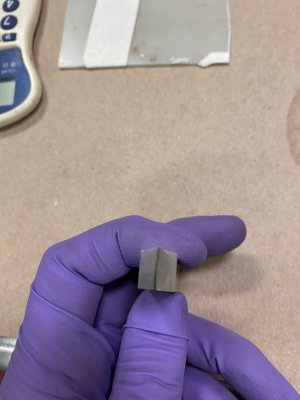
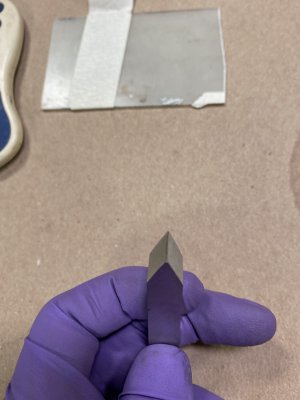
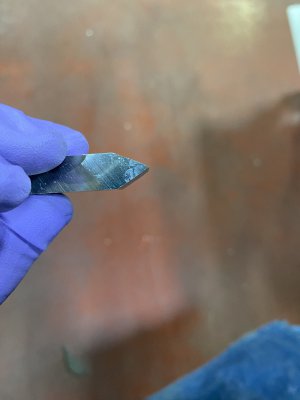
Alright, I’m taking a bit of everyone’s advice. I bought 3/8 hss blanks. 1”, 3/4”, 1/2” aluminum stock and an assortment of nuts to test my threads. I will grind my threading tool and post pics of the results of my first attempt and the tool used on the aluminum. Adjust my methods as necessary once we find out if it is me, or the stainless causing problems.
 
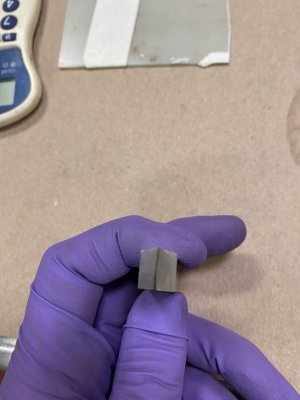
To all following this thread, I believe you were correct about the 5/8 blank being too big. I can see where the tool got too hot under the point. Not enough relief and too much material to remove to begin with.
 
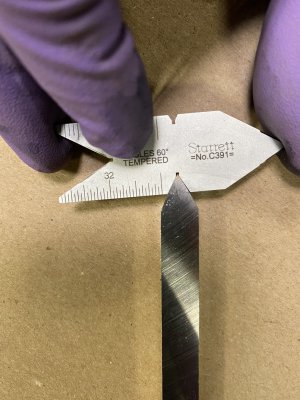
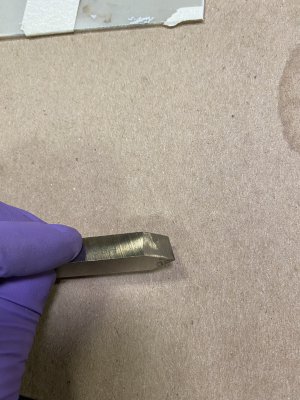
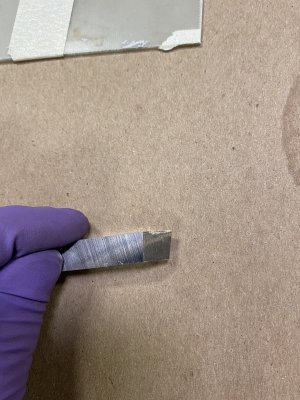
How’s this boys?
 

Attachments

  • B42E9FC6-79E2-40EE-8EEB-22138310ED1D.jpeg
    B42E9FC6-79E2-40EE-8EEB-22138310ED1D.jpeg
    1.9 MB · Views: 24
Also this is shorter and smaller than my tool post accepts. Is it safe to only have it secured by two lock down screws to make the tool longer, or do I need to buy longer ones, or shim them. I’m gonna try it now.
 

Attachments

  • 670BB05A-BB5F-4500-97FA-E0B1602B9301.jpeg
    670BB05A-BB5F-4500-97FA-E0B1602B9301.jpeg
    2.4 MB · Views: 20
  • A1931CA0-1868-411F-95A3-3C92694747F7.jpeg
    A1931CA0-1868-411F-95A3-3C92694747F7.jpeg
    1.3 MB · Views: 12
  • 26B94E08-00F6-4950-B3B8-28021324BCCC.jpeg
    26B94E08-00F6-4950-B3B8-28021324BCCC.jpeg
    2.3 MB · Views: 12
  • C84638A6-1A3F-4E4C-9B78-0D5844159321.jpeg
    C84638A6-1A3F-4E4C-9B78-0D5844159321.jpeg
    1.3 MB · Views: 12
  • 3E4A1679-D474-4348-852E-300C49ED0682.jpeg
    3E4A1679-D474-4348-852E-300C49ED0682.jpeg
    1.5 MB · Views: 12
  • 3521AED0-6ECE-4824-BAE0-E20D58A8A37A.jpeg
    3521AED0-6ECE-4824-BAE0-E20D58A8A37A.jpeg
    2.3 MB · Views: 13
  • B4D87C9A-2B28-4562-B14D-0FA985BBDC32.jpeg
    B4D87C9A-2B28-4562-B14D-0FA985BBDC32.jpeg
    2.4 MB · Views: 14
  • 6E196FF0-7A8D-48B8-A6D5-AB4DD20E6DA4.jpeg
    6E196FF0-7A8D-48B8-A6D5-AB4DD20E6DA4.jpeg
    1.3 MB · Views: 14
  • 7C12212E-DF0B-455E-94F6-349CC940EA02.jpeg
    7C12212E-DF0B-455E-94F6-349CC940EA02.jpeg
    1.3 MB · Views: 12
  • AA019DDC-E364-46D8-A6D6-895368D066A7.jpeg
    AA019DDC-E364-46D8-A6D6-895368D066A7.jpeg
    1.5 MB · Views: 11
Back
Top