Making a backplate for an ER40 set tru chuck

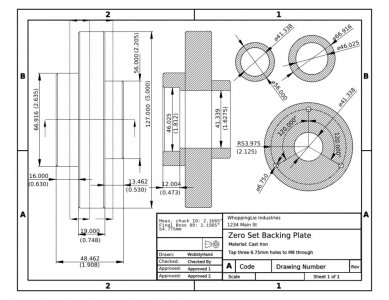
Thought it might be a good time to take a look at the ER40 chuck again and measure the recess for the back plate boss. Measured it with a telescoping gauge and micrometer. Comes out to 2.1665" which is slightly over the Shars drawing 2.165". Seems to be the common wisdom (HM) that the boss should be machined to 0.010" smaller, for a 0.005" clearance clear around the boss. That would make the desired boss OD to be 2.1565". (54.775 mm). For now, I will initially machine the dimension to 56mm. I have a note on the drawing for the final dimensions. While looking at the drawing I discovered I had reversed some dimensions, so I fixed all that. Here's my dense single sheet drawing for the backplate.
backplate_techdraw.jpg
So, time to remove the spindle copy and get to the cast iron. First steps will be to prep for turning cast iron. Haven't turned cast iron on a lathe yet, but have done some milling work. It's messy. That's tomorrows work.
 
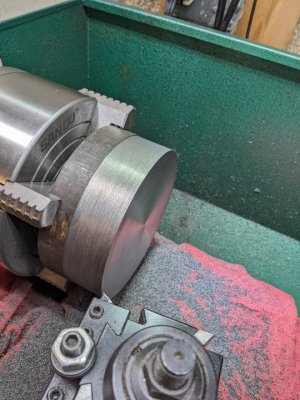
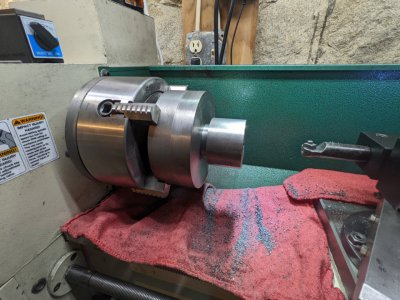
Haha, couldn't resist. Cast iron is in the chuck and some turning happened. This piece was rough. Got it faced and partially turned. At least there will be a flat face to put in the chuck.

Yeah, what a mess! This time I remembered to wear a mask to minimize breathing the dust. Tried putting down some shop rags for covering the lathe. Worked ok until it wound around the lead screw. Stopped and fixed it and continued on. Stopped only because I was getting hungry.
PXL_20220315_231139864.jpg
I'll work on the rest of it tomorrow. Was a pretty good day.
 
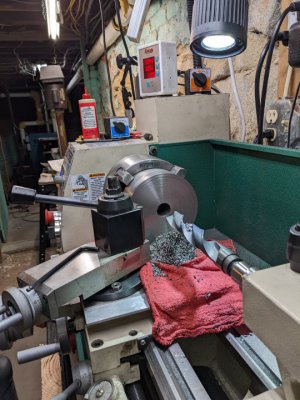
Found that I had chipped an insert, which was the cause of poor finish quality. Basically found I had left the TCGT inserts that I had used on the spindle copy, in the tool holder. They got beat up bad from the irregular cast surface. Put in a TCMT insert and things went a bit better. Peeled off the outer skin, and refaced the cast iron. Then started the drilling, to prepare for boring. Here's a picture after the final 1" drill. Wish the G0752Z had a tang socket, but it doesn't. Had two slips of the adapter to quill interface under load. Maybe a taper mismatch. Maybe just debris in the socket. Yet another thing to look at...
PXL_20220316_165100094.jpg
Suspect the drill, or the adapter aren't perfectly straight, (or the quill travel?) a bit of squealing at times due to rubbing against the bore. Glad the drilling is over. Now to change gears again to a nice moderate feed for the boring. Boring is boring enough without having to hand feed another 0.6" in diameter!

After a less than great night sleep, made a change in the shop today. While working on cast iron today, I used a 3M HEPA respirator. Seemed to have really knocked down the iron dust inhalation. Much, much better. Too many leaks with a KN95. A real 3M HEPA cartridge respirator that fits is what one needs.
 
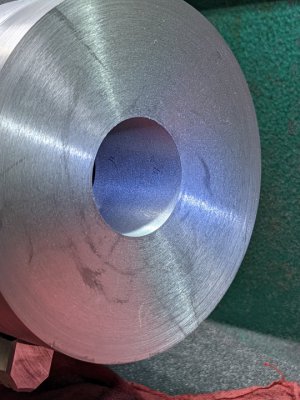
Some boring happened, but not there yet. Going fairly smoothly. Opened up the diameter 0.300", now at 1.300". Plan is to take it to 1.600 with this coarser insert and switch to a better one for a fine finish. Kind of not sure what the bore size should be! The spindle threads had the minimum pitch diameter. So that means the nut has to have what minor diameter? 1.6400 or 1.6150"?
 
Based on the wisdom of others, have sought the average. So wanted to hit 1.6275". I stopped at 1.6270". Suppose that's good enough.
PXL_20220317_160403217.jpg
Used an insert with a bigger radius to hog out the hole. Switched to a nose radius of 0.002" for the final pass. Was glad I used the bigger radius for the hogging. Definitely was some deflection at lesser cuts. When I examined the insert, there was a tiny break at the nose. Running 300 RPM, which I understand is too slow, for this size hole. Could the slower RPMs account for the chipping of the insert? Or this just happens with cast iron?

Next, I will partially bore the spindle counterbore. I'll do it to within 0.020" of final diameter, and maybe to within 0.020" of final depth. I'll use the more rugged insert for this.
 
So wanted to hit 1.6275". I stopped at 1.6270"
Man, I can only dream of hitting half a thou. I have to work hard to get +- 0.002 on most things I work on. I just don't have the patience or the skill/experience needed.
 
Man, I can only dream of hitting half a thou. I have to work hard to get +- 0.002 on most things I work on. I just don't have the patience or the skill/experience needed.
Must be the patience. I take it slow, maybe too slow. I think me hitting this was a fluke. I'm usually further off. Slowly, I seem to be getting a little better. I was within 0.006" and changed to the better (small radius) insert. The small radius insert seems to make it a lot easier to hit what you want. The 0.015" radius insert was noticeably deflecting on small cuts. I remember putting in a 0.005" cut and only getting 0.003". (I knew this would happen from reading @mikey 's boring thread.) The 0.002" radius insert will take a 0.001" cut.

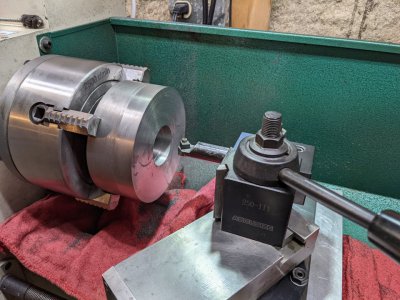
Almost blew the whole piece when I started boring the spindle counterbore. Was boring away and suddenly realized I didn't know the stop depth! Caught it in time. Was a close one! So here is the semi-done counterbore. Within 0.020 on ID and depth. Setting up to do the threading with a LH threading bar and needed a break. @mmcmdl loaned me this tool and I greatly appreciate it! This will be it's intended use. Thanks Dave! Yes, Dave, this is the thread, I promised you.
PXL_20220317_192205932.jpg
For some reason, it took a long time to set the compound angle. Haven't done it on this lathe and was struggling to figure out a good way to indicate it. The protractor doesn't go past 90! Not that it is accurate, but how hard would that have been to put in the extra marks? Finally took a ground 30 degree angle and stuck it to the compound using a magnetic block from an indicator stand I junked. Then indicated the surface along the cross-slide axis. Eventually the readings started making sense and got it to within 0.0005" in a 1" travel. Think that is an error of 0.28 degrees. Stopped fiddling with it. I should have put on my good DTI and got it to a tenth, but got lazy. Figure it's a lot closer than using a protractor with it's wide black lines.

When I get back to the shop, I will measure the counterbore OD again, to ensure clearance for the threads! Work double checking. If all ok, then time to put on some gloves and change the gears back to 8 pitch threading mode. Sure would be nice to have a real QCGB or an ELS! Gear changing isn't particularly hard, but it sure is messy.

I'm going to thread away from the chuck. The back plate is threaded, but has clamps to the spindle. I will use small cuts, and hope that nothing comes loose on me. I will snug the chuck down tight first using a wrench and then lock those clamps.
 
Last edited:
Relatively uneventful reverse threading with a LH tool. This lathe is a bit flexible. Think I will have to make a better compound clamp. You could see the deflection of the tool/compound especially when leaving the thread, the spring movement was a bit disconcerting.

The tool bit started about 0.1" away from the cast iron, (towards the chuck,) not giving much time to react for a mistimed latching of the half nuts. And yes, I did that once, but it was very early in the cutting cycle, only a few thousandths deep. Was able to back it out with little noticeable damage. After that, slowed the lathe down to 150 RPM and the timing got a little easier.

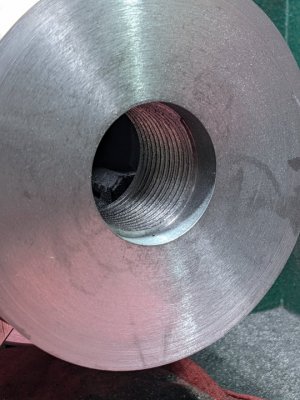
Because of the considerable deflection, I made multiple spring passes once I got 0.030" away from final. Do a cut of 0.005", do a spring pass, do a cut of 0.003", do a spring pass, etc. Once I could get the spindle copy to just start in the thread, it was only spring passes to shave off a tiny bit at a time. Now the spindle copy just freely turns into the back plate, until it hits the undersized spindle counterbore.
PXL_20220320_155624859.jpgPXL_20220320_155708529.jpg
Next step is to slightly open up the spindle counterbore (and slightly deepen it) and to chamfer the back plate thread start (really the exit in this case).

Threading away from the chuck out wasn't too bad. Next time, I will give myself a little more distance to make it a little easier to recover from a screw up. Honestly, I got lucky on this piece.
 
I just ordered an ER40 square collet block for $30 and intend to chuck it in my lathe in a four jaw chuck. Wouldn't that be just
as good as one of those fancy chucks or am I missing something?
that is what intend on doing for making some repeated offset holes
 
Back
Top