-
Welcome back Guest! Did you know you can mentor other members here at H-M? If not, please check out our Relaunch of Hobby Machinist Mentoring Program!
You are using an out of date browser. It may not display this or other websites correctly.
You should upgrade or use an alternative browser.
You should upgrade or use an alternative browser.
Models for grinding HSS Lathe Tools
- Thread starter mikey
- Start date
Travis, you made me smile! You made a tool your own way and it worked - awesome!!! This is the kind of thing that I love to see.
I'm glad I posted them then! I like seeing other people's tools, so I thought I'd share. Having the parts thread together perfectly was very satisfying.
What other types would work for that job?
Tip for change gear users... Always double check the pitch on scrap. I use some random PVC pipe pieces I have around. I managed to flip a gear set and had about 5TPI. I was aiming for 14.
- Joined
- Feb 2, 2017
- Messages
- 1,234
- Joined
- Dec 20, 2012
- Messages
- 9,422
Hey Evan,
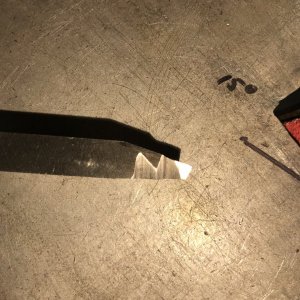
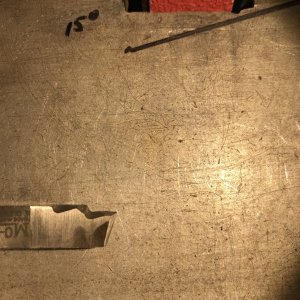
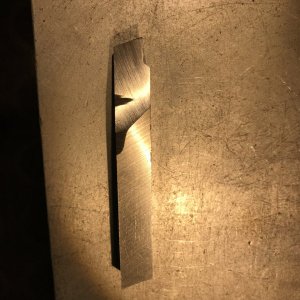
It looks like you got the relief angles right and your tool shape is fine. However, the rake angles are problematic. I can see side rake but the back rake is slightly lower at the tip, which gives you a negative rake. The intersection of the side cutting edge and the top of the tool is also irregular so the tool may not cut well.
This is all easy to fix. Draw a line on your tool rest at about 15 degree from the horizontal, up near the belt. Lay your tool on the rest with the side cutting edge facing up and align the shank of the tool with the inked line on the tool rest. Keep the back of the tool flat on the tool rest and push it into the belt with your push block. Do not let the angle of the tool bit deviate when doing this. Let the belt cut until the grind reaches the tip of the tool. This will give you both a 15 degree side and back rake.
Please give this a try and post up a pic. The rake angles are the trickiest for folks to grind but once you figure out how to hold the blank steady, this will be a piece of cake for you. Don't worry, you'll get it and I'll stay with you until you do.
- Joined
- Feb 2, 2017
- Messages
- 1,234
Mike,
One question I had was whether the top (back?) rake should be ground with the table set at 15º or 0º? I ground it at 15º. I did draw a 15º line on my table, but I am having tracking issues with my belt--it kept scooting as I put lateral force from the angled blank (which is why the back rake is "stepped"). I may be better off doing this step on the bench grinder until I figure out what I need to do to get the belt tracking rock-solid on my 1x42.
Will give it another shot next weekend.
Evan
- Joined
- Dec 20, 2012
- Messages
- 9,422
Mike,
One question I had was whether the top (back?) rake should be ground with the table set at 15º or 0º? I ground it at 15º. I did draw a 15º line on my table, but I am having tracking issues with my belt--it kept scooting as I put lateral force from the angled blank (which is why the back rake is "stepped"). I may be better off doing this step on the bench grinder until I figure out what I need to do to get the belt tracking rock-solid on my 1x42.
Will give it another shot next weekend.
Evan
Another complicating factor might be that platen. It attaches only on the bottom so rigidity is compromised; as you apply force into the belt, the platen moves backwards. You might look for ways to stiffen the platen, like welding side plates to it or perhaps a gusset of some kind behind it. Regardless, the platen has to be solid or your grinds will suffer.
The other thing you can do is find a stronger tracking spring to help keep the belt from moving.
I also found that ceramic belts cut much better than aluminum oxide belts. They require less pressure to cut well so you might want to try them.
Finally, try using M2 HSS instead of cobalt. Cobalt isn't hard to grind but it does require more pressure to cut and that might cause your belt to move. A ceramic belt plus M2 steel will give you a better chance at a decent grind.
- Joined
- Nov 14, 2016
- Messages
- 3,002
I've had more time with the square tool I ground. Initially I just took a stone to the tip to just slightly blunt it to create the nose radius.
I've since sat down and spent a little more time fine tuning the radius with a stone, and have found it makes quite a difference.
It was working well enough before, but it now turns out a better finish and peels off long (1/2" - 2") strips of brass and aluminum instead of little flakes. Really kind of neat to watch and easier to clean up. Not long enough to get in the way.
- Joined
- Dec 20, 2012
- Messages
- 9,422
Yeah, it makes a difference. I spend whatever time it takes to smooth the radius so that it transitions to both side and end evenly. The nose radius is involved in every cut you take with a turning tool. Even a facing cut involves the very end of the nose radius. It pays to do this part of the honing job well. Make sure to make a light pass or two on the top of the tool after you finish honing the nose radius to remove any burrs that may have arisen.
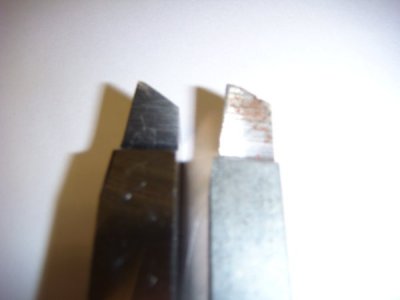
Being past time to pass my models on, I forced myself to take time to grind the primary today. With the excellent directions on post #104 I had no trouble. My belt grit may have been a little light as it took a few minutes, especially on that first big cut. But I was able to reproduce the shape, no problem, first try. I tried touching the radius with the belt and think I made it too big. Hard to see 1/32 at my age LOL. A stone in order for that step. I piddled with it taking some huge cuts in 6061 effortlessly. Got a little galling on my tip but I had no lubricant which was probably part of the reason. And no honing. Excited to be able to do this. Thank you.
Photos, models vs mine after playing around and I redid some edges a couple of times to sharpen the radius I made a hair big and ugly.
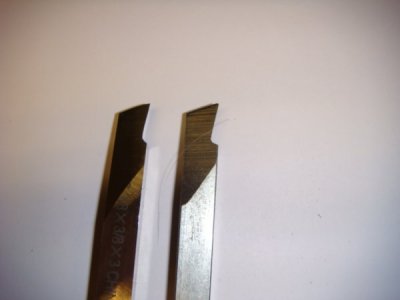
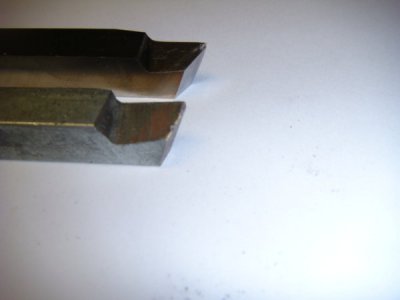
Photos, models vs mine after playing around and I redid some edges a couple of times to sharpen the radius I made a hair big and ugly.


Last edited:


