My adventures with my RF-30

In this thread I will document my adventures in getting this mill from the dealer to up and running in my garage. I have another thread here that documents some of the early research and mills I looked at.

I just bought an RF-30 clone. It was originally sold by Rutland Tool, which I remember as a local SoCal company in the 80's. I bought it at a machinery dealer in Pomona, Wheeler Machinery. Nice people, very reasonable to deal with. I was pleasantly surprised. I got the mill and a 5" Kurt vise for $975 out the door. After the sale I asked if I could get a t-shirt, too, and they said yes.

1. LOADING
They loaded it with a forklift into my truck. I have a Chevy 1500 so the 600lb weight was no problem. The put a 2x4 between the quill and the column and picked it up with a forklift. It balanced really well and the 2x4 held the weight just fine.
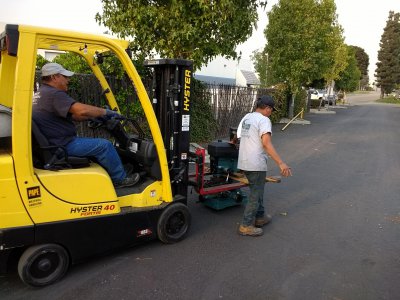
IMG_20201026_165216372.jpg

Once in the truck they pushed it to the back with the forks.
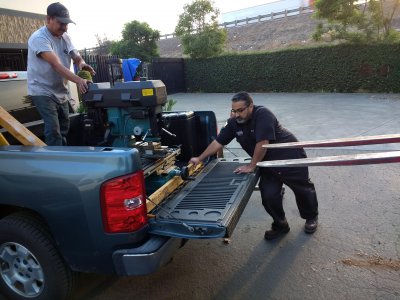
IMG_20201026_165515507.jpg

I tied it down with just two straps wrapped around the column. It didn't move at all.
 
Mikey I wonder why the sheet metal stand that most places sell with these mills don’t have the hole in them to adjust the Y leadscrew backlash? I guess cause not all the mills have adjustable screws. EDIT; also the tin top is designed to hold coolant, I forgot about that.
The stand I build will have that access for sure.
Cheers

Yup, I agree that it might be because some of these mills do not have back lash adjustment. Mine does have that adjustment capability, and the stand that came with the mill has access underneath to enable that adjustment.
 
Your wood stand will work just fine. One suggestion is to extend the front and rear cross members out 8 to 10 inches from the base of the mill to support a wider top. Since the mill base is directly over the side cross members there is no benefit to increasing the thickness of the top. You probably don't even need the plywood. The sheet metal top is all you need. On 2x4's and 4x4's gluing the joints doesn't add anything. This size of lumber expands and contracts so much with normal humidity changes that over time the lumber will crack just outside of the glue joint.

For the side panels to be an effective sheer panel the fasteners should be spaced 4" apart.

I would consider adding one drawer and one shelf in the cabinet.
 
I had a metal stand with similar dimensions and was always concerned that it would tip over, especially with the X table extended to one side. I would make your wooden stand much wider to improve stability or add 2x4's extensions to the bottom
 
Your wood stand will work just fine. One suggestion is to extend the front and rear cross members out 8 to 10 inches from the base of the mill to support a wider top. Since the mill base is directly over the side cross members there is no benefit to increasing the thickness of the top. You probably don't even need the plywood. The sheet metal top is all you need. On 2x4's and 4x4's gluing the joints doesn't add anything. This size of lumber expands and contracts so much with normal humidity changes that over time the lumber will crack just outside of the glue joint.

For the side panels to be an effective sheer panel the fasteners should be spaced 4" apart.

I would consider adding one drawer and one shelf in the cabinet.

I can't extend the table out behind the mill, but I was planning on extending it in the front about 3" or so. It will probably be 36" wide, maybe 48" depending on if I keep some other stuff in the garage or move it.

Yeah, maybe the shear panels/side covers will be sufficient if I just screw them into the frame. No glue would allow for expansion and contraction. Although, maybe I should see if the glue will expand and contract with the wood.

I'm putting a side tool box I'm not using under this for storage. Otherwise I'd add drawers as you suggest.

I had a metal stand with similar dimensions and was always concerned that it would tip over, especially with the X table extended to one side. I would make your wooden stand much wider to improve stability or add 2x4's extensions to the bottom

I thought about that, but the mill is so heavy that it will be hard to unbalance. It's also bolted the top I could also bolt the stand to the floor. I could go 36" wide and the 2x4's would support 1,000 lbs. according to the load calculator. Did you ever notice any tipping?
 
Jeff I was suggesting making the top wider side to side. Not extending it out the back or the front. 36" wide is wide enough.

Can the Y nut be rotated 180 degrees so that the adjusting screw faces back towards the column? If it can then you might not need an access hole in the top. You might be able to access the screw with the mill table moved to the front of its travel.

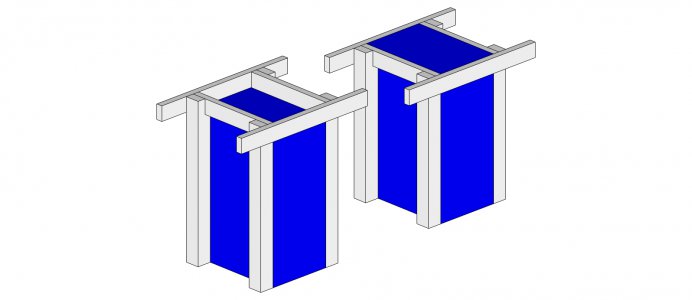
I have also been trying to figure out exactly how you plan to build the wooden stand. So I did a drawing in sketchup of what I think that you intend to build. I included the end cabinet in the drawing but not the stand top. The stand on the left is 3 1/2" higher than the cabinet top. The stand on the right is flush with the cabinet top.

mill stand ver 002.jpg

Because the mill base is almost the same dimensions as the top of the cabinet the rear mounting bolts will go through the stand top. The front mounting bolts will either go through the stand top or the front 2x4 depending where you place the mill on the stand. If the stand is flush with the cabinet top as in the right drawing you will need to cut an access hole in the cabinet top. On the other hand if you have the stand top above the cabinet top as in the left drawing you could cut out a small portion of the front 2x4 to provide access to the adjusting screw. If it was me building this stand I would make the stand like the drawing on the left.

If the stand is going up against a wall you could fasten the stand to the wall to prevent the stand and mill from tipping over.
 
I just measured the base on my stand. The sheet metal one that so many places sell for the RF30/31 type mills.
It is 23”wideX24” deep at the base. It is very stable.
I will be making a new stand for it, I can buy 20’ of 2”x2” .187 angle for about 25 bucks.
Thinking 24”X24” by 30” high. This would put the table top at about 41” or so.
With adj feet & a shelf or two.
Wood would work fine for a stand, but I usually build things like these out of steel.
Any thoughts on this?
 
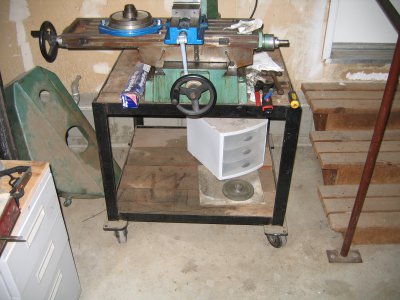
The stand for my mill/drill is made out of 2x2 angle iron with 2x6 douglas fir top and casters. It is stout.

IMG_3776.JPG

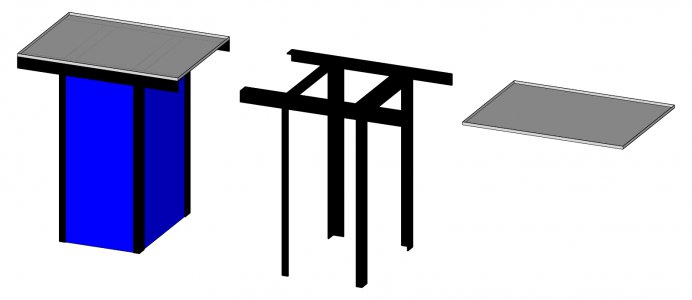
I did a drawing for an angle iron stand to fit around Jeff's end cabinet that I posted in his other thread.

mill stand.jpg
 
A good shove from the top would have tipped it over. I put extensions on the bottom to be safe

I was curious about this so I extended the table as far to the right as I could and stood my 165 lb. weight on it. The machine didn't budge. I had to jump up and down to get it to move even a little.
 
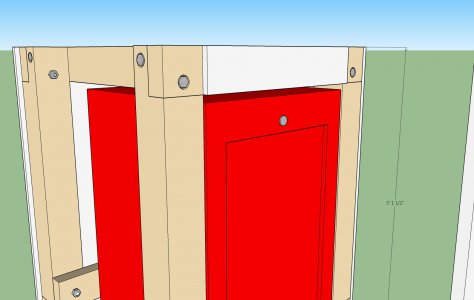
Chuck/mickri: Hopefully these detail views will explain it a little better:
wood stand detail 1.jpg wood stand detail 2.jpg

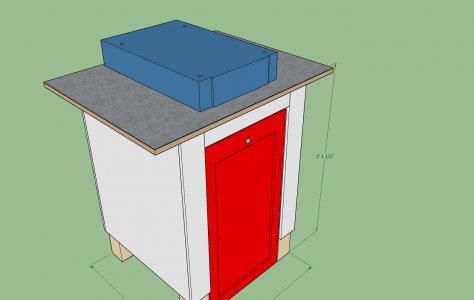
The red is the tool chest. The silver dot is the lock and the recessed area is the drawers, which I didn't draw. There is a little clearance between the top of the chest and the bottom of the 2x4's. I was going to counterbore the holes for the nuts in the bottom of the 2x4 so they didn't stick out the bottom.

I drew just the base on the top. The front machine mounting holes can either be lined up with the front 2x4 or just behind it. In either case, the rear mounting holes don't line up with anything; they'd go thru the top.

The machine rests on the front and rear cross members only, not the side 2x4's.
 
Last edited:
Back
Top