

-
Welcome back Guest! Did you know you can mentor other members here at H-M? If not, please check out our Relaunch of Hobby Machinist Mentoring Program!
You are using an out of date browser. It may not display this or other websites correctly.
You should upgrade or use an alternative browser.
You should upgrade or use an alternative browser.
My First Lathe - HF 9" x 20"
- Thread starter wachuko
- Start date
- Joined
- Aug 6, 2015
- Messages
- 3,886
#3 is a carriage lock knob for the Z axis which is just a knob I made pressed on over the allen head screw that was there.
Pressed bolt in the knob... good grief...
I am always thinking the most complicated way to do things... Goodness... Here I was thinking about cutting a hex wrench, pressing it and securing it with a set screw...
Just press the bolt on the knob, duh!!

Last edited:
- Joined
- Aug 6, 2015
- Messages
- 3,886
This is looking good. Of course I do not have the pressure of making it to a set of plans... this is all freehand...
Watched some videos on how to drill on radius surfaces... first use an end mill to make a flat area, then center drill, drill and tap...


Also drilled and tap the side hole for the set screw... only waiting for the set of assorted set screws that I ordered... those should be here today. But outside of that, done!!!


EDIT: The set screw arrived. This task is now complete!!
Watched some videos on how to drill on radius surfaces... first use an end mill to make a flat area, then center drill, drill and tap...
Also drilled and tap the side hole for the set screw... only waiting for the set of assorted set screws that I ordered... those should be here today. But outside of that, done!!!
EDIT: The set screw arrived. This task is now complete!!
Last edited:

- Joined
- Aug 6, 2015
- Messages
- 3,886
Well... I tried making the knob that locks the cross slide. The knurling tool that came with the QCTP does not work well with how flimsy the compound rest is... The knurling tool is the kind you push into the material... I have a scissor type as well, but it is too big for the AXA holders that I have...
Anyhow, I gave it a try... It works but it is not the best looking knurled knob...

So I removed the compound rest and installed the one the previous owner made... Much better. Will give that a test tomorrow.... Oh, and I will do a better chamfer on the knob as well... I was just trying the knurling tool first...

Anyhow, I gave it a try... It works but it is not the best looking knurled knob...
So I removed the compound rest and installed the one the previous owner made... Much better. Will give that a test tomorrow.... Oh, and I will do a better chamfer on the knob as well... I was just trying the knurling tool first...
- Joined
- Nov 14, 2016
- Messages
- 3,002
2. What is the reason I see folks installing bearings on here?? I will still need to replace the bolt that I got from Little Machine Shop. It does not comes out enough. And if installing bearings is a good modification to make, I will need that bolt to be longer to accommodate for those.
Odd, mine fit with no modifications. I got the QCTP from LMS along with the adaptor. Yours looks like the same QCTP, but maybe if it was from another vendor there is a little difference in size? I think you said you got AXA so that should be the same.
Not sure why anyone would add a bearing, the handle already has a bearing.
Also figured out my confusion on the reverse. My 9x20 is like yours forward and reverse on the spindle, no reverse on the lead screw. The way my Logan is wired it has no reverse on the spindle, but a reversing lead screw I got them mixed up in my head.
I need more time in the shop to play with my toys.
Nice work so far.
- Joined
- Jan 21, 2021
- Messages
- 452
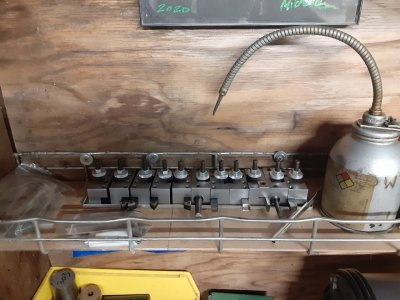
OK, I have a few reference pic of the Budget DRO....plus I gave you a bad link yesterday, here is the one I meant to post...
 www.hobby-machinist.com
Emco Compact 8 dimension request
Hello, I have acquired a Emco Compact 8 lathe bed and carriage. Can some one please give some measurements of the spindle housing and center line of the spindle from the bed? I'm going to give this project a shot at working again ;) Thanks !!! Steve
www.hobby-machinist.com
Attachments
-
 Resized_20210923_152442.jpeg472.1 KB · Views: 109
 -
 Resized_20210923_132352.jpeg379.3 KB · Views: 99
 -
 Resized_20210923_132340.jpeg414 KB · Views: 100
 -
 Resized_20210923_132156.jpeg166.1 KB · Views: 103
 -
 Resized_20210923_132145.jpeg435.7 KB · Views: 102
 -
 Resized_20210923_132057.jpeg376.8 KB · Views: 105
- Joined
- Aug 6, 2015
- Messages
- 3,886
OK, I have a few reference pic of the Budget DRO....plus I gave you a bad link yesterday, here is the one I meant to post...
Emco Compact 8 dimension request
Hello, I have acquired a Emco Compact 8 lathe bed and carriage. Can some one please give some measurements of the spindle housing and center line of the spindle from the bed? I'm going to give this project a shot at working again ;) Thanks !!! Steve
Very clear now on what I need to do. Excellent, thank you!
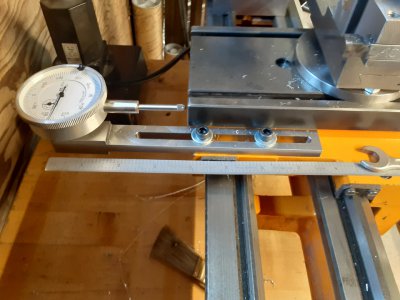
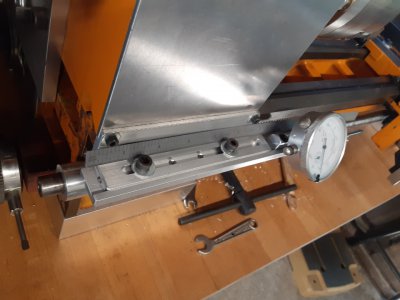
Changing the compound rest for this tool post made all the difference. Very rigid now. And it made doing the knurling much easier.
Not perfect, but good enough for the task.

- Joined
- Aug 6, 2015
- Messages
- 3,886
Removed 3-jaw chuck to start working on that backplate...


I probably should do this first. So that this thing is secured and I have some additional peace of mind... ohh, and more later on why all that area looks so nasty and dirty...

Cutting this down to size is going to be one of those projects that I do not think I will enjoy much. The amount of dust, grit (sand-like) particles flying everywhere was unreal...

This was just two passes!

Just figuring out the setup as this is so close that I had to stick out the cutter so it would reach the end of the backplate...

I did clean everything up...well, still need to empty the tray...


I need to cover everything around the area (my motorcycle is right next to the lathe)... this will not be fun, and not because of the process, but because the lathe is right next to the laundry door and on the way to the fridge we have in the garage... so lots of traffic when getting stuff from there.
Meaning, I can already hear my wife "you can't take all the grime/dirt inside! The floor feels like walking on sand! wah wah wah wah wah wah". Good grief!

I probably should do this first. So that this thing is secured and I have some additional peace of mind... ohh, and more later on why all that area looks so nasty and dirty...
Cutting this down to size is going to be one of those projects that I do not think I will enjoy much. The amount of dust, grit (sand-like) particles flying everywhere was unreal...
This was just two passes!
Just figuring out the setup as this is so close that I had to stick out the cutter so it would reach the end of the backplate...
I did clean everything up...well, still need to empty the tray...
I need to cover everything around the area (my motorcycle is right next to the lathe)... this will not be fun, and not because of the process, but because the lathe is right next to the laundry door and on the way to the fridge we have in the garage... so lots of traffic when getting stuff from there.
Meaning, I can already hear my wife "you can't take all the grime/dirt inside! The floor feels like walking on sand! wah wah wah wah wah wah". Good grief!
Last edited: