The biggest item to complete is the limit switch wiring. Right now it's just temporarily connected so I could get running.
Currently I have five limit switches each running a separate cable back to the enclosure.
They each have a 24v+ and 24v- and a signal wire.
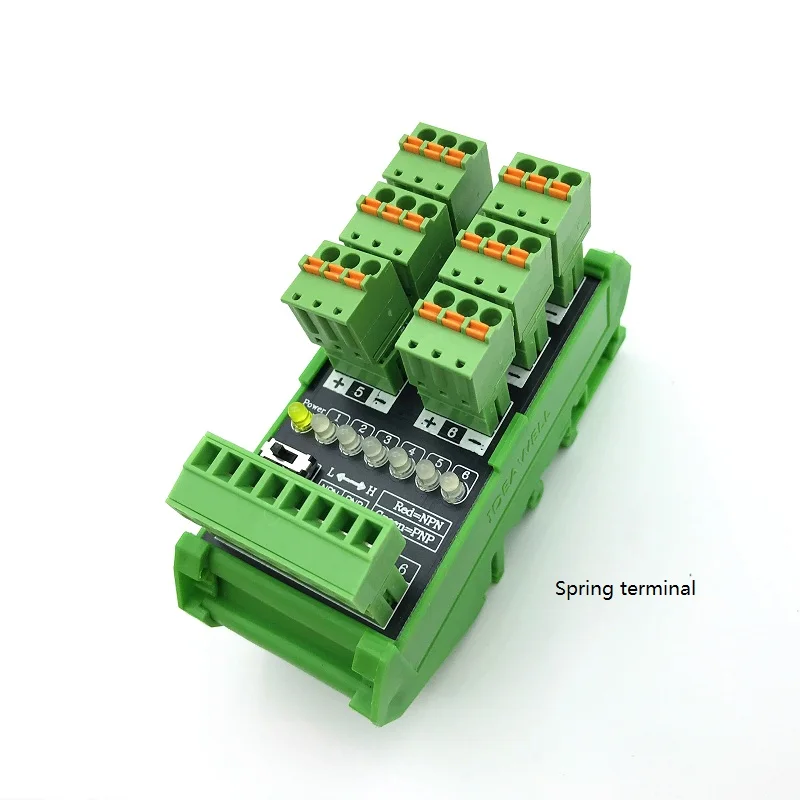
There's no need to have five separate sets of 24v +/- wires so I bought one of these things in the photo to consolidate the power and signal wires from the five switches into one eight pair cable.
This block gets mounted up on the end of the X axis gantry where all of the switch wires enter the cable chain.
Each set of three switch wires go into one of the six, three-pin terminal blocks. I'll only need five as I only have five switches.
Then I connect the eight pair cable to the strip of terminals at the bottom. The two left pins are 24v+ and 24v-. The other six are for the signal wires from the switches.
I will connect one pair of wires to the 24v+ and 24v- and five wires into five of the remaining terminals.
I will run this cable to the enclosure where I I connect the 24v+ and 24v- wires to the 24v+ and 24v- distribution bus. The five wires for signal go to the control board.
Other than that I have to connect my e-stop switch and then I can make the door for the enclosure and button it up.
") View attachment 400422
View attachment 400422