POTD- PROJECT OF THE DAY: What Did You Make In Your Shop Today?

Take it off and static balance it. Let gravity tell you where the heavy spot is. Then just add or remove weight until it stops in a different postion every time you spin it.

I static balance motorcycle wheels the same way all the time. Have yet to fond one that won’t balance on one or two tries.

Trying to do it dynamic without test equipment will end up driving you crazy
I have got it so that it is only 3 thou of movement. I would consider that better than the 20 + thou that I started with.
I consider that a win, and acceptable. The problem with taking it all apart is then I would have to spend a lot of time getting it parallel again. I need to sand some stuff. I have no problem hand sanding (block and paper) but this will leave them all the same size.
 
I have got it so that it is only 3 thou of movement. I would consider that better than the 20 + thou that I started with.
I consider that a win, and acceptable.
For a drum sander I would consider that far better than most. The Delta ought to sound a little better when running. Motor and bearings should benefit from the new found concentricity as well.
 
More Tool Storage!

[This is to some extent "What Did You Buy?" and "What Did You Make," but mostly made]

I have been lamenting the lack of additional space in my small shop for more tool storage (walls full, floor – other than 24" max walkway around a central storage/utility core – occupied, no unused horizontal surfaces and with the exception of my 30 year old Gerstner 2613 tool chest everything is stacked to the practical limit (need to open the lids of the tool chests). I considered moving some of my least used tools into the under utilized tool storage in the garage, but while this would help my daily exercise it would be a pain. Then the light bulb went off (brain fart as one of my past coworkers would say): bring the unused storage from the garage into the basement shop! I rearranged storage in my Kennedy cart to free up a drawer, moved the contents from my 40 year old 28" Kennedy base into said drawer, cleaned up the base and I was ready . . . except the 2613 Gerstner is 13" deep, and the Kennedy base is 9-1/2" deep.

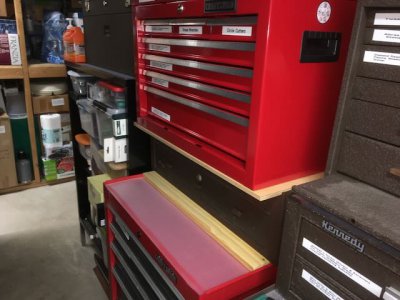
However, I had run into a similar issue last year with a Craftsman chest on a used Kennedy base:
Riser n Craftsman.jpeg
For this previous project, the Kennedy base was wider than the roller chest it was going to sit on, so I needed a spacer to position it above the flanges on the roller. I attached the base to the spacer so it wouldn't shift. While the Craftsman box is narrower than the base, it is deeper, so I made an extended top for the base. To preserve as much space as possible, and keep the back of the boxes away from the wall (covered with tools), the extension overhangs the front of the base, but allows good access to the drawers in the base. The chest is screwed down to the extension, and the extension is located between the back & side flanges on the top of the base, with saw kerfs under the front overhang to clear the front flanges.

For the Kennedy/Gerstner setup, since I had a little more room to work with I made some tweaks:

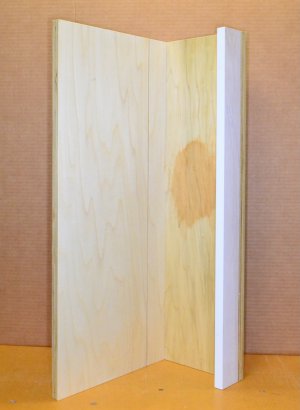
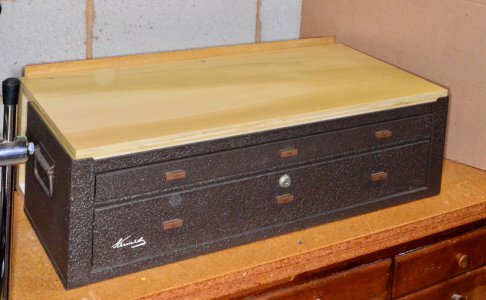
I purchased some 3/4" (yes, really 3/4"!) Poplar plywood on Home Depot's website: a couple of bucks more than 23/32" Pine, with free shipping and pre-cut at the factory, which had to be more accurate than my 5-1/2" Craftsman C3 battery saw (or the well-meaning staff at HD) so I ordered it. A box arrived in three days, panels cut to exact sizes and just needing light sanding to be ready for finishing: I have found a new source for project plywood, delivered to my front door! This is what I made:
Kennedy Base w Extension.jpeg
A top extension, with a rear support and backstop for the Gerstner chest.
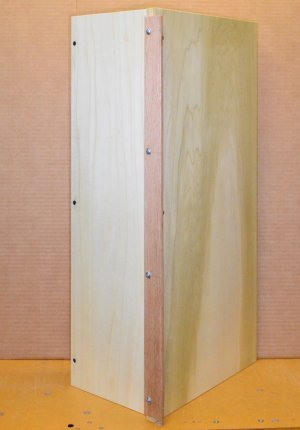
Kennedy Base Extension Top n Back.jpeg Kennedy Base Extension Inside.jpeg
The extension fits within the side flanges of the base, there's a saw kerf to accept the back flange, and a return at the bottom of the back support that touches the bottom of the Kennedy base so I can push the assembly up against the backstop I had previously placed on the re-purposed, 60 year old pine chest the Gerstner has lived on. The brown-ish area on the inside of the support is where I tested some Minwax One-Step Stain/Poly I had (where no one would see it), but the color wasn't right and it raised the grain; I ended up using Minwax One Coat Satin Poly on all surfaces, which is my go-to when all I'm looking for is something to protect the wood.

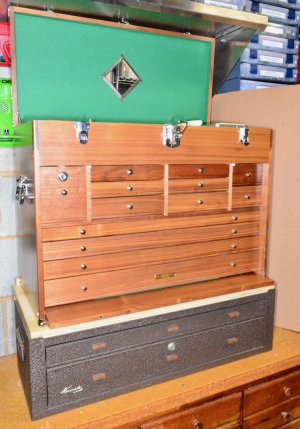
Here's the final result:
Gerstner on Kennedy Base Open.jpeg
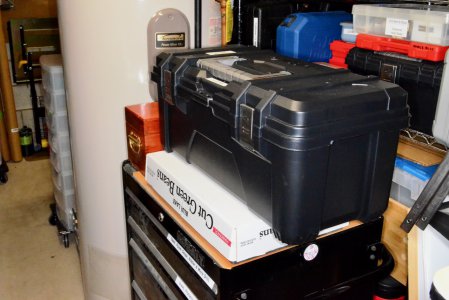
It's a tight fit under the SS shelf, but it works and I've got 432 sq.in. of more tool storage (or 3 sq.ft., which doesn't sound like as much).

How do I keep my decades old toolboxes looking so good? Well, I was taught from an early age to take care of my possessions so they don't get knocked about; and in the case of the Gerstner (which I bought as a home for the carving & miscellaneous small tools I inherited when my Father passed), I keep him protected:
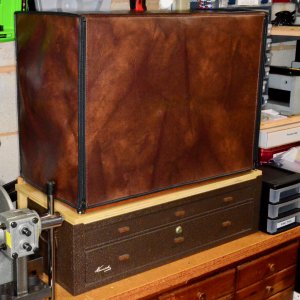
Gerstner Sleeping.jpeg
 
Last edited:
POTD...Not too much. Waiting for a callback for a family medical issue, that may become urgent.
So, just prepping for the silly foam milling project. Waiting for a collet to come in for the router table spindle.
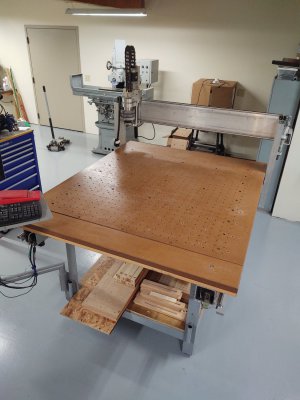
But, in the meantime, I did do this to the table.
DidThis.jpg
Don't let it fool you. This cleanup session took the better part of three days on and off. Since the table doesn't get used all that often, it's the catchall workbench for all sorts of odds and ends that need to get sorted ant put somewhere, eventually, when you finally need the table, again... If you have a router table, you know that it ends up as storage more often than not!

Next step will be to raise the router spindle. The gantry support rails are drilled so the gantry can be brought up and down quite a bit. Going to need +6" for the foam, and probably 7 to 8 inches for the cutter. So, it'll be running near capacity once I get the gantry raised. Then tram it in, as there is some adjustment for square. The last time I set it up, it was out of square a few thou per inch. Not a big deal, but with a 2" fly cutter, you could just see the overlap.


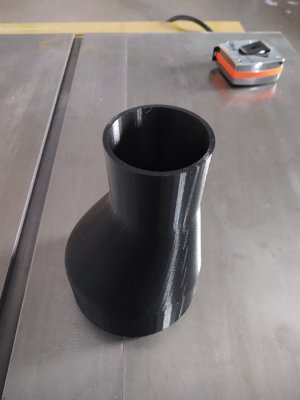
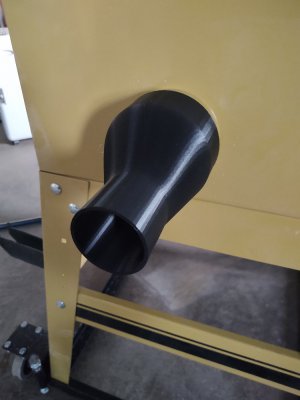
Also, made the 3D printer do this. The new-to-me table saw has a dust collector port. But's a 4", that doesn't fit the shop vac. And the 2" port inside it doesn't fit the shop vac either. So, drew up a quick 4" to 2" adapter. Took like 3 minutes to measure up and draw. The print, on the other hand took over 10 hours. I print these sorts of adapters with a 3mm solid wall for strength. Slower going, but, the printer runs unattended, so easy enough to let it run.

This.jpgForThis.jpg
 
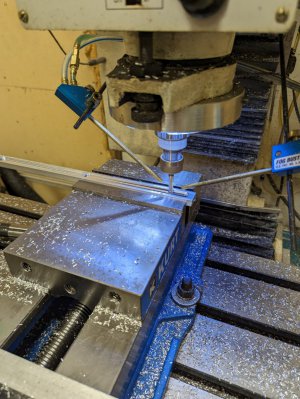
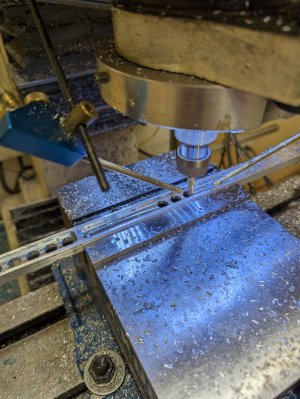
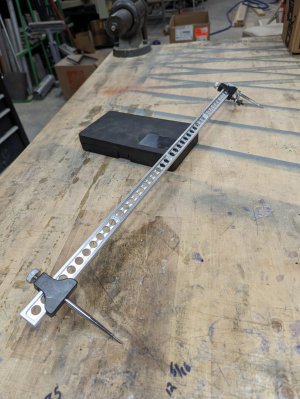
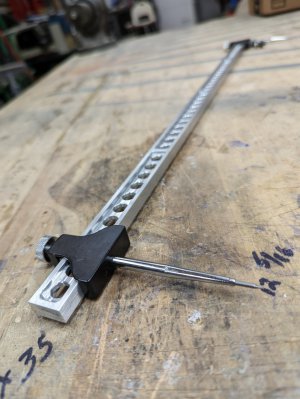
I recently bought a couple of points for a trammel compass and while I could have just cut of a length of aluminum bar but what's the fun in that. I have been making the transition from AutoCAD to Fusion 360. I figured this would be a good excuse to learn the CAM features of Fusion 360. My mill table has a maximum X axis of 19 inches and I wanted the bar to be 24 inches. So I decided to made 4 sections of 6" each. First I pocketed one side then turned the bar over and pocketed then milled the holes. A bunch of hand deburring and I was good to go.

PXL_20230310_185921756.jpg PXL_20230310_194539287.jpg PXL_20230310_204711117.jpg PXL_20230310_204754534.jpg
 
I recently bought a couple of points for a trammel compass and while I could have just cut of a length of aluminum bar but what's the fun in that. I have been making the transition from AutoCAD to Fusion 360. I figured this would be a good excuse to learn the CAM features of Fusion 360. My mill table has a maximum X axis of 19 inches and I wanted the bar to be 24 inches. So I decided to made 4 sections of 6" each. First I pocketed one side then turned the bar over and pocketed then milled the holes. A bunch of hand deburring and I was good to go.

View attachment 440582 View attachment 440583 View attachment 440584 View attachment 440585
That's the nicest bar I have seen on a trammel out of AL.
I have seen some fancy wood ones.
 
Back
Top