
Also... since I never really have tested this lathe since getting it.... I checked the level of the lathe again and then using a test bar with 2” collars mounted between centers....cut the collars and miced them. They were within a thousandth of each other.

-
Welcome back Guest! Did you know you can mentor other members here at H-M? If not, please check out our Relaunch of Hobby Machinist Mentoring Program!
- Forums
- THE PROJECTS AREA
- PROJECT OF THE DAY --- WHAT DID YOU DO IN YOUR SHOP TODAY?
- Project of the Day Mega-Thread Archives
You are using an out of date browser. It may not display this or other websites correctly.
You should upgrade or use an alternative browser.
You should upgrade or use an alternative browser.
2020 POTD Thread Archive
- Thread starter eugene13
- Start date

Also made a handle for my SB QCTP so I won’t have to fumble for the wrench anymore. After making one for the Clausing , I couldn’t believe how much easier it is while using the lathe. Seems like a small thing, but it’s a big time saver in my opinion. I do still need to clean up the area where it screws into the brass nut.
Attachments

Last edited:
- Joined
- Jul 14, 2017
- Messages
- 2,448
Today i had a job to do on my lathe, i had a relative bring me two cylinder rods and rod ends with all the threads striped out, i cut down the old threads, threaded them with the next size down, and welded the cylinder ends shut, then u changed the chuck on my lathe, hold them and drilled and threaded them, this simple job took some time, i had to wait for them to cool down after welding.


- Joined
- Oct 30, 2012
- Messages
- 960
Nice work. Gotta love those “hey man...” jobs

- Joined
- Dec 6, 2015
- Messages
- 809
I finally finished my wood lathe stand for my third wood lathe. The first one I bought was taken apart, and attached to the new stand and the new-old lathe as spares. All three lathes are all from about 1941.
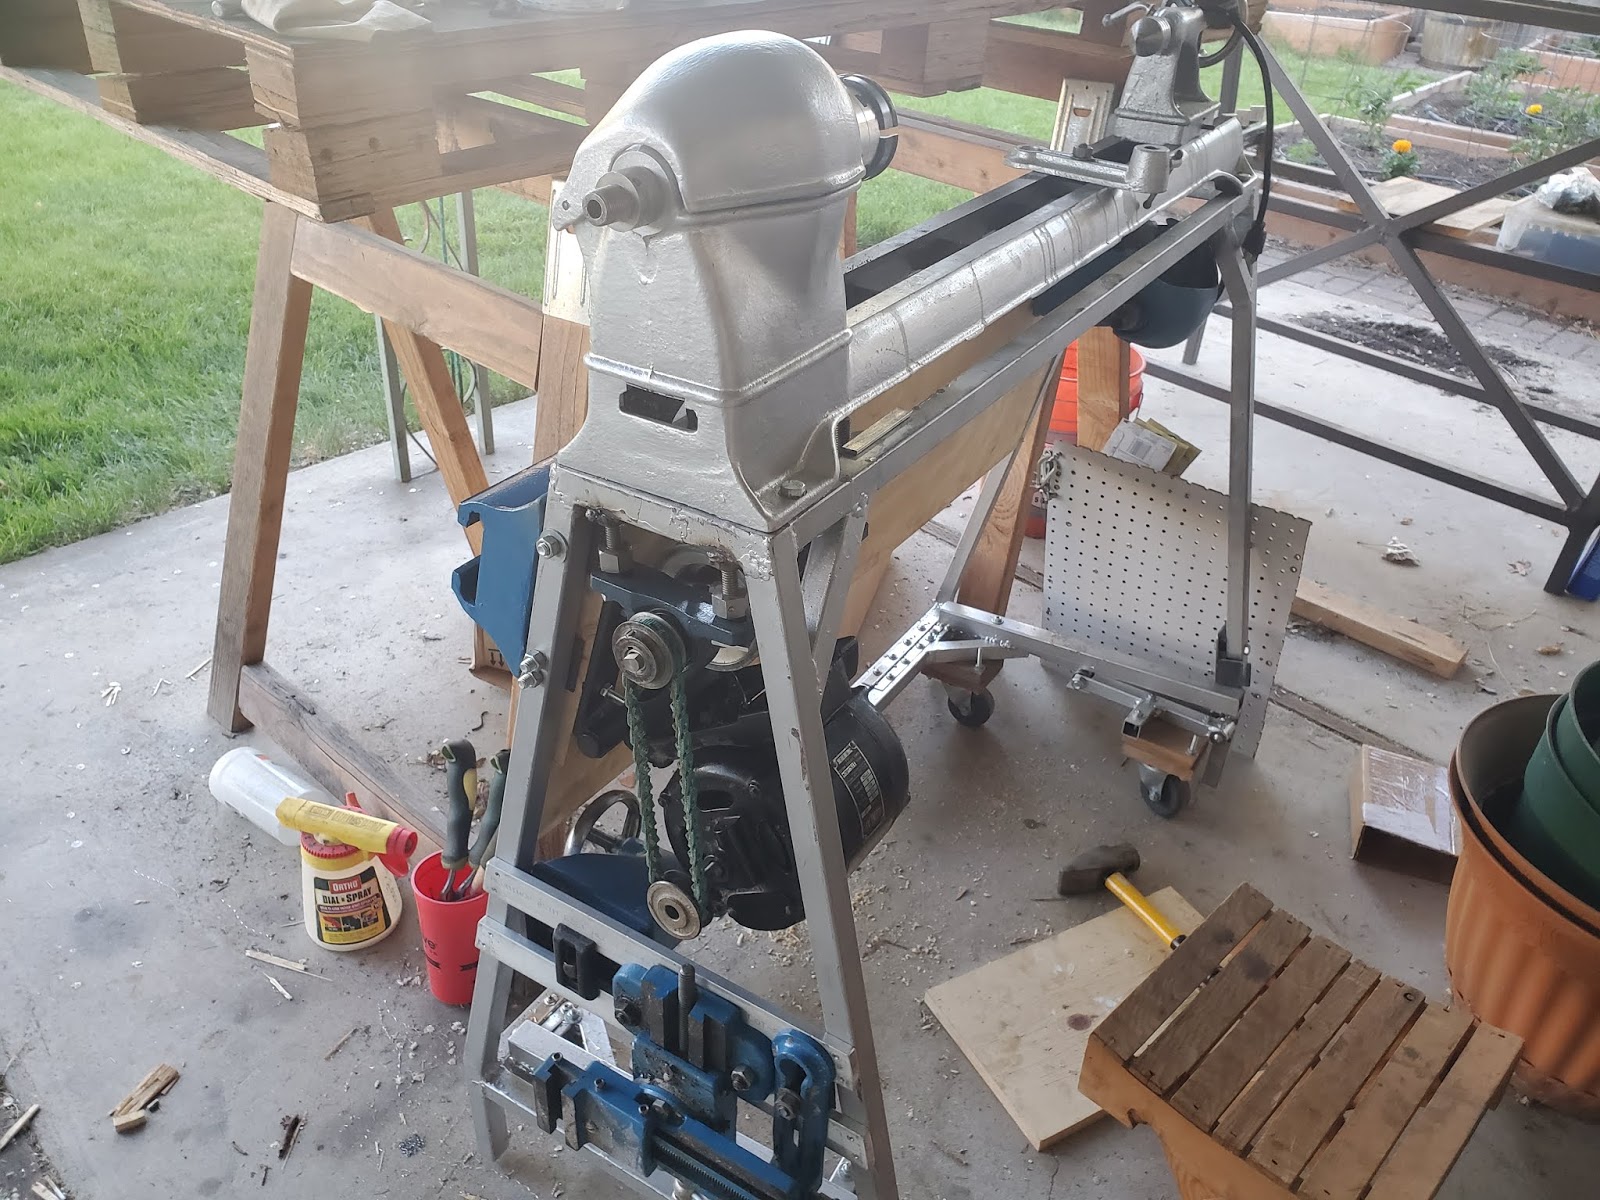
The casters on the bottom are on levers, so I can press the pedal and raise the entire structure onto castors, move it to where I need to, then drop it down. The stability is excellent, plus I have all of my spare parts from the old one. I used aluminum bar stock to imitate the bed gap so I could stash accessories onto the stand without being on the lathe bed. Countershaft underneath can be modified easily.
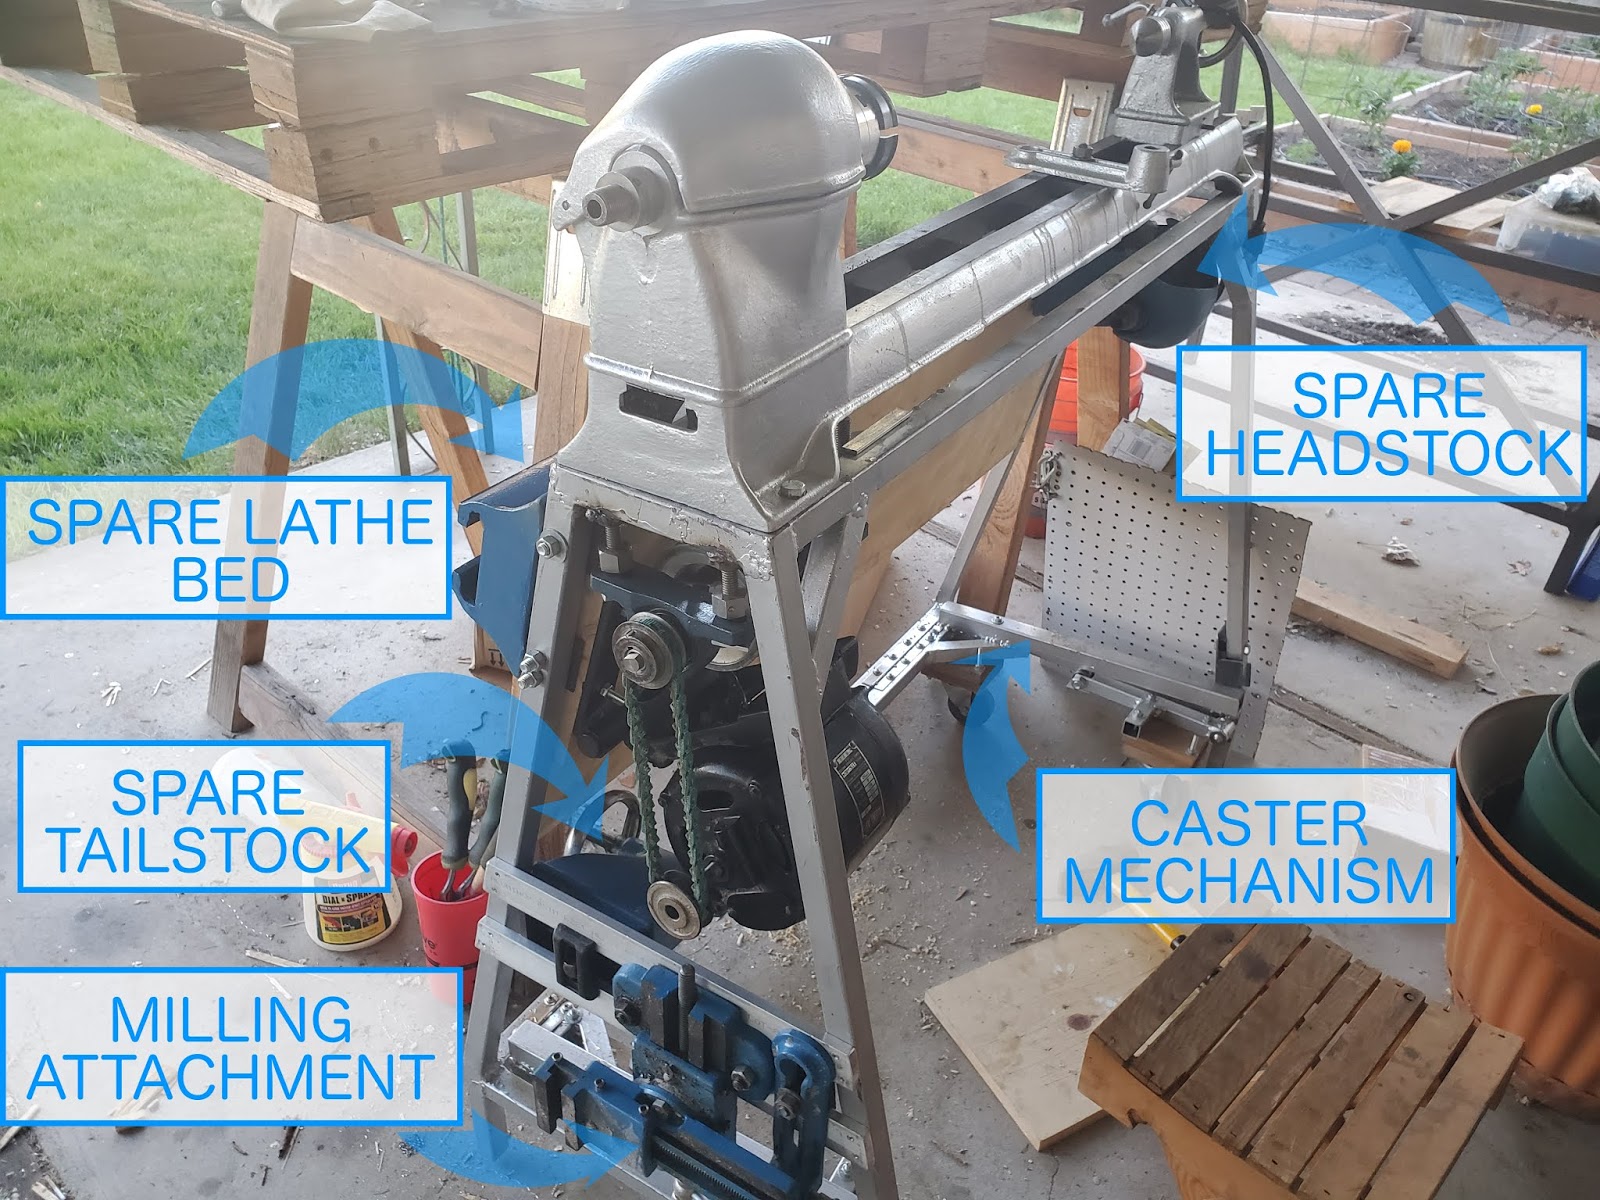
I still need to attach peg board to the tailstock end that holds all of my screw drivers, wrenches, sand paper, and turning tools. I also need to attach a piece of sheet steel over the motor to stop from getting liquids onto it. That would complete this one. I'm excited to move the bulky stand still in place out of the way and drop this one in place. Then I can re-focus on my Heavy 10 project.
The casters on the bottom are on levers, so I can press the pedal and raise the entire structure onto castors, move it to where I need to, then drop it down. The stability is excellent, plus I have all of my spare parts from the old one. I used aluminum bar stock to imitate the bed gap so I could stash accessories onto the stand without being on the lathe bed. Countershaft underneath can be modified easily.
I still need to attach peg board to the tailstock end that holds all of my screw drivers, wrenches, sand paper, and turning tools. I also need to attach a piece of sheet steel over the motor to stop from getting liquids onto it. That would complete this one. I'm excited to move the bulky stand still in place out of the way and drop this one in place. Then I can re-focus on my Heavy 10 project.
After inspiration from this thread about a drill press spindle light, I ordered some angel eyes of my own. Of course, this has been a common way to light a mill spindle as seen over the years. E.g., here, here, or here. I got 120 mm and 100 mm so I could nest two of them. For a total of $17.64, I received two of each, about six weeks after ordering; all four function. I designed and 3D printed a mount and it does a great job of lighting up the workspace. I did wrap the edge with electrical tape to eliminate the side emission; a revised mount will include that barrier (and adjust some dimensions to evolve the design).

Here's how I configured the mount:

Here's how I configured the mount:
- Joined
- Jul 14, 2017
- Messages
- 2,448
Today's job was nagging me for 2 months now, my car port has a grapes on it, they provide shade for my cars and fruit in the autumn, but this year because of the late snow they are very late with there grow. And the new to me 607 being all black is suffering. So after seeing my options, i consulted with couple of "grape experts", and decided to install a garden netting, it should help the grapes and provide some shade till the leaves grow. So i bought me a bit more netting then i needed, clear out all the cars and begin tying it and installing it, this was very difficult, because of the height, uneven, broken concrete and all the branches sticking up. At the back i decided to just to stretch the netting over the bushes so i don't need to cut it and i have a bar at the footings to tie it to. Not too bad for an evening work and for 20$ in netting.


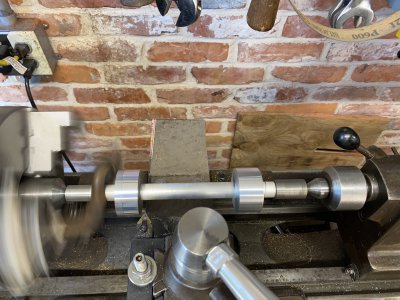
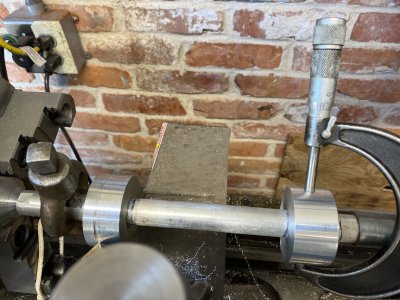
Yesterday I made an expanding arbor:
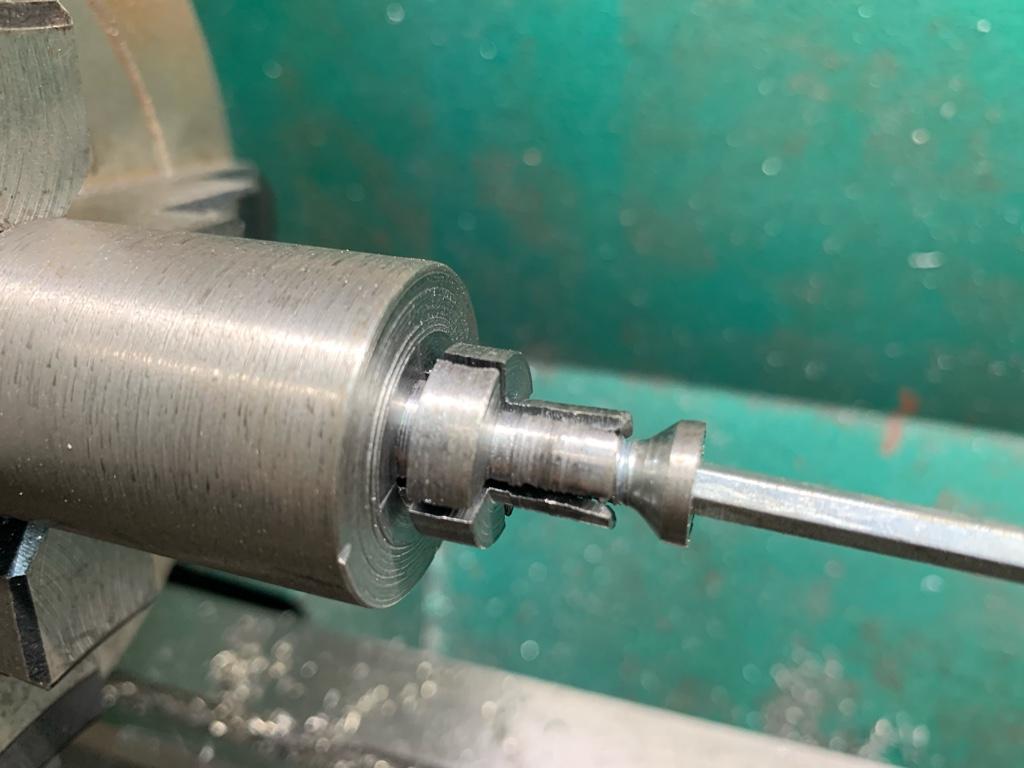
to hold slices of drilled 303 bar:
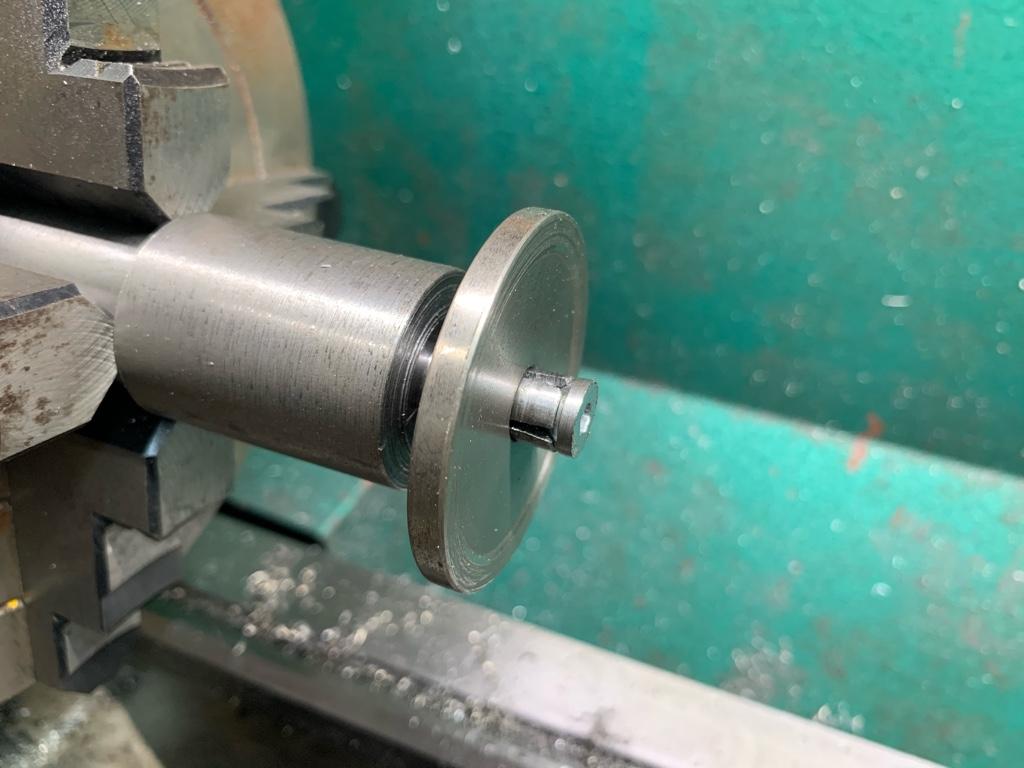
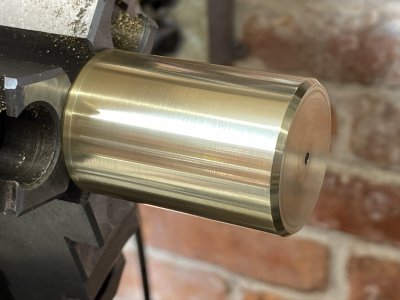
for some large washers:
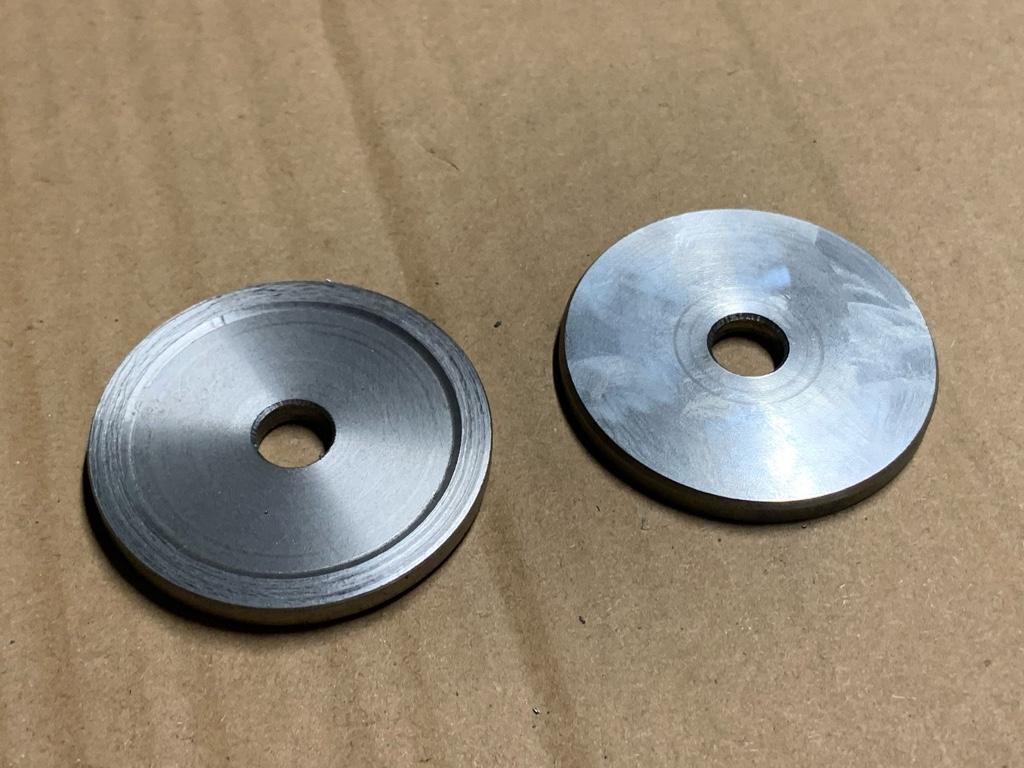
It worked pretty well but the 3/8” ID doesn’t allow much torque so the cuts had to be pretty light. It was my first time making or using an expanding arbor though so I’m pretty pleased.
to hold slices of drilled 303 bar:
for some large washers:
It worked pretty well but the 3/8” ID doesn’t allow much torque so the cuts had to be pretty light. It was my first time making or using an expanding arbor though so I’m pretty pleased.
Looks like your going to be making some wineToday's job was nagging me for 2 months now, my car port has a grapes on it, they provide shade for my cars and fruit in the autumn, but this year because of the late snow they are very late with there grow. And the new to me 607 being all black is suffering. So after seeing my options, i consulted with couple of "grape experts", and decided to install a garden netting, it should help the grapes and provide some shade till the leaves grow. So i bought me a bit more netting then i needed, clear out all the cars and begin tying it and installing it, this was very difficult, because of the height, uneven, broken concrete and all the branches sticking up. At the back i decided to just to stretch the netting over the bushes so i don't need to cut it and i have a bar at the footings to tie it to. Not too bad for an evening work and for 20$ in netting.
View attachment 325907View attachment 325906