Quarantine Projects!

Did some more on my taper attachment!

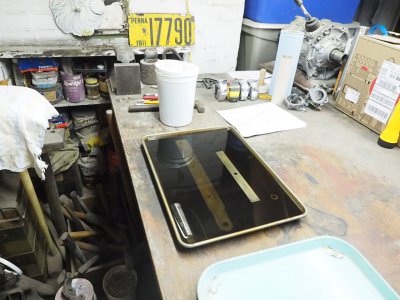
Das partsensoaken!
EM520736.JPG


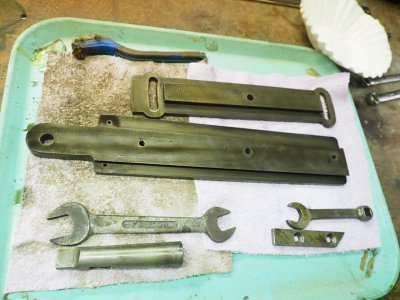
They came out pretty good. That light surface rust that cast iron gets is where Evapo-Rust really shines. I brushed them all with a small brass wire brush while the parts were wet. I also threw in a few other things just for the heck of it. The wrenches could use more soak time but I'm done waiting!
EM520737.JPG


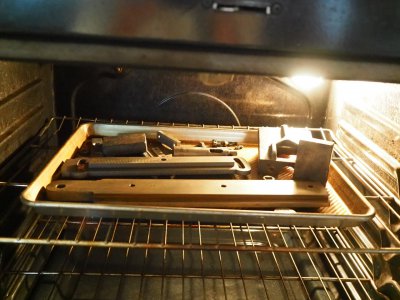
I rinsed everything with water and dish soap then popped 'em in the oven at 180* til dry. About 30 minutes.
EM520738.JPG


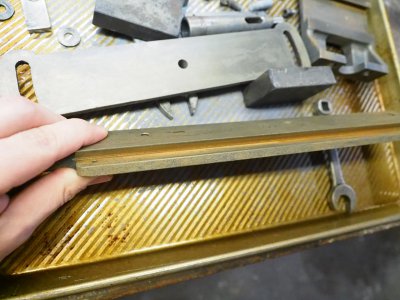
I experienced some light flash rust after the oven, mostly in cracks and dovetails. No problem, everything will get buffed with scotchbrite.
EM520739.JPG


The short part on the right is scotchbrited and the longer one is not. The scotchbrite takes away the gold cast from the wire brush.
EM520741.JPG


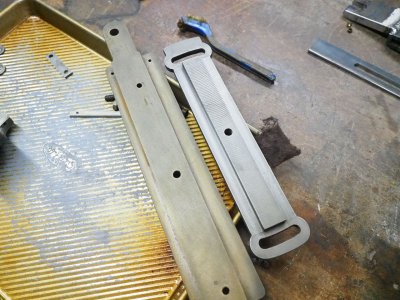
You can see the shaper lines on this part! To think shapers were used for mass production at one time! How far we've come! I wonder why this wasn't fly cut? Some other parts have fly cutter marks.
EM520747.JPG


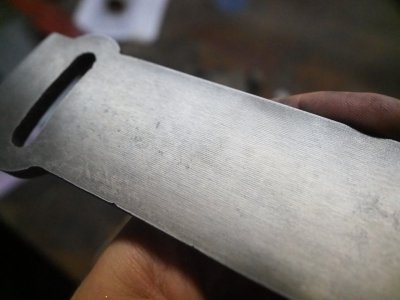
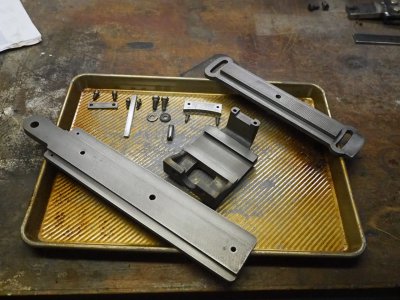
All the parts came out great! You can see fly cutter marks in the long bottom piece. The only real painting is on the angled bracket. I'd like to just brush it so I don't have to mask. The long narrow parts are machined both sides so no paint except for around the perimeter edge. Might not be worth the trouble...
EM520748.JPG


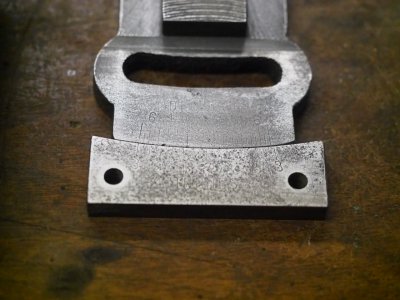
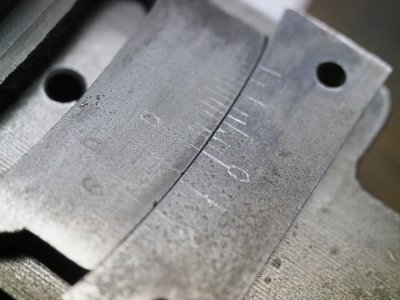
Below is a picture of the only real concern I have for this restoration. You can only very faintly see the lines and numbers for the gauge. The upper part has degrees and the lower part says inches, per foot I assume. I can't really even see the zero mark on either piece.
EM520751.JPG


Any ideas on how to fix this up? Maybe I can super carefully re-scribe the lines one at a time with a straight edge and carbide scriber?
 
Did some more on my taper attachment!

Das partsensoaken!

View attachment 320766


They came out pretty good. That light surface rust that cast iron gets is where Evapo-Rust really shines. I brushed them all with a small brass wire brush while the parts were wet. I also threw in a few other things just for the heck of it. The wrenches could use more soak time but I'm done waiting!

View attachment 320767


I rinsed everything with water and dish soap then popped 'em in the oven at 180* til dry. About 30 minutes.

View attachment 320768


I experienced some light flash rust after the oven, mostly in cracks and dovetails. No problem, everything will get buffed with scotchbrite.

View attachment 320769


The short part on the right is scotchbrited and the longer one is not. The scotchbrite takes away the gold cast from the wire brush.

View attachment 320770


You can see the shaper lines on this part! To think shapers were used for mass production at one time! How far we've come! I wonder why this wasn't fly cut? Some other parts have fly cutter marks.

View attachment 320771


All the parts came out great! You can see fly cutter marks in the long bottom piece. The only real painting is on the angled bracket. I'd like to just brush it so I don't have to mask. The long narrow parts are machined both sides so no paint except for around the perimeter edge. Might not be worth the trouble...

View attachment 320772


Below is a picture of the only real concern I have for this restoration. You can only very faintly see the lines and numbers for the gauge. The upper part has degrees and the lower part says inches, per foot I assume. I can't really even see the zero mark on either piece.

View attachment 320773


Any ideas on how to fix this up? Maybe I can super carefully re-scribe the lines one at a time with a straight edge and carbide scriber?

I think that would be a good approach but would wait until they are in place so you can verify.

Looking good:encourage:

John
 
GoceKU - Nice to hear from you! It's been a while since I've seen one of your posts. Good to know that you're healthy. May you STAY that way!

Weldo - That's a fascinating restoration ... especially your noting and analyzing the tool marks. You stay healthy, too!
 
OK new plan.

I tried re-scribing the graduation lines on the taper attachment. Some were defined enough that the scribe followed the old marks, some were not. Here I tried to re-scribe some of the more defined ones. Some went awry...

EM520752.JPG


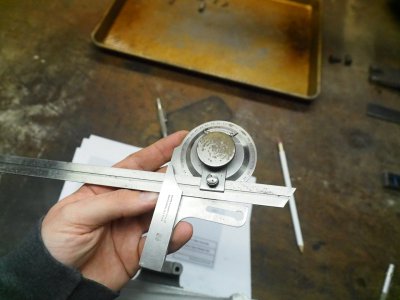
New plan involves this thing. I bought this a few months ago because it was cheap and never used it once. It had sat in a box in my sometimes damp basement and got some rust, which bugs the hell out of me! It was pristine when I got it. Well it still functions anyway.

EM520754.JPG


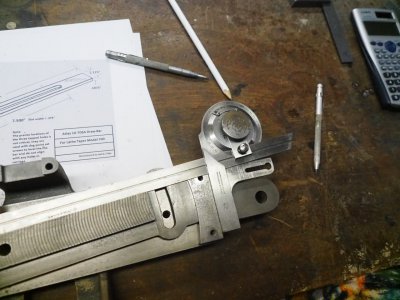
I can set the angle thusly...

EM520753.JPG


The above is just a mock up, no fasteners are installed. The protractor is set at 5 degrees. As long as the small piece with the inside radius is screwed on perfectly square this should be a relatively accurate way of setting the angle. The protractor can resolve down to five minutes, (or single minutes with some eyeballing and guessing) which is a lot better than the hash marks on the attachment itself.

Notice the protractor rides over the one screw hole slightly. The original screws were of the round head variety but I'm gonna have to countersink the holes and use flat head screws for this to work. Luckily I have some 10-24 screws saved from something. I pays to save everything you possibly can!
 
Nice work, @Weldo
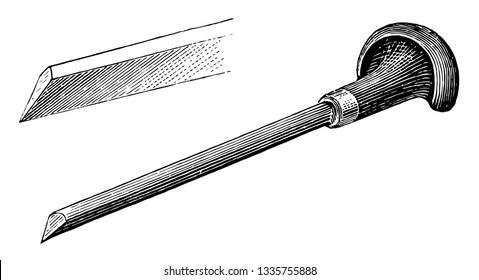
For engraving, this is the tool you need. I only know it as a graver. More control than a scribe.
lozenge-graver-which-used-engraving-260nw-1335755888.jpg
 
Did some more on my taper attachment!

Das partsensoaken!

View attachment 320766


They came out pretty good. That light surface rust that cast iron gets is where Evapo-Rust really shines. I brushed them all with a small brass wire brush while the parts were wet. I also threw in a few other things just for the heck of it. The wrenches could use more soak time but I'm done waiting!

View attachment 320767


I rinsed everything with water and dish soap then popped 'em in the oven at 180* til dry. About 30 minutes.

View attachment 320768


I experienced some light flash rust after the oven, mostly in cracks and dovetails. No problem, everything will get buffed with scotchbrite.

View attachment 320769


The short part on the right is scotchbrited and the longer one is not. The scotchbrite takes away the gold cast from the wire brush.

View attachment 320770


You can see the shaper lines on this part! To think shapers were used for mass production at one time! How far we've come! I wonder why this wasn't fly cut? Some other parts have fly cutter marks.

View attachment 320771


All the parts came out great! You can see fly cutter marks in the long bottom piece. The only real painting is on the angled bracket. I'd like to just brush it so I don't have to mask. The long narrow parts are machined both sides so no paint except for around the perimeter edge. Might not be worth the trouble...

View attachment 320772


Below is a picture of the only real concern I have for this restoration. You can only very faintly see the lines and numbers for the gauge. The upper part has degrees and the lower part says inches, per foot I assume. I can't really even see the zero mark on either piece.

View attachment 320773


Any ideas on how to fix this up? Maybe I can super carefully re-scribe the lines one at a time with a straight edge and carbide scriber?
That's interesting and weird that part has what looks like shaper marks. I looked it up and Atlas only made a 7" stroke and that piece looks longer than that. So Atlas used machines by other companies to make their machines? Could those marks be made by a horizontal mill? Sure do look uniform like a shaper doing a rough cut.
 
Did some more on my taper attachment!

(......clipped)
Any ideas on how to fix this up? Maybe I can super carefully re-scribe the lines one at a time with a straight edge and carbide scriber?
Along with the tool @pontiac428 suggested, check out Chris on Clickspring.
Everything you every wanted to know about engraving. The guy is amazing.
 
Along with the tool @pontiac428 suggested, check out Chris on Clickspring.
Everything you every wanted to know about engraving. The guy is amazing.
Dan, can you help me out here, is there a specific episode where he engraves? Clickspring has a lot of vids. I get lost and detoured everytime I get near that guys site. I needed up watching vids on bluing trays!
 
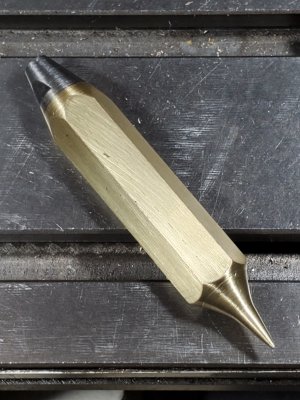
A quick project today. A bob to be on the end of a plumb line. This was more of a creative type task. Started out with a generic plan which quickly changed as the available material was a little different that I thought I had.
OK, for sure the pointer should be steel and replaceable, but since this is a 4-1/2 ounce version, that was skipped over. A proper bob does need a way to attached the string and be well centered. As you see that part is steel and the rest is brass. Not intending to fully polish it, just wanted a nice appearance. The flats are for a 3/8 wrench or a good adjustable wrench.20200413_204229.jpg
 
Dan, can you help me out here, is there a specific episode where he engraves? Clickspring has a lot of vids. I get lost and detoured everytime I get near that guys site. I needed up watching vids on bluing trays!
I believe he shows engraving mostly in his "The Antikythera Mechanism" series. There's (9) episodes I believe.

He also has another channel now that I forgot about. Clickspring Clips.
Here's a couple from there:
 
Back
Top