South Bend 9A gut check

Here's some of the stuff that's getting stowed. I'll be looking at other work spaces on the forum for getting more organized as a work space but for now it's just being used for convenient storage.
 

Attachments

  • IMG_3562.JPG
    IMG_3562.JPG
    143.8 KB · Views: 22
  • IMG_3569.JPG
    IMG_3569.JPG
    123.9 KB · Views: 20
more stuff...
 

Attachments

  • IMG_3565.JPG
    IMG_3565.JPG
    135.7 KB · Views: 24
  • IMG_3567.JPG
    IMG_3567.JPG
    126.8 KB · Views: 30
Plus a bunch of bits, reamers and taps. Spent many evenings cleaning up a box of tapered shank drill bits. All of this came out of an unheated garage so it was beginning to haze with rust but most everything cleaned up nicely with elbow grease.
I'll have to come up with some proper storage cabinetry for it all. Here's the bits in a shoe box with a nice coat of oil..
 

Attachments

  • IMG_3568.JPG
    IMG_3568.JPG
    54 KB · Views: 33
My current problem is getting the gear box mounting screws out of the gear box. Tried using an 18V makita impact driver but no luck. They won't budge. I would usually try heat but that doesn't seem to be an option here. Anyone have any suggestions on getting these machine screws to break free? Any help will be appreciated.
Thanks again.
 
Last edited:
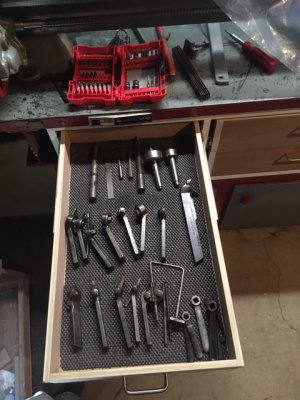
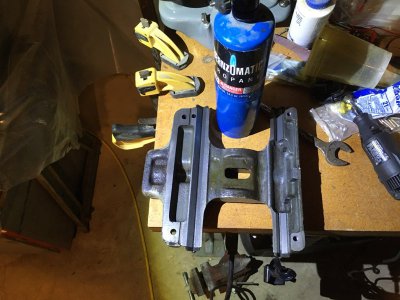
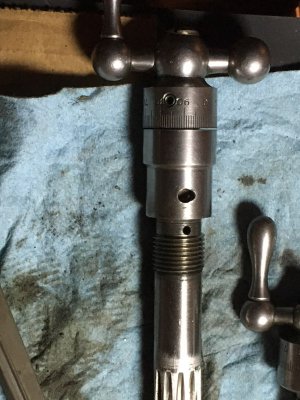
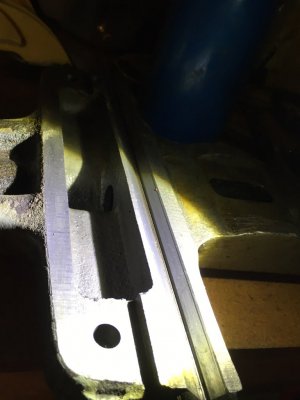
Your usual go-to should help. Remember, those are taper pins holding the shafts in place, so they only come out and go in on one direction. If either side gets peened over, they become harder to remove. With heat, go slow and heat (it doesn't have to be much) the whole casting. Make sure the casting is solidly supported, and a good whack in the right direction should get it going on a pin punch. I was very worried about breaking my casting, but ultimately had to resort to heat with a 3lb hammer. Do not miss and hit the casting.

joe
 
Thanks for the reply Joe.

My description of the problem may have been muddled.
Actually, what I'm getting hung up on are the three mounting screws that attach the gear box to the lathe bed. The screws are located on the top of the lathe bed next to the HS and screw into the top of the gear box attaching it to the lathe bed. They take a flat head screwdriver and my Impact driver won't budge any of them.
 
Ah. Use something to lift against the gear box, then, as the weight of the box compounds the problem. You might need to soak it for a few days in break-free juice like PB Blaster. WD-40 is small potatoes when breaking something loose that has been locked in place for decades. If you need a good home made juice and you have some automatic transmission fluid and acetone, mix a small amount of 50%/50% (the shelf life of the mixture is poor), then fill the holes above the screw heads and let it soak through. Just remember, paint and acetone don't mix well. It is nearly as effective as Krill oil.

joe
 
And by lift, not lifting the whole thing. Maybe 20lbs of lift. The intent is to reduce the weight of the gear box on the threads. Once the screws have soaked for a few days, use a hand held impact screw driver (make sure it is set to loosen and not tighten), and a few good whacks with a hammer should break it. Once it starts turning, it becomes a little difficult to hold it up while screws are removed. A second pair of hands is always helpful.

joe
 
Another update...

Had battles with the saddle. The cross feed collar was a real stubborn P.I.A. to unscrew with the pin wrench. Things were said, things were done. The collar gave way and the screw is now out on the bench for cleaning/inspecting. The cross feed collar's pin hole was already wallered out from what I guess is a previous disassembly. I've added to it as it was a real grunt with heat to get it to break free and unscrew. I'm thinking of using 'Never Seize' when reassembling here.


There is a gap between handle and dial of the cross feed. The resto book is saying to add a shim washer. I'm guessing most are using shim stock to make a washer out of? It's what I plan to do unless there is a simpler alternative.

A similar amount of wear can be found on the saddle ways as there was on the bed ways. At least it looks consistent along the length.

Hope everyone is staying safe and healthy!
 

Attachments

  • IMG_3579.jpg
    IMG_3579.jpg
    90.4 KB · Views: 15
  • IMG_3580.jpg
    IMG_3580.jpg
    109.2 KB · Views: 14
  • IMG_3581.jpg
    IMG_3581.jpg
    94.4 KB · Views: 14
  • IMG_3586.jpg
    IMG_3586.jpg
    80.2 KB · Views: 16
My plan is to get the saddle ship shape and reassembled and move on to the spindle. I'll feel much better attacking the three gear box mounting screws with my newly arrived impact drive and hammer with the head stock removed and out of harms way.
 
Back
Top