Straddle knurler build, no mill required (we hope!)

Small flurry of activity. In the morning made a shoulder washer. Managed to hit 0.2498" with a target of 0.2495" A little snugger, but it fits nicely in the reamed hole. Shoulder came out a little thinner that I wanted, because I forgot I needed to clean up the parted workpiece. It's 0.037" so it is still ok. Drilled out the hole with a #14 and #13 drill. Unfortunately, a #13 is not quite big enough to pass a 10-32 screw. I used the stubby drills in the lathe. After a couple of tries and fitting the bushing to the pieces, I finally managed to get the length ok. I have mounted a dial indicator on my lathe, but it fouls with the compound when I set it at 6 degrees. I used the 6 degree setting so I would get 0.1 mill in Y for every 1 mill in the compound. Made it a lot easier to sneak up on the diameter. But the compund postion required I move and reset the indicator a lot more than I would have liked. It would be better to get a 2" travel indicator. Lunch came and I had to do some errands with my wife.

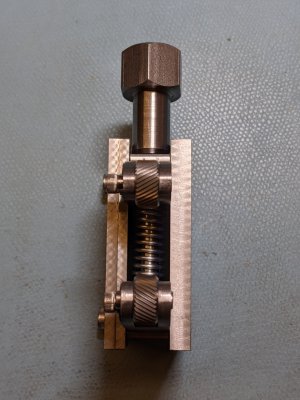
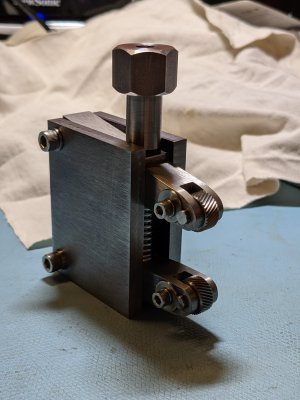
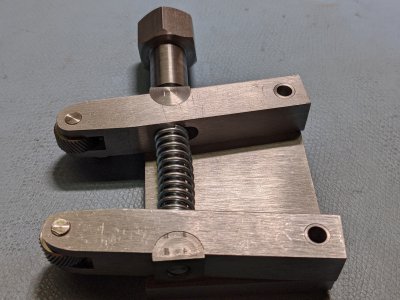
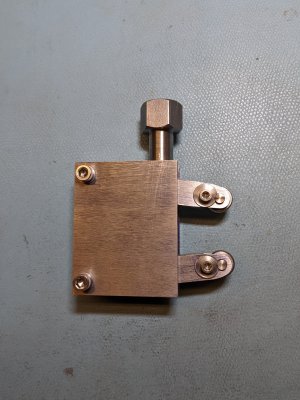
When we came back, my order from McMaster had arrived. Got a handful of stubby drills, some spiral point taps, and a #12 stubby drill. The #12 drill makes a hole just big enough for a 10-32 to make it through. So I immediately drilled out the bore of the shoulder washer. Then I made the second shoulder washer. I didn't quite make the second one as nice as the first. I really was trying for 0.2498 again, but I was satisfied with 0.2495, which was what Mikey specified in his plans. Was psyched that the pins were done, so I switched to the mill and tapped the 10-32 holes. At this point, I really wanted to see more of this assembled. Found a spring, the delrin washer I turned, the nut I made, and all the other pieces and assembled it. Naturally the first time I put it together it was sort of backwards. Took it apart again and reassembled it the right way.
PXL_20210615_010550774.jpgPXL_20210615_010610456.jpgPXL_20210615_010731107.jpgPXL_20210615_011040253.jpgPXL_20210615_014117839.jpg
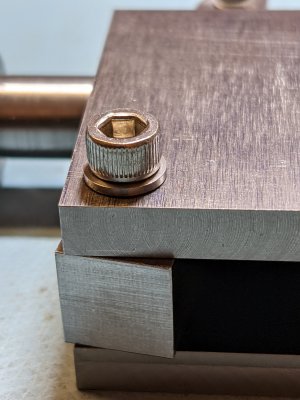
I need to make the internal plate spacers and to drawfile the plates slightly. When the 10-32 screws are fully tightened the arms are tight. I don't like the spring I got, I need to get something with thinner wire, as I get coil bind. Also for the nut, I think I drilled out too many of the threads. I could make another one later. I run out of threads at larger openings. Looking at the last picture I think the bottom shoulder pin is not quite long enough. The head is thicker, so I could make the body a little bit longer. Will have to grind a new HSS tool to do it. There's lots of clean up on this to do, polish it, shorten the bottom knurler pin so it looks like the top on, and just make it look a little nicer. Not unhappy with it, more amazed that I've gotten this far.

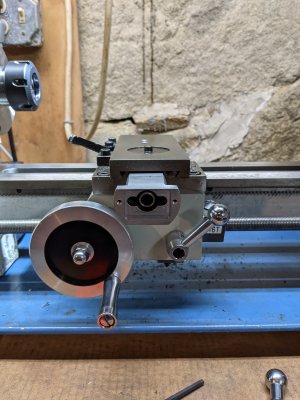
Was looking at my lathe as how to mount this. I think I will make a plinth, for a rear mount. My mini-lathe does not have any t-slots. So, I will have to disassemble the cross-slide to look underneath it to find a safe place to drill and tap the cross-slide.
 
Found a chunk of 6061 2"x2.5"x6" that I bought a while back, that could serve for the plinth. I think I will make a separate location feature for it, by bolting on a piece of steel. Initially I was going to mill in the feature to the plinth, but thought to myself, the edge needs to be relatively thin, (0.125") what if I drop this thing, if it bent, it would be ruined. So for me, it makes sense to just make a separate piece that could be replaced.

Measured the spindle height and found it to be 56.75mm from the top of the cross slide. I'm not positive that is the exact number, but it is close. Found a 60 degree point that I had turned and a lathe tool height gauge and found the gauge was set at 57mm and the point was about 0.25mm below the edge. No wonder some of my tools weren't cutting right, they were too high.

Curiously, the right spacer height for the knurler is close to an inch. So the rough maximum height of the plinth should be about 2.5" + 1" or 3.5 inches. That's a sturdy chunk of metal. More exactly, the plate is 2.490" high, or 63.26mm. The 1/2 height is 31.63mm. The spacer height is then 25.12 mm which brings the center height to 56.75mm. I think for the final setup to mark the holes, I will use the point, which I cut from O-1 and scribe a line to get the correct height. Not yet sure how it will help, but one needs all the indicators one can get. After pulling the cross slide and taking some dimensions, the next machining thing that needs to be done is to cut and square the plinth. Initially I thought I had 2"x3" stock, but it is only 2x2.5.

Don't think it matters, as the limit is the cross-slide and the compound. Cross-slide is 65.2mm wide or just a little over 2.5". Pulled the cross-slide. Got the screw out, then loosened the gibs and pulled the cross-slide out the back. There's a hidden spring clip which prevented me from separating the front casting from the screw. I vaguely remember it from the first time. Of course, I didn't remember the magic trick, but I just rotated the whole casting and screw and I was able to fully remove the screw from the nut.
PXL_20210615_185130451.jpgPXL_20210615_193729376.jpgPXL_20210615_194114427.jpg
I'd like to make the plinth relatively big, but the adjustment screws for the cross-slide are in the way. Have to mill a notch so as not to prevent access. (Or only do the adjustments when the plinth is not installed.) The thinnest part of the casting is 9.48 mm. Think I can just drill through it as long as I stay out of the dovetail area. When not in use I can plug the holes. The 2"x2.5" piece will work out fine.

To the drawing board. Need to sketch up a couple of ideas.
 
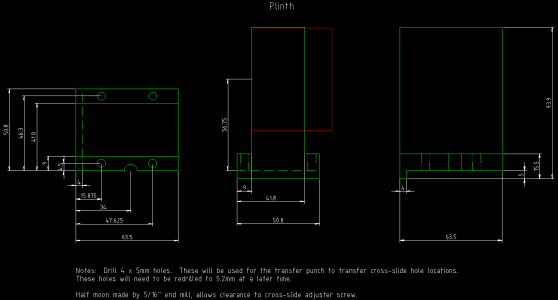
Have two ideas, one is a plinth that is 63.5 x 50.8 x 93.9 mm that I can make out of 2"x3" 6061, or a more svelte one that is about 40 x 50.8 x 93.9 mm out of 7075. Since the 7075 is a remnant, and the piece is 41.275 x 95.25 x 346, I can saw off a piece of 7075 and be close in dimension. I was planning to have a 9mm wide flange that is 10.5mm thick to bolt through to the cross-slide. This was assuming 5mm or 10-32 screws for the hold down. @mikey's plan uses a single pair of screws to hold down the plinth and a pair to hold the knurler to the plinth. Since the use is for a mini-lathe rather than a Sherline, the plinth needs to be significantly taller.

Should I use 2 or 4 screws for the plinth hold down? Thicker or thinner plinth? Seems like the plinth in the plans is roughly 1" thick.
Attached is a drawing for the wider plinth. I decided against a separate piece for registration, in favor for a built-in edge as the expected weight will be under 2kg. The edge is planned to be 4mm wide and 5mm deep. The green is the part whereas the red shows where the knurler plate would mount. Drawing is not complete, yet. Comments? I'm really weak in this area, so I'd appreciate any feedback. Is including a dxf file helpful?

I did put a comment in the drawing that the holes should be 5mm in diameter, rather than the usual 5.2mm or 5.5mm. This is to accomodate a 5mm transfer punch, so I can mark the cross-slide. The 94mm height of the plinth and the offset of the hole of 4.5mm from the plinth body means I cannot clamp and drill the plinth and cross-slide together. I will have to drill the plinth from the bottom, then clamp the plinth to the cross slide, and use the transfer punch on the cross-slide. I can redrill the holes in the plinth larger if necessary. If there is an easier (and better) way, it would be good to know.
knurler_plinth.png
 

Attachments

  • knurler_plinth.dxf
    56.2 KB · Views: 2
  • wider_plinth.pdf
    39.8 KB · Views: 1
Last edited:
Well, I picked something. Who knows if it is the right choice, but it is a choice. Going with the smaller piece of 7075. Spent all day yesterday sawing it. Really, it took my saw 6 hours to cut. Yes, there is something wrong with the saw. I have a solution for it but that isn't for this thread.

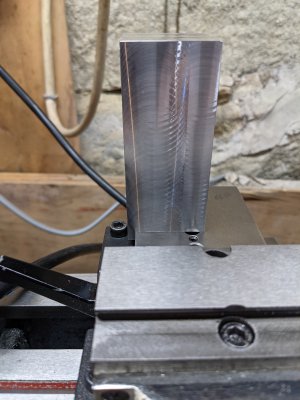
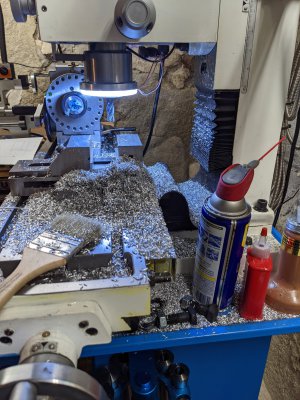
Today I spent some time squaring the block and making the locating feature. I had cut the piece too large on the slowest saw in the East, so I had to pay for it by machining a lot of metal. Used a fly cutter and had to stop and vacuum up the chips 3 times. Chips went everywhere. Spent a lot of time on my feet and seem to be paying for it tonight.

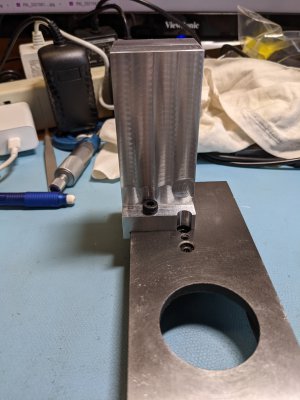
So far, this is what I have.
PXL_20210618_205850642.jpg
On the lathe it clears the carriage lock nicely. I will slot the corner so it fully goes to the edge, but won't do that until most of the machining is done. The end mill is pretty sharp and square, but will run a slitting blade in the corner to guarantee the registration.
PXL_20210618_205734890.jpg
Tomorrow I'll work on hogging out the metal to form the mounting flanges.
 
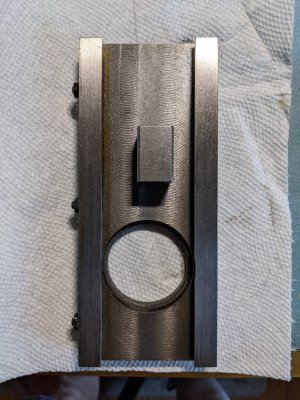
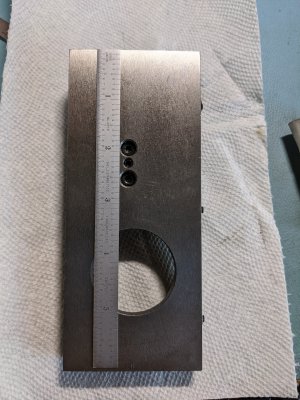
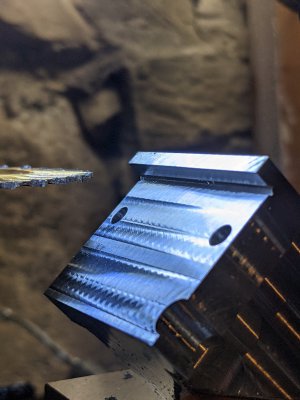
The plinth is almost done. I really didn't think I would be able to accurately drill the holes in the cross-slide well enough. As it turns out I'm 0.008" off from the edge. That's because I can slip in an 0.008" shim between the registration edge and the plinth. So I will redrill the plinth holes from a 5mm hole to a 5.5mm hole. That should be just enough. Save for mounting the knurler and drilling out the two holes the plinth is pretty much complete. Cut a slot to allow the fit up right into the corner with my slitting saw. Also made some chips. It was good.
PXL_20210619_170848434.jpgPXL_20210619_185858981.jpgPXL_20210619_204027405.jpg
Still thinking on how to get the knurler at the correct height. To help, I bought a 6" digital height gauge. At least I will be able to measure the spindle height to 0.001", which is an order of magnitude better than I can eyeball. The fitting exercise is sure to be really fiddly. I think that's it for today.
 
Put a scribe in the chuck. Move the carriage to just where you get a mark on the plinth. Move the cross feed to make a line.

Measure and mark the center of the knurler between the arm pivots.

Line up and mount.
 
Put a scribe in the chuck. Move the carriage to just where you get a mark on the plinth. Move the cross feed to make a line.

Measure and mark the center of the knurler between the arm pivots.

Line up and mount.
It took a while for what you said to sink in. Yesterday, I said to myself - yeah right, just line them up - that is the hard part.

Today, I drilled out the mounting holes a little bigger and made sure the reference edge did align with no gap. That worked. Then I mounted the plinth up again and made the scribe line. I used a scriber point with a tungsten carbide tip. The diameter was 1/8" and I just stuck it in an 1/8" collet. Have to say I went in too deep, but it did do what I needed to do. I deburred it with a stone and it was ok. Then I mounted the knurler body in the mill vise, found the center and used the same scriber tip to make a fine line in the steel. With the fine adjust on the mill, it made a "just right" fine line. I still couldn't figure out how to line the two up, so I stopped for lunch.

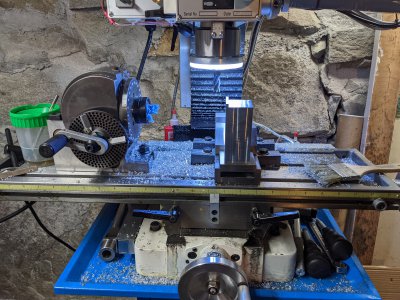
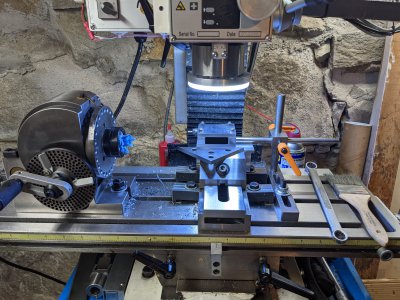
Once fortified, it was pretty easy to figure out what to do. Installed the plinth in the mill vise. Find the center of the scribed line with the point of the scriber. I used a magnifier to line it up. I zeroed the DRO and locked the X axis. Then I lifted the head up a little over an inch and put the knurler assembly on the plinth. I used a 45 degree angle plate edge to make sure the knurler body was vertical. I moved the body until the scribe line on the knurler aligned with both the scribe point and the knurler was up against the edge of the plinth. That was relatively easy. I used a stop on the knurler body in the x-axis.
PXL_20210620_180108499.jpg
Now I am trying to figure out how on earth to clamp this in place. I think something (maybe a lot of things) is (are) going to have to move - and cause everything to have to be re-indicated and setup again. I don't mind that, but even with all that, I am struggling with how to clamp it in place. Even my clamping kit bars seem to be far too short for this set up. What do most of you do when you seem stuck?

I could make some clamp arms, I have some 3/4 x 5/8 low carbon bar. Not sure how to make the teeth that are in the edge, but it's possible. Still wondering how to get a clamp in the region of the stop, there doesn't seem to be room for a stud, because my vise hold downs extend a bit away from the vise. Is there an easy or obvious thing to do that I have missed? The vise slot is curved near the end, so I can't quite re-locate the vise clamps that are in the middle slot to the slot closest to the operator. If I could do that, then I could get in a stud for the hold down clamp relatively near the part. The vise hold downs have square edges. I could clip the 90 degree corners to 45 degrees, but when I looked at it last, it didn't seem it would buy me enough room to clamp in both the bottom and top tee-slots, the vise is just a tiny bit too short for that. Are these vises machinable? Or are they too hard? Is it possible to extend the vise slots a bit?
 
I did it in two steps. Line up on the knurler, drill mounting holes on whatever spacing you want, and repeat on the plinth.

I did disassemble the knurler and drill the plates together. Plates got a clearance hole, plinth got threaded. Then make the spacers and bolt it up. I ended up needing to adjust the spacer length. Start long and bring them in slowly till you get the fit you want. It's easier to deflect the plates with the screws than I expected.
Thanks. That's a lot easier!

Did you use aluminum or steel spacers? Would it matter? I have some 1144 in 3/8", but my aluminum stock is a bit larger diameter. When you say start long, how much wider than the arms is a good start point? 0.010"? More?
 
Aluminum works fine, but whatever you have will get it done. I would go more like 0.05 long, just so you have room to cut down.
 
Back
Top