Trash to Treasure? Modifying a 3" Vise-shaped-object into a Shaper vise

Day 3, a little more grinding!

I only had a little more than an hour today, but I did some grinding milling and grinding.

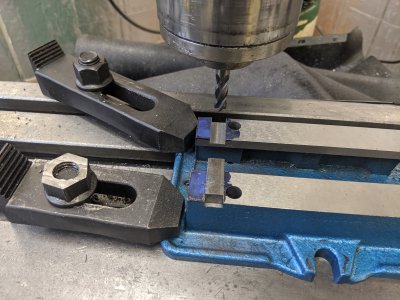
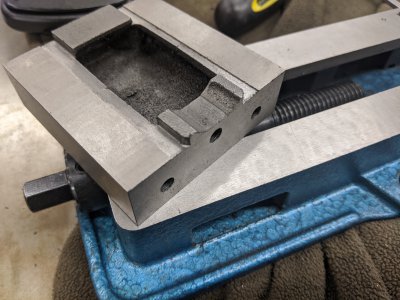
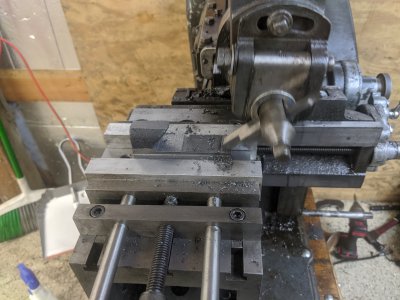
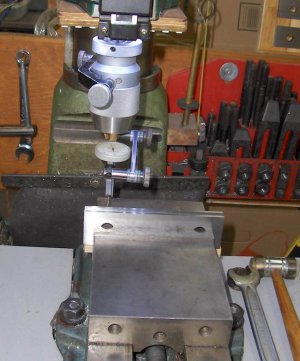
I ground started by fly cutting, but I ended up having to switch to a carbide face mill since the speed was too much for the bolt I used to hold down the center:
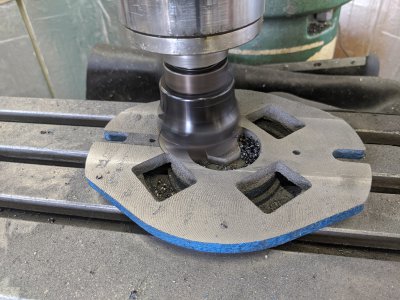
IMG_20200619_152930.jpg

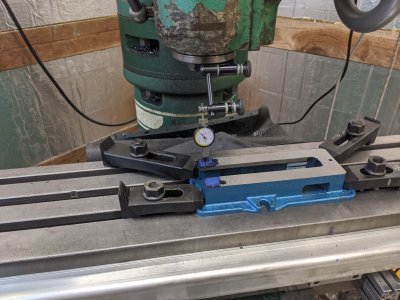
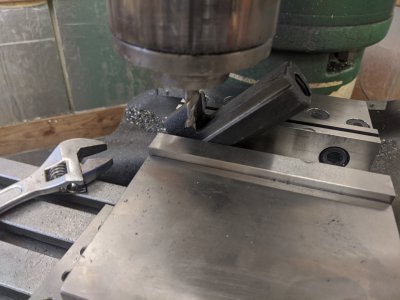
I then straightened it more or less to the T slots and milled the mounting holes inward about 1/4" on each side to make it fit my table.
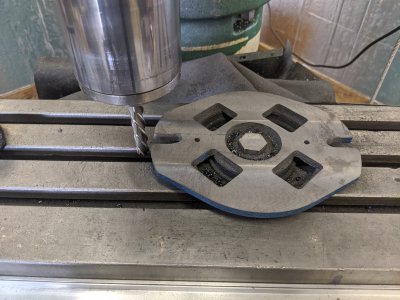
IMG_20200619_154322.jpg

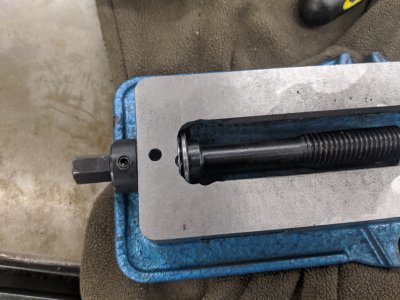
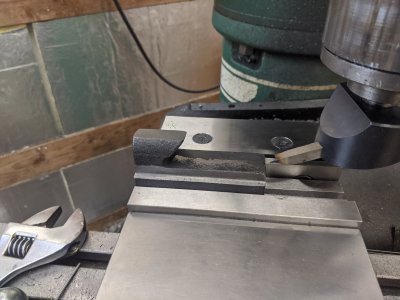
I cleaned up an area for the bolt as well. I ended up grinding a thick washer down a bit flat on one side to mount.
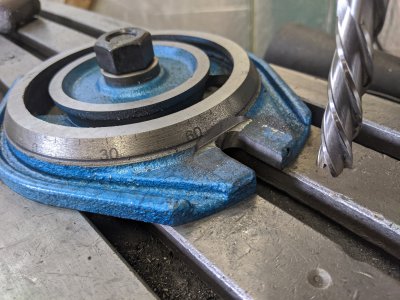
IMG_20200619_154839.jpg
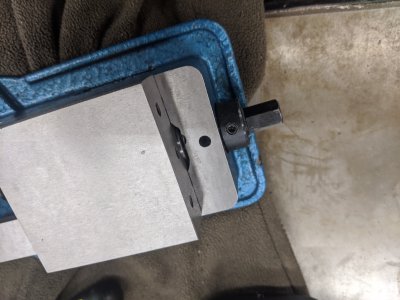
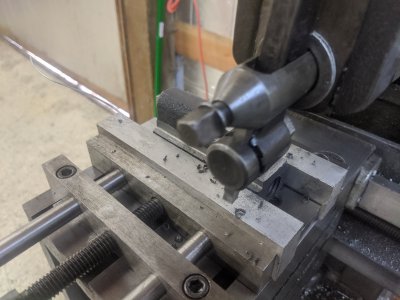
I popped the pivot back in and remounted!
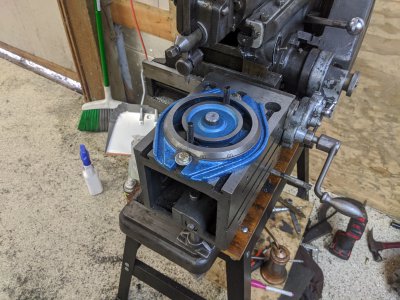
IMG_20200619_163029.jpg

I ground the base and reground the bottom of the body of the vise while I was at it. The base itself is down to .853, so I saved more than .300!

The body went down another 2-3 thou as I wanted to clean up the grind and it came out much better!

Next I want to mill the keyway in the body, which should be its last Op on that part.

I'm hoping I can get another 3-400 thou out of the vise jaws as well to minimize the height.
 
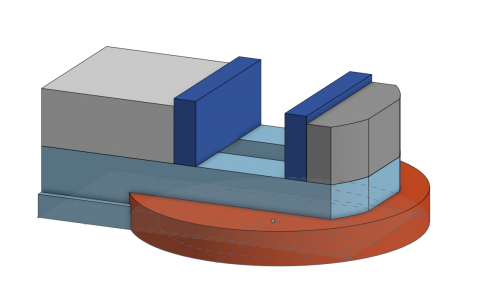
Is it going to be rigid enough on that swivel base? And will be base stand up to the forces? They're only designed for moderate side loads, with most of the work being done with a rotary cutting tool. The shaper produces huge linear forces by comparison. Worst case is having the vise oriented with jaws parallel to the cross feed: the entire section under the fixed jaw is unsupported until you reach the bolts at the middle. The T bolts are fixed into the base which you've removed a fair bit of meat from. I reckon you may end up cracking the swivel base, or at very least ending up with the vise lifting at the front as the cuts start. My mechanical spidey sense is tingling! Hehe.

But... I have an idea! There's a better way to do this. What's the max swing on your lathe? Or even better, do you have a rotary table for your mill?
 
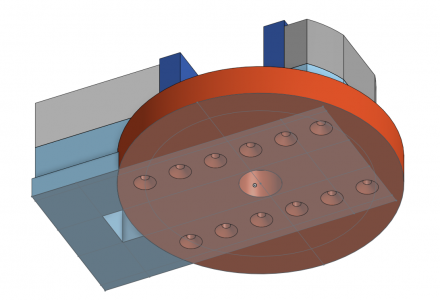
vise1.PNG

vise2.PNG

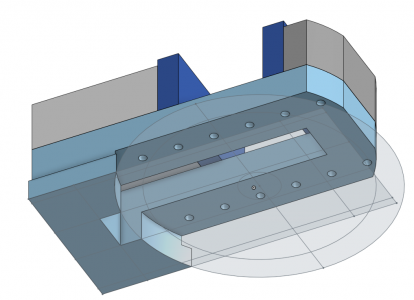
vise3.PNG

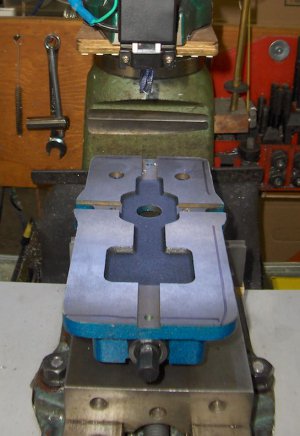
If you've got the means, it's entirely possible to modify the vise so it has it own swivel base. you'll lose some strength out of it, of course, but put it right back in with a hefty round steel base. I reckon a 15mm steel plate ought to be plenty. It's not drawn to scale, and not even completely throught through, but I think it's a workable idea. Few things I've already thought up since drawing it, like radius the cutout in the vise base to avoid the sharp corner, zig-zag the bolts etc. Needs a lot of finessing. Gains you the entire height of the swivel base and a ton of rigidity, though! The advatanges being that the entire base of the vise rests on the table, and you can clamp it under the fixed jaw where it's most needed. You'd probably want to knock up a special set of toe clamps to suit too.
 
That's an interesting idea!

As far as, will this be strong enough: we will see :) it is for a small shaper, which people often use the small drill press vises with success. I believe this to still be stronger than one of those.

Frankly, this is a cheap experiment more than anything.

As far as lathe swing: 16" :). My rotary table is pretty small though.
 
Day 4: Trying to put it back together...

I'd decided that I didn't want to worry about taking another ~.400 off the jaws until I needed it, so I figured I should start putting things back together. I had looked at the moving jaw and realized the 'top' of it was pretty thin anyway, so I don't think I could take anymore off the top.

I managed to mill the relief in the moving jaw, and grind what the factory 'forgot', the bottom and under-jaw faces of both. However, troubles started when I went to put the nut back in/back together. I don't have much pictures from the end where things were worst, but I'll describe it at the end :)
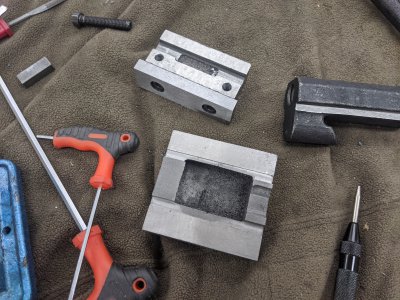
But first, I had to cut the slot for the fixed jaw keys. It was pretty simple, I mounted it to the table and indicated on the inside of the bed, probably the only straight surface on this whole darn thing.
IMG_20200620_133438.jpg
The key was a little larger than 3/8", so a 3/8" endmill did the trick. I ended up bolting the jaw on losely at first, then using blue/a scratching tool to figure out what the min/max area was for the key, and lined it up off of that.
IMG_20200620_134656.jpg

My first mistake of the day.... I realized that the moving jaw (which used to get hung up on that back) actually wouldn't move at all since now it was flat back here. I went to town with a carbide die grinder, and made a mess of it. I opted to give up about here.
IMG_20200620_145417.jpg

Here you can see I ground/relief cut the bottom of the moving jaw, this went easy enough!
IMG_20200620_145422.jpg


After further inspection, I realized I could just use a file on the back of the fixed jaw (see the picture after this one!) and get back quite a bit more range. I ended up at about 2 1/4" jaw opening.

IMG_20200620_145735.jpg

This is the filing, I rounded over those edges to fit into the back of the channel.

IMG_20200620_145740.jpg


I set the nut up in the mill and cut the 45 degree angle. I had to take A LOT of material, as it wasn't even close to 45 degrees. This is probably the beginning of my downfall :)
IMG_20200620_145932.jpg

I also realized (or thought I had), that the cast face here was hitting the bottom of the jaw. So I tried to remove it with the fly cutter. The fly cutter had a hell of a time, so I moved onto plan b.

IMG_20200620_151013.jpg

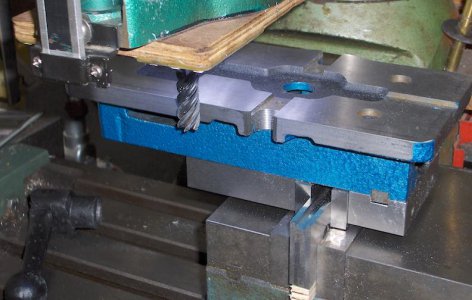
Plan B was making the shaper do it! It seemed to do an acceptable job right up until I snapped the bit! I wasn't taking deep cuts, but this cast iron ended up having some horribly hard spots that got the shaper mad. in the end, this part didn't go terribly.
IMG_20200620_152448.jpg

For the inside, I switched to a 60 degree 3/8" HSS bit I had. It isn't a great geometry for the shaper but seemed to do the job anyway.
IMG_20200620_155308.jpg


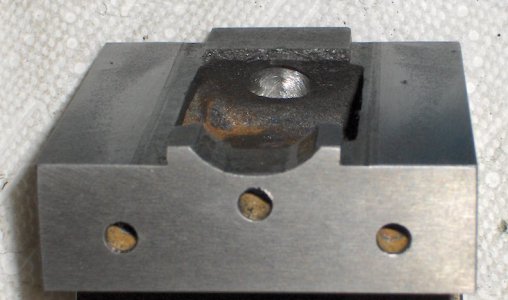
Then, I decided to assemble it again and made some bad discoveries... I discovered that the moving jaw was actually hitting the TOP of the 45 degree angle, so I took ~200 thou off of that, which allowed it to lay flat. It then seemed to be assembled, but the moving jaw was VERY lose, even after putting the set screw in the back.

I think I now have 2 issues: The 45 degree angle doesn't go 'low enough', so I have to use an endmill to reset and make that go all the way down to the base. Second, I've reduced the length of the 45 degree section by quite a bit, so the set screw is no longer long enough. Hopefully between the two I can get this working. I've chosen to not take any more out of the jaws, so I'm basically at the 'end' of this project.

I'm still hopeful I'll get a usable vise out of this, even if it is a little taller than I'd like. I still think it'll clamp correctly, so I'm going to continue on the project.
 
Erich -
After reading your initial post, I'd ordered one of these for myself - just the right size for my DynaMyte DM2400 CNC mill! I already have a 3 incher, but it has some problems of its own. And for the price, I figgered I had little to lose. It arrived yesterday, after I'd posted.

I've disassembled it and found pretty much the same issues you did. I don't have a surface grinder, so I'll just file and stone where necessary. Interesting thing about the half-nut. I'd assumed from your posts and from the (5") vise refurb I did years ago that the half-ball would be more-or less shiny and well finished steel. Wrong! It's rough-as-a-corn-cob cast iron. Both the flat and the curved faces are terrible. Durn!

I filed the angled face of the nut flat, as I'd done with my previous refurb. I also filed the "flat" face of the half-ball. The "spherical" face has me in a quandry. I tried sanding on it with foam-basked sandpaper, and got some of the worst spikes and burrs off. But going further will be a real chore. PS - I did find a nice way to hold the ball while sanding - use a longish round bar super-magnet for a handle.

I see three possible paths forward:
1. Do the best I can on the half-ball and its pocket, and call it good. The real angle-lock (sliding) function happens at the flat faces anyway. This is the easiest solution, and might well be OK.

2. Disassemble my existing 3 incher, check the quality of the half-ball, and swap if it's better. Then sell the old vise on Craigslist (with full disclosure). I do plan to sell the old one in any case.

3. Look for a bearing ball of the right diameter, mount it somehow, and sand/grind off one side. I started by looked through my collection of bearing balls, but found nothing of the right size. The problem is how to acquire a ~½" diameter ball. Guess I could post a help request on the forum.

PS to everybody else - I didn't bother to take any pictures ... Erich's are so good. I'll continue to report on progress.
 
Wow, you're braver than I am! I wouldn't get into this without a surface grinder!

I am planning on polishing the flat side of the ball and calling it done. I might belt sand the rounded part a little, but it's about as good as it can get without being able to get inside the socket side.

I WILL say I'm surprised to find my jaws were square. If I were to do this again, I might do Lo-fis idea of a rotary base and just grind the bed - unground sections of the jaws, and clean up the nut. I think my attempt to make this so much shorter is just leading to a painful experience :)

Erich -
After reading your initial post, I'd ordered one of these for myself - just the right size for my DynaMyte DM2400 CNC mill! I already have a 3 incher, but it has some problems of its own. And for the price, I figgered I had little to lose. It arrived yesterday, after I'd posted.

I've disassembled it and found pretty much the same issues you did. I don't have a surface grinder, so I'll just file and stone where necessary. Interesting thing about the half-nut. I'd assumed from your posts and from the (5") vise refurb I did years ago that the half-ball would be more-or less shiny and well finished steel. Wrong! It's rough-as-a-corn-cob cast iron. Both the flat and the curved faces are terrible. Durn!

I filed the angled face of the nut flat, as I'd done with my previous refurb. I also filed the "flat" face of the half-ball. The "spherical" face has me in a quandry. I tried sanding on it with foam-basked sandpaper, and got some of the worst spikes and burrs off. But going further will be a real chore. PS - I did find a nice way to hold the ball while sanding - use a longish round bar super-magnet for a handle.

I see three possible paths forward:
1. Do the best I can on the half-ball and its pocket, and call it good. The real angle-lock (sliding) function happens at the flat faces anyway. This is the easiest solution, and might well be OK.

2. Disassemble my existing 3 incher, check the quality of the half-ball, and swap if it's better. Then sell the old vise on Craigslist (with full disclosure). I do plan to sell the old one in any case.

3. Look for a bearing ball of the right diameter, mount it somehow, and sand/grind off one side. I started by looked through my collection of bearing balls, but found nothing of the right size. The problem is how to acquire a ~½" diameter ball. Guess I could post a help request on the forum.

PS to everybody else - I didn't bother to take any pictures ... Erich's are so good. I'll continue to report on progress.
Bsuracw
 
Today I completed the "fluff 'n buff," plus a couple of modifications, on my 3" vise.
Wow, you're braver than I am! I wouldn't get into this without a surface grinder!
It should be mentioned that my goals and ErichKeane's weren't exactly the same. His goal was to build a precision tool for a shaper. My goal was to produce a functional vise for my little bitty DM2400 CNC mill. So I was pretty much satified with getting it cleaned up, smoothing out the rough (milled but not ground) surfaces, and adding some alignment features (described below).

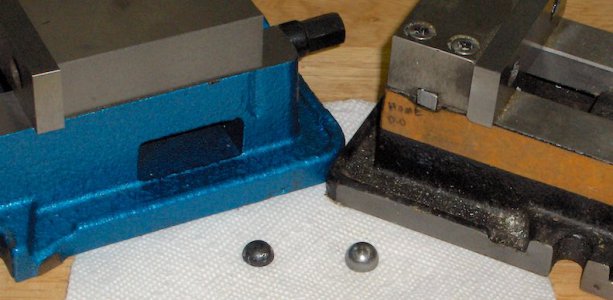
In an earlier post I'd mentioned that the half-ball in the new vise was really rough. One of my possible plans for dealing with this was to see if the ball in my existing 3" vise might be better and worth swapping out. I was lucky! The photos below show the half-balls from the two vises. The "old" one (from the black vise) is nicely smooth.
kHPIM0072.jpg
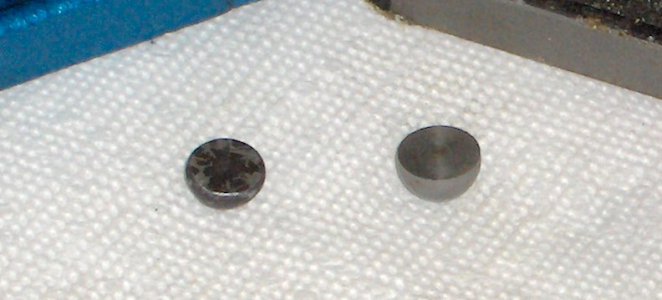
The photo also illustrates the main problem I had with the old vise. Note that the screws used to attach the fixed jaw come in from the top. Turns out they're so close to the jaw face screws that they interfere with each other! The fixed jaw attachment screws in the new vise come in from below, and are well clear of the jaw face screws. The photo below shows the back sides of old and new half-balls. Note that the "new" one is still somewhat rough, even after having been sanded. The "old" half-ball is machined and smooth.
kHPIM0074.jpg

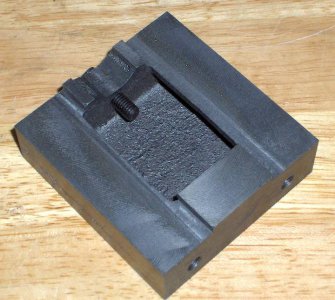
The next photo shows the smoothing I did on the underside of the moving jaw. Not only was the surface just milled and not ground, but as you can see from the contours of the partially filed (lighter) areas, it was uneven in other ways. I got each side as flat as I could with a fine file. Didn't worry about the relative heights or alignment of the two sides. My main purpose was take away the high spots and smooth the movement of the jaw. The next photo shows the half-ball pocket in the jaw after I'd ground it with a small stone mounted on my Dremel. As I'd mentioned in a previous post, my goal was to make the sand-rough "as cast" surface at least somewhat smooth to the touch. It feels a lot smoother than it looks in the photo.
kHPIM0076.jpg
kHPIM0078.jpg

After breaking the sharp edges of the cast parts (using tha manly art of draw filing), I cleaned everything up, gave it a wipe with an oily rag, and reassembled.

I then added alignment features to the base of the vise, parallel and perpendicular to the fixed jaw face. These fearures (also visible on the old vise) allow me to align the vise on my mill table with just a machinist's square or a parallel held against the front edge of the table. Using this technique I can get squareness to within .001" or so. Plenty good for CNC work! For one thing, I always mill the perimeter of the part anyway, so the alignment of the raw stock is seldom critical. For another, I generally work with plastic of various flavors on small CNC mill. And plastic is well known for its tendency to move, shrink/swell, and distort during and after machining. So an inaccuracy of a thou or two will disappear in the noise.

To begin with, I clamped a stack of my tallest parallels in my big mill vise and indicated the fixed-jaw side to within .0005. Then I closed the new vise down on the parallels, which were now the reference surface. Because this arrangemet was just a bit flimsy, I took very light cuts (.005 to .010) on the periphery of the new vise, first with a rougher, then with a finishing end mill.
kHPIM0080.jpg
kHPIM0082.jpg

Finally, because I'd milled away the ears around the mounting slot on one side of the vise, I deepened the slot a bit.
kHPIM0083.jpg
 
That is great! Thanks for sharing! I am just going to try to polish by my ball to see if it is good enough, but that replacement looks way better :) If Kurt didn't have a $25 minimum, I'd just buy a replacement.

I went out to mess with it a bit last night and was able to tighten the set screw in the back a little further that cured my jaw problem! So, I think I'm done other than whatever I can fix with the 1/2 ball!
 
That half-ball is really a piece of work, isn't it. Perhaps you can find a ball bearing ball with a diameter between 11.5mm and 12.5mm (which includes ½") and proceed as I'd planned as one of my paths forward. Soft solder it to a length of brass or steel pipe, grind away half of it, then unsolder and hot-wipe the solder residue off. The solder should hold the ball well enough. I was planning to do the grinding by hand, quenching frequently to prevent the solder melting. You might well be able to do it on your surface grinder ... much finer control!
 
Back
Top