What's a good technique to use telescoping inside bore gages?

When you bring the telescoping gauge to the mic, be sure the rounded ends of the gauge are in the center of the anvil/spindle contact surfaces and that the handle of the gauge is perpendicular to the axis of the spindle of the mic.

It is mostly a matter of practice.
 
The mic part is as you say, just practice. It's a little fiddly, but ok.

Think the telescoping gauge part requires a lot more finesse on my part. Not there yet. Haven't found the just right zone between too darned tight and oops the gauge slipped open. To make it harder, the feel isn't the same for the different telescope gauges.

Practice, practice, practice. When you get tired of that, practice some more... ad infinitum...
 
I've been boring for the better part of 30 years, probably more, and I still practice my technique before doing a precision bore. These gauges rely on feel more than anything else and that is attained through practice. Focus on developing the right tension on the locking knob - just snug, not overly tight. Practice - it will come.
 
How is this done? Soft metal insert and slurry?

I'm no expert but yes, lapping tool & lapping compound. I use tools made by Acro. They come in a pretty good range & you can buy replacement barrels which is important if you use progressive grits or wear them out. https://www.traverscanada.com/barrel-blind-hole-lap-sets/p/112581/

I have seen plans to make lapping tools but there are quite a few kind of pita machining elements to get right - the radial slits, the tapered internal seats on either end, the steel holder, matching tapered adjustment screw... For the price they are good value IMO.

Just know that lapping is excruciatingly slow. Ideally your bore should be within 0.001" with good finish or you will be there a long time. 2-3 though is asking a lot of the lap, coarse compound, potential for deviation etc.

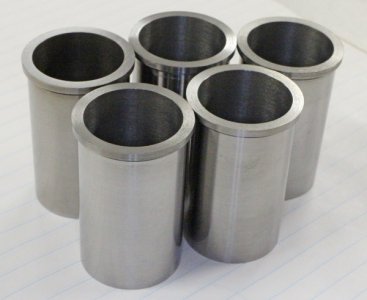
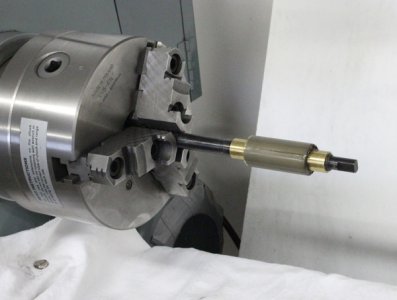
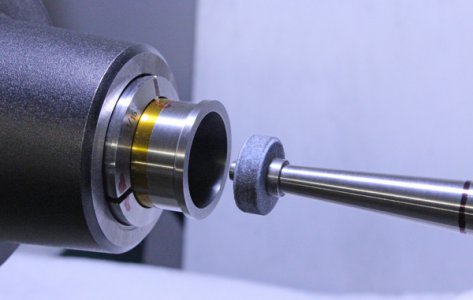
Some pics of my cast iron model engine liners, nominally 24mm bore, within .0001-0.002" of one another. There are some hours there. Actually because I had multiples to do I gave up on turning > lapping. I have a tool post grinder & used that to get them all withing a thou before lapping. That's a different subject (and expense LOL).
 

Attachments

  • IMG_2605_edited-1.jpg
    IMG_2605_edited-1.jpg
    103.7 KB · Views: 10
  • IMG_2622_edited-1.jpg
    IMG_2622_edited-1.jpg
    95.4 KB · Views: 8
  • IMG_2635_edited-1.jpg
    IMG_2635_edited-1.jpg
    83.8 KB · Views: 10
Last edited:
Just hold your nostrils, look sideways & click BUY haha
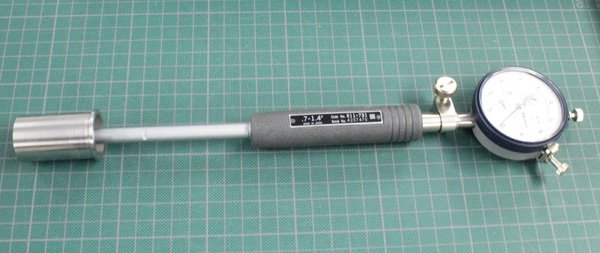
These are very useful because you can calibrate them to a bore standard, or for that matter to the jaws of your micrometer if that is how you are measuring a shaft that has to fit. The downside (aside from $$) is they are a bit longish but they also come in different handle lengths. A typical kit comes with a range of anvils to span a bore range. If you already have a decient dial, you may be able to swap it in & save mony by buying the gage only vs inclusive of the dial. Just know the dial holder is kind of specific to the nominal dial OD, plunger length range etc. And the usual caveat, beware of bad clones or wannabees. Some are OK & some are junk just like micrometer or caliper shopping.
 

Attachments

  • IMG_2625_edited-1.jpg
    IMG_2625_edited-1.jpg
    91.9 KB · Views: 10
  • IMG_2626_edited-1.jpg
    IMG_2626_edited-1.jpg
    121.4 KB · Views: 10
...
I measured the 0.7598 and 0.7501 ring bore gauges 12 times each. (At my desk.) You know, to practice. Mean measurement was 0.749825 and 0.750192. Standard deviation was 0.0000866 and 0.000108. ...

I think that within 0.001" is the best I could do with telescoping gauges. But, this first measurement is off by nearly 0.01". Are you sure the gauge isn't sticking?
 
I think that within 0.001" is the best I could do with telescoping gauges. But, this first measurement is off by nearly 0.01". Are you sure the gauge isn't sticking?
Typo. NOT 0.7598. @ericc The two ring gauges are 0.7498" and 0.7501". My measurements (when I knew what the answer would be) were within +/-0.0001 mostly. But that's because I threw out the bad ones (because I knew what the true value was). In "real life" I won't know the answer and will have to accept what I measure.

What is the proper etiquette? Should I edit the original post, with the correct value or just have this?
 
Two cents worth. De-burr the edge of a bore before measuring if using verynears.
 
Two cents worth. De-burr the edge of a bore before measuring if using verynears.
Good point. Know I sometimes overlook this. So I de-burred. In this case, it didn't matter, but it's good general practice. Never know when a sharp edge is going to bite!
 
That makes a lot of difference, thanks. This doesn't look so bad at all. If you are having a hard time with unintentional bias, you could try measuring one of your own bores, and just looking at standard deviation. I'd be happy with mostly within 0.0001". I was just working on boring a piece to fit. I used a micrometer and a telescoping gauge and hit it right on. Then, just to see how things were going, I tested with a junk dial caliper, possibly from Harbor Freight. It was off by 0.015"! I pulled out an end mill, and it turned out the calipers were right on. The micrometer was off by 0.015". How could I have nailed the bore? Of course, ID and OD measurements were with the same instrument. Somehow, the calibration was off by a huge amount, but I was able to screw the micrometer back to zero. I don't know how it was off by so much. The dial caliper can easily be off by that much if a chip gets caught in the rack.
 
Back
Top