2013 POTD Thread Archive

Oh yea, did that :) After I decided to keep the bike, the first thing I did was take a safety course where I did my M2 test, as being a first time rider I needed as much training as possible. That was back in 2010 and now riding is like second nature. Also found that my driving even changed in the car, much better situational awareness, and when I go for the full M test (probably next year) I will do it at the same place that gives you a 2 day training session then road tests you.
 
I just finished adding a 50 mm micrometer to the end stop of my lathe carriage.It proved
well done,but uncovered that the dial of the carriage handle is slipping.I will have to
take care.It is friction type.May be adjusting friction leaf spring.I'll post pictures when ready.
Ariscats. :angry:
 
Man, there is nothing that gets the creative juices going than getting in shop and doing something. I've been in a bit of a funk the last week or so, probably stress at work. When I get home I'm just too tired to think clearly and it's been bugging me when I walk through my shop on the way to my home office. I want to do something but being tired and seeing the mess in the shop, I'm just don't know where to start.

Today I finally got off my lazy butt and cleaned up the shop. I fixed the shelves I couldn't store anything on due to needing reinforcement. That lead to putting stuff away on the extra space the shelves gave me. Which lead to getting my new tool boxes setup where the clutter use to be. Tools are now in the new tool boxes. There's more space on the benches. I upgraded my laptop and the PC for CNC router to the latest version of Ubuntu Linux.

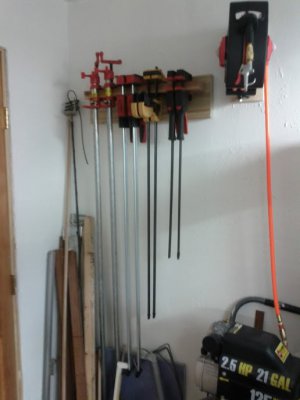
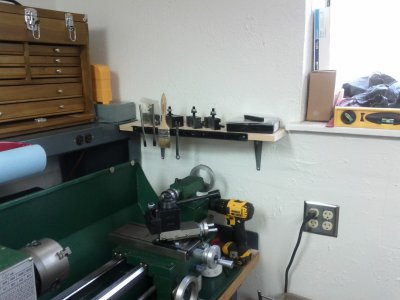
Tomorrow I'll put up the racks to store my wood working clamps. The shelf over the lathe for the tool holders will be next. I'll get the CNC router cleared off. I may even start that R8 and TTS tool racks I've been contemplating for the CNC mill.


-Freeman
 
Today's projects, and the day is still young. I know these are simple projects and the more skilled among us may think they are a bit inane. They help keep the shop organized and make it a place I want to spend time in.

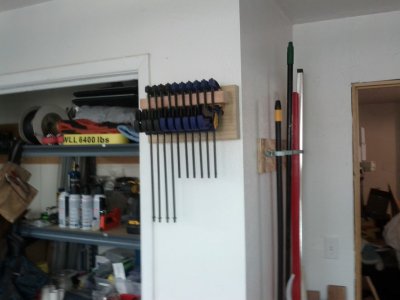
Wall racks for my clamps. The short ones I use quite often, so they get placed out where I can get them easily. The long clamps go behind the door.

IMG_20130505_125256.jpg
IMG_20130505_121043.jpg

A small shelf for the lathe tools.

IMG_20130505_133358.jpg

IMG_20130505_125256.jpg IMG_20130505_121043.jpg IMG_20130505_133358.jpg
 
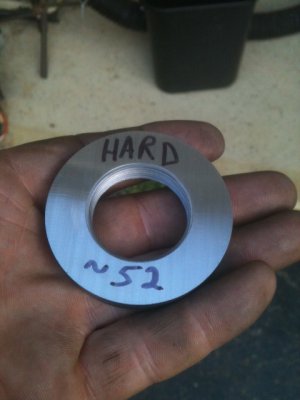
Well, it wasn't really a project. I usually spend Sunday in the shop experimenting with something new. Today, I heat treated this collar nut (which I made a couple weeks ago for some grinder hubs) and surface ground it using the Kool Mist. It's the first time I've heat treated something with the expectation of a specific Rockwell hardness and also the first time I had a chance to use the Kool Mist with the surface grinder. Wow! What a pleasant surprise. Parts usually get a little hot and get slight surface burns but not with the mist. The part stayed absolutely cold the whole time and the side effect was that it came out dead-on flat. 0.3250" wide all the way around. Usually, a part this size will vary about 2 ten thous due to heat expansion from the time you start until the last pass. The part does not call for this level of precision but, I was just messing around. It's 1045 and fully treated. That's a pretty fast-pass grind as you can see. The reflection is the underside of the garage eaves and the clouds in the sky.


Ray

Hard and Ground.JPG
 
Not really a project, but progress in my ongoing quest to clean and organize my overstuffed shop. Today I grabbed a box of maybe 100 misfit drill bits (mainly all Chicago Latrobe) and measured then sorted and put them in the right little slots in my drill bit index.
 
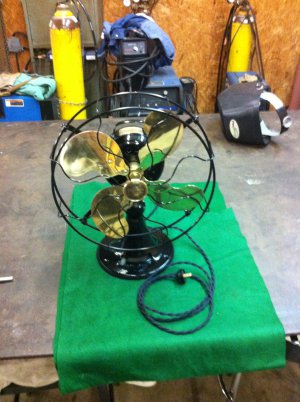
Finished this fan for a friend who just found out his cancer is in remission!!!!! He asked if I would fix a couple for him so here is the first one. These are time consuming for sure.

David

church grill 036.jpg
 
Collected the steel for my CNC T&C cutter grinder - first pieces ! Yeah !!!
And the servo motor mounts (first 4) and the MPGs (first 6) and the mill mounts (4).

Only had to go 5 times, ordered these last monday.
(Well, its about 200 kg and 100 pieces, but still ..)

And then washed the crud off (half) the steel, and have it drying now.
Tomorrow I get to make a mount to test the servo I have had waiting 3 months ..
And next the first of 11 of 25-32 mm ballscrews..

Happy and advancing..
 
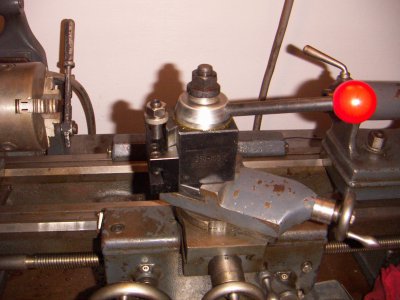
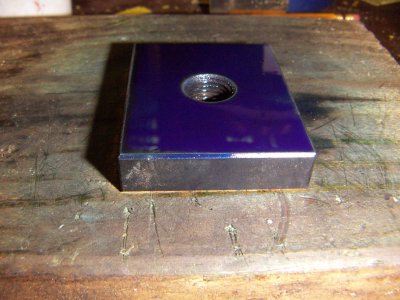
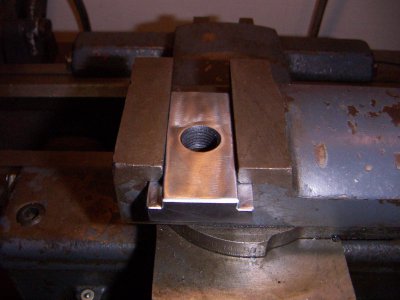
A few things that needed to get done for awhile now, but have been put off due other more pressing things around the farm and shop was 1) my 9" Logan needed it's QC TP bottom tee nut which slides into the compound machined to shape. Being an imported 100 series QC, the part comes rather generic and has to be milled to suit it's final fit sizing.

I hadn't realized just how hard this material was before I started and as I am rather lacking in the better/higher quality end mill arena, had to make do and take small bites at a time. But I prevailed.

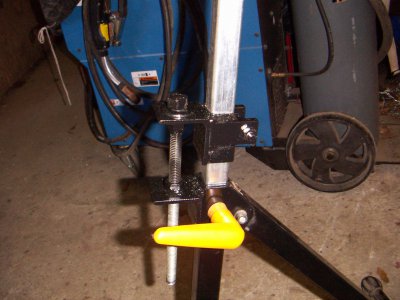
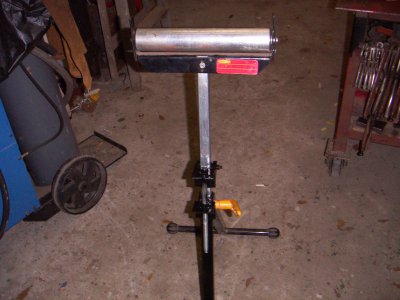
The other task 2) was making a few of my cheapie roller saw stand supports a tad more user friendly than having to keep tugging and tapping, checking for a level fit on the saw table etc etc etc.

Adding an adjusting screw tethered to the lower portion and having the upper adjustable legs bracket to allow the leg to raise to about the needed height, tighten that bracket to squeeze on the upper leg and then use the all-thread bolt to raise or lower the upper leg as needed to get a flat fit on the saws vice table.

I made two sets and will leave the other 4 stands as is for now.

3) I did get my 13" SB bolted to the concrete using all thread studs epoxied in 3/4" holes and the lather trued and leveled. That in itself was much of a relief for my mind. Hard to do some things when your doing them by yourself.

I made myself a 'toe jack' for lifting and helping with the SB's move into the machine room and will add this in a thread by itself later on.
PICT0041.JPG PICT0045.JPG PICT0049.JPG PICT0050.JPG PICT0051.JPG
 
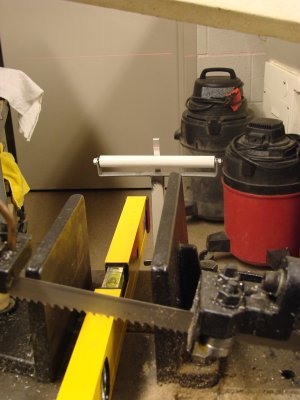
Great support post adjuster. I'm going to copy it. Here's an addition I made to a short roller stand for my horizontal band saw. I got a cheap laser level from Harbor Freight. On the support post I added a little aluminum pivoting flange. The laser is 1cm off the level's base, so I scribed a line on the flange 1cm above the roller. Flip up the flange, put the level on the band saw's table, raise the stand until the laser line crosses the scribed line, flip down the flange, and the roller is perfectly level with the table. This is necessary because of an uneven floor.

Ken


Laser Level Target.jpg

Laser Level Target.jpg
 
Back
Top