2013 POTD Thread Archive

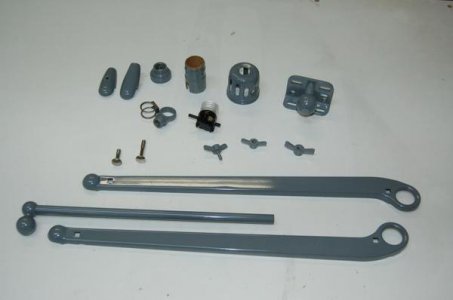
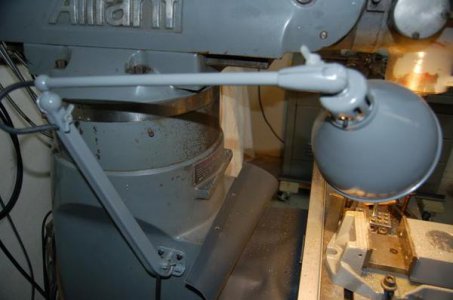
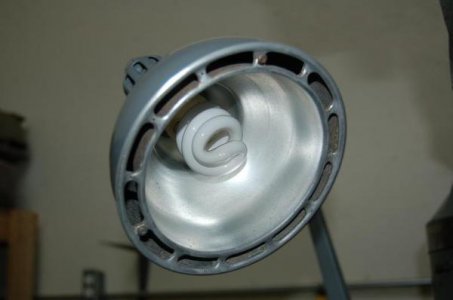
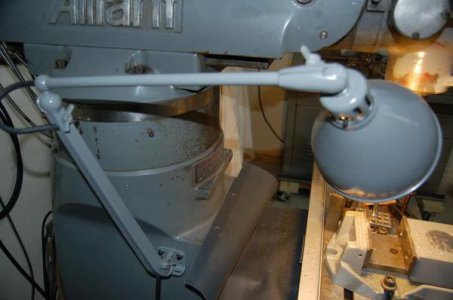
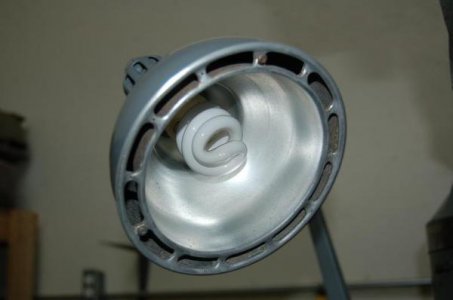
Besides working on the combine I painted the parts for my other mill light, the reflector is still in the media blast cabinet.

MillLights1.jpg

It looks just like the other one I've already done.
They looked like crap before I started on them.

MillLights2.jpg
MillLights3.jpg

If I get ambitious I'll put it together with the new wire and socket switch ass'y tonight.
I do miss the light from the other side........

MillLights1.jpg

MillLights2.jpg

MillLights3.jpg
 
Well with the little time I had this week I Mounted my new (to me) jet 15 on the wood stand it came with. (will be building a new one) and as part of that I added two 5" wheels to the back of my shop crane/engine hoist. I mounted them so they point straight back from the bottom horizotal tube. now I can fold it and just leen it back to roll it around. the 3" wheels do not roll so good. And since it goes back to the shed when not in use these make my life much easier.

- - - Updated - - -

Just seen your post I said a prayer for you and your family. Sorry to hear of your loss.
Mark


My dad passed away a few weeks ago and my niece wanted to have some ashes. I made this of 1.5" brass, its about 4" tall. I started with making the threads with tap and die's 1" 8tpi, then screwed it together and turned it. I was just going for whatever I could easily turn with the tooling in the holders.

View attachment 62275View attachment 62272View attachment 62273
 
Been retrofitting my 1987 new-to-me CNC 10X50 Millport Knee Mill the last couple weeks with Ajax controller/electronics and Centroid software. Tonight I got the auto way oiler connected and run time configured and under software protection (disables controls if oil tank is empty/low) control. I also got the flood coolant pump connected and under software control. Video of the coolant running in the Home CNC section here: http://www.hobby-machinist.com/showthread.php/18381-1987-Millport-1630-CNC-Ajax-AllinOneDC-retrofit
 
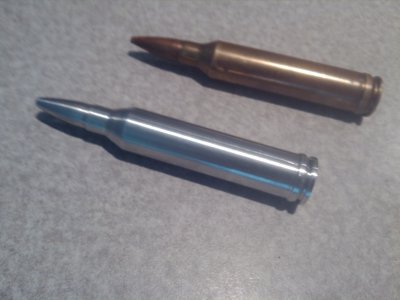
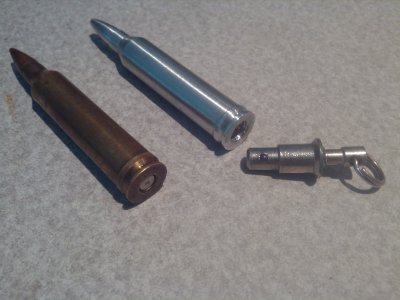
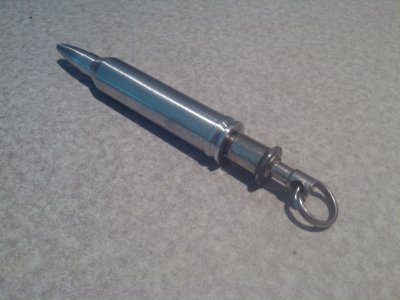
A little "lathe therapy" in the form of a new 7mm Rem Mag keyring:

2013-10-23_15-04-12_62.jpg
2013-10-23_15-06-13_412.jpg
2013-10-23_15-06-31_882.jpg

2013-10-23_15-06-13_412.jpg 2013-10-23_15-04-12_62.jpg 2013-10-23_15-06-31_882.jpg
 
Started some soft jaws for the chuck on my lathe, will finish them tomorrow.

frankie
 
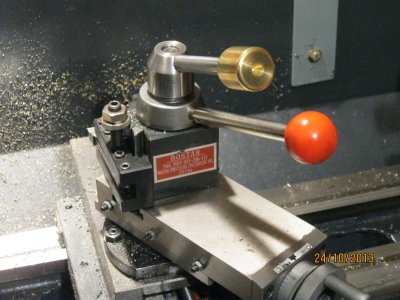
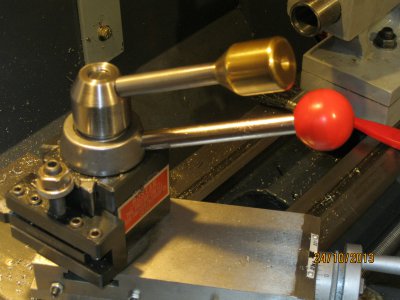
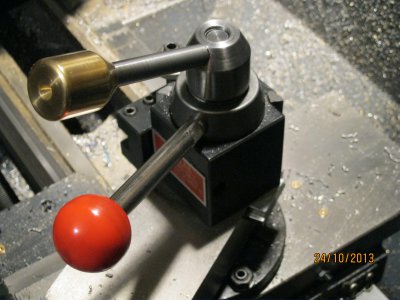
It only seemed like the "natural" thing to do, so I built myself a QCTP release lever. The lower nut portion is made from semi trailer brake cam shaft ( I am told and led to beleive that it is 4140 forged alloy )I currently have several hundred LBS of this 1 1/2" solid shaft , with an almost unending supply . The rod is made of run of the mill hot rolled round stock and the brass knob end was made from some 1.125" brass shaft that I caught one of my workmates as he was about to destroy a foot and a half shaft beating a bearing sensless. Needless to say it came home with me and I made him an appropriate size punch for the job at hand in return.

IMG_1019.JPG IMG_1020.JPG IMG_1021.JPG
 
I spent some quality time with the south bend today! First real long session with her, she ran for about 5 hours and the bearing caps never even got warm. This was the first time I really used the south bend since I restored it, all I got to say is it is a real joy to use. It just flat out works. I have said all along that I intend to use it as she was designed to be, it's not art or a museum piece, but as close to a brand new 1949 south bend heavy 10 as I can get I think. So I oiled her up and got to turning, todays project was to make a bunch of blanks for wood turning chisels that I make. I started with 3/8" square cold rolled steel. I turn 3" of the shank round, that way all a wood turner has to do when making a handle for them is drill a 3/8" hole in the handle and epoxy them in. So here's a few pics of the lathe running and making cuts and getting covered with chips and oil. I have re purposed the cart that I used when restoring the lathe to a tool cart for the mill and lathe, I can just pull it out when I need it and stash it between the mill and lathe when I'm done. Was a fun day. Here's some pics........

View attachment 62737View attachment 62740View attachment 62741

Greg,
That is a nice job on the rebuild of the Heavy 10.
Doing some woodturning also, I'm curious what kind of tools you are making, will they hold inserts or will you machine them for scrapers?
I have made some square and round insert type tools, come in real handy for roughing work.

Bailey
 
From my other thread:

http://www.hobby-machinist.com/show...king-style-aluminum-boxes?p=150984#post150984

Tried a little "proof of concept" today:


attachment.php


Didn't feel like big set-up, so I locked 2 pieces of 1/4" aluminum bar stock and
plowed thru with a 1/4" endmill at 1/4" depth, eyeballed the spacing.
A little cleanup with a file and a rubber hammer.... tight fit and you still see the joint detail.

I think I might have a winner!

Do a search for Boxmaker (freeware), it will give you a .pdf and dimensions per thickness of stock for any size box you key in.
I use it for my laser cutter on wood and plastic, neat little program.
 
On various occasions I do plumbing projects around the house and sheds, generally with PVC, CPVC, and sometimes copper pipe. I don't do it frequently enough to justify buying a bunch of specialized tools. But I do like to clean up the OD of the pipes after sawing to length - removing the "crumbs" makes it easier to get the pipe into the socket, as well as keeping the water cleaner, preventing clogged aerator screens, etc.

Rather than buying a bunch of different sized pipe bevelers. I've usually used a small wood plane to clean up the OD. Only trouble is, keeping the pipe aligned against the plane iron is hard on the thumb ... and incipient arthur-itis has been adding to the difficulty.

Today I made an adjustable stop to help locate the pipe on the plane when deburring.

I started by tapping a 1/4-20 hole in the sole of a small plane. Then I milled down one leg of a piece of 3" x 3" aluminum angle. This would be the face against which the pipe is held. The base got a guide strip down one edge and a slot slightly wider than 1/4" down the center line. The slot allows positioning the stop for various pipe sizes, up to 2" (nominal).
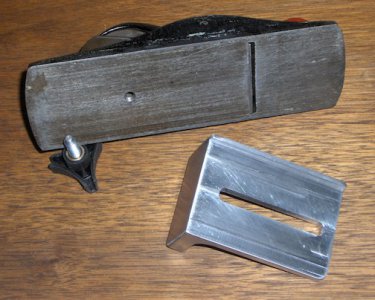
Parts.jpg

The guide plate is attached to the plane with a wing nut.
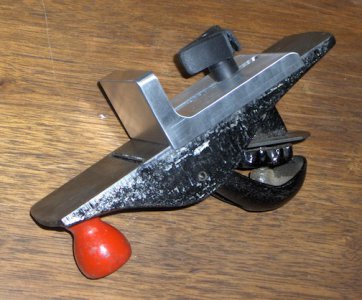
Assembly.jpg

To deburr a pipe, I adjust the stop, hold the pipe against the stop with one hand, and rotate the pipe with the other.
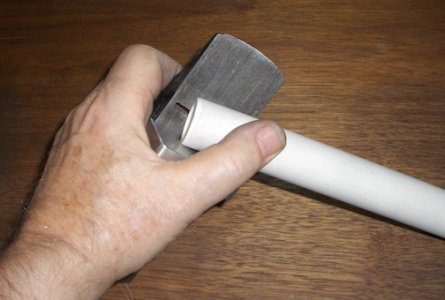
InUse.jpg

A swivel head deburring tool is handy for cleaning up the ID of the pipe.

InUse.jpg Parts.jpg Assembly.jpg
 
Back
Top