2014 POTD Thread Archive

If I understand your need for "math" correctly, I will share with you some math from the Dividing Head book by David Gingery that I have been reading - it will do me some good to exercise myself in this.

First, you know the pitch of the tap or hob that you will be using. You need to convert the pitch to distance from one tooth to another. So a tap with a 16 pitch has 1/16 or .0625" from one tooth to the next.

This needs to match the pitch of the worm wheel that you are making. So the "circular pitch" (C.P.) of your wheel is equal to the pitch of your tap. So in the example here, the wheel also will have a C.P. of .0625.

Diametrical pitch is calculated by: D.P. = 3.1416/C.P.

So, in our example, the wheel would have a D.P. of 3.1416/.0625 = 50.

Now you can start working on the size of that wheel because the outside diameter of you blank can be estimated by (N+2)/ D.P., where N is your choice of the number of teeth in the wheel. Play with this until you get a wheel "as big as the space will allow".

Then, more accurately, you can get the outside diameter of your blank by adding two "addendum" to the "pitch diameter".

Where the pitch diameter = N/D.P.
And addendum = 1/D.P.

So, the O.D. = (N/D.P.) + 2(1/D.P.)

The depth of your cut will be = (2.2/D.P.) + .002"

Okay, I hope that helps you


Bob
 
Hi Savarin,

Thanks for your comment and interest. I don't have much more to show but I did post a photo of my first gear ever. It's in this thread, on the same date as this reply.

Bob
 
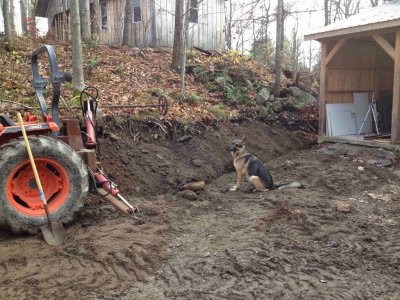
Trenched in a power line to the new shed for lights and plug ins. Quality control is checking it out and probably thinking if I had one of those there wouldn't be a safe chipmunk in the country.

IMG_1474.jpg

Greg

IMG_1474.jpg
 
thanks for the suggestions

I thought about a removable cover but considering where this will be mounted and the fact that LEDs can last a lifetime as long as you don't over-current or over-heat them I figured I would not likely need any service but that could be a V2 option. As for various LED configurations. I do a lot of Electronic systems design and looked at a number of different LED modules. There are many out there that can provide more volume of light that the one that I am making. I wanted to balance size with light output. I settled on a 1000mcd 50mA thru-hole mounted LED. I have 10 of them on order. I think they will provide more than enough volume of light and will fit in the small round space that I have. I'll hook them up on the bench and if I think they are not bright enough, I have enough room to double the quantity and there are also other LEDs with higher output.

As far as using some tint to the resin or something to defuse the light. You might want to consider a little experimenting with some spare single LEDs of the type you want to use. They come clear and with a shaped plastic case to focus the light. You might get the performance you want with filing the dome flat to let the light not be so focussed on one place. Or just lightly sanding the surface from clear to foggy with sand paper. Maybe a combination of methods and considering the formation you could get what you want.
 
That is a good idea [Cadillac STS]. The LEDs that I have selected in part because of their light output unfortunately don't have domes. As I have thought about what is important I think that there are two things that I dislike the most from the halogen lamp I am currently using and both are illustrated in the picture of the actual milling of the aluminium part in my first post.
1. Shadows. Half of the part is bright and the other half is darker and the tool and tool holder cast an even bigger shadow. The ring of LEDs will address this regardless of if they are diffused or not.
2. Specular highlights. This is the direct reflection of the lamp on the highly reflective surface of the part. This may not be a problem for many materials but it is a big deal with Aluminum. The more diffused the light source the less this will be a problem.

I am still going with a Resin Casting but my current plan is to go with a completely clear resin. I can then experiment with putting a diffuser in front of the lamp similar to what [hman] suggested. I can test with something simple like a piece of paper but could use a piece of plexiglass. I had a suggestion from a friend to use White Spray Paint from a distance to create a fine mist. Start with just a little and then keep adding until I get the effect I want.

The LEDs, power connector and on-off switch arrive today so I should have the electrical portion wired up this evening or tomorrow.

As far as using some tint to the resin or something to defuse the light. You might want to consider a little experimenting with some spare single LEDs of the type you want to use. They come clear and with a shaped plastic case to focus the light. You might get the performance you want with filing the dome flat to let the light not be so focussed on one place. Or just lightly sanding the surface from clear to foggy with sand paper. Maybe a combination of methods and considering the formation you could get what you want.
 
Had a go at making a long bolt in stainless today.
I have never tried to turn anything so tough before.
It was very difficult getting a good finish
The pressure required to get the knurls was pretty high and without the cam-jack knurler I dont think I could have done it but as it happens I think they came out perfect.
I used the lowest speed the lathe could go and used the parting tool to cut the channels after knurling a 15mm length.
The shaft is 5mm dia and 80mm long and the knurled end is 12mm dia. and I used the die holder in the tail stock and threaded again under low speed. After the difficulty with the turning the threading was quick and smooth.
bolt.jpg
I need another one but think I will just make the knurled ends as nuts and thread a bit of 5mm rod as an easier process.

bolt.jpg
 
For LEDs that are not domed fogging them with some fine sand paper can diffuse the light to a softer look and maybe avoid the shadows you don't want.
 
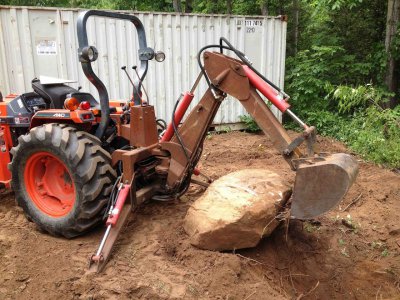
Thought I'd add a photo of the backhoe I built 10 or 12 years ago. Figured it might need some mods so never painted it as I was assembling it. Still no paint but rust is a finish too. Has more power than the tractor has weight, when it hits a rock trenching, the hoe doesn't slow down the tractor just skids back.

IMG_0043.jpg

Greg

IMG_0043.jpg
 
For LEDs that are not domed fogging them with some fine sand paper can diffuse the light to a softer look and maybe avoid the shadows you don't want.

Yes I was thinking of that as well. I figured if I lightly sand the surface of the Clear Cast then I can always polish out if sometime in the future I change my mind.

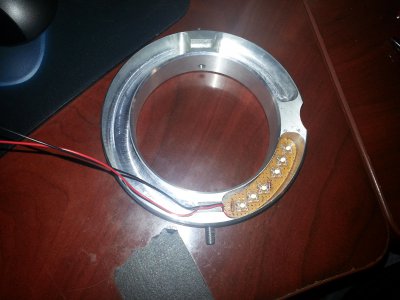
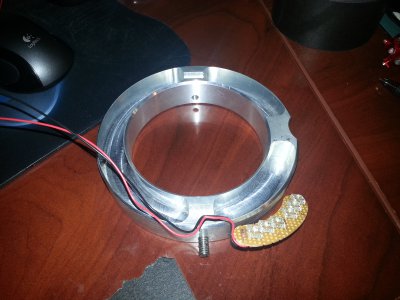
Built up one of the boards this evening. here are a couple of pics. 6 LEDs in the Small cavity and 12 in the large for a total of 24 LEDs. These 6 are quite bright. I think it will be a good idea to check the overall brightness on the Mill before I pour the Clear Cast in case I want to tone it down a bit. I have a two position Power Switch so I could have a Low and a High with half the LEDs off for the Low setting.
20141029_213208.jpg20141029_213144.jpg

20141029_213208.jpg 20141029_213144.jpg
 
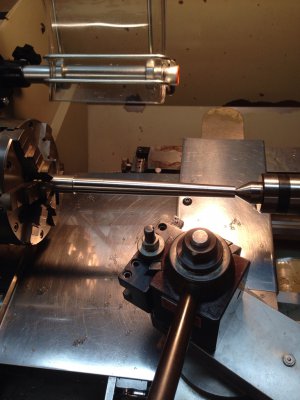
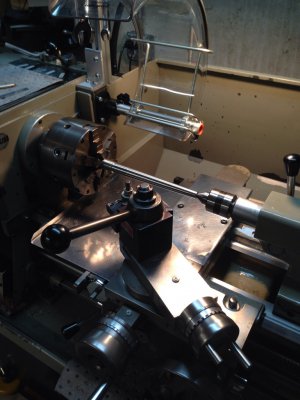
First time needing taper attachment. Doing a sample pc for a guy - 1 deg per side 7-1/2" long. 304 ss.
Wow that was some nasty stringy chips coming off then wrapping around thrashing . The angle i ran the tool at to clear the live center made the chip miss the chip breaker on the insert. Im going to make the guy his sample pc but he needs 200 pcs. Afraid me gonna have to call my friend w cnc's to do that many or Ill be turning cranks for a year of sundays and wear out my little lathe!!
ImageUploadedByTapatalk1414646106.960406.jpg
ImageUploadedByTapatalk1414646121.194384.jpg

ImageUploadedByTapatalk1414646106.960406.jpg ImageUploadedByTapatalk1414646121.194384.jpg
 
Back
Top