2014 POTD Thread Archive

Hi Friends,

This one is not very glamourous or precise but it got me out of a pickle. While replacing a shaft end encoder at work, I slightly cross threaded the threaded hole in the end of the shaft. I went back to the shop, looked but found no tap that would fix the threads. So I took the mounting bolt from the old encoder cut a slot in the middle of it (see picture) and screwed it in the shaft hole to repair the threads.

The edges at the bolt threads from my cut are sharp enough to repair the female threads in the shaft. However, this "tap" only lasts once or twice, it won't cut new threads and it won't work on badly damaged threads.

I had been using this trick for years with damaged pipe female pipe threads and odd ball female threads that a Grade 8 bolt would work instead of investing in an expensive "real" tap.

Happy Trails
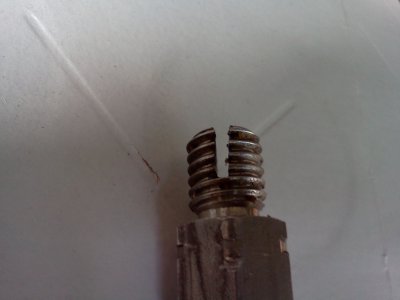
HOME MADE TAP.jpg
 
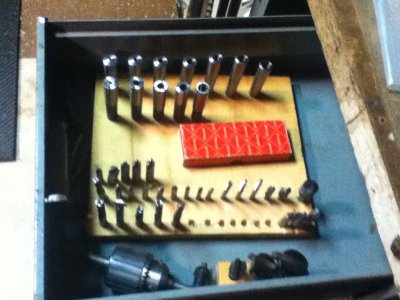
Made a collet and tooling holder for a drawer in the shop. Still need to add more holes.

photo (37).JPG

photo (37).JPG
 
Last edited by a moderator:
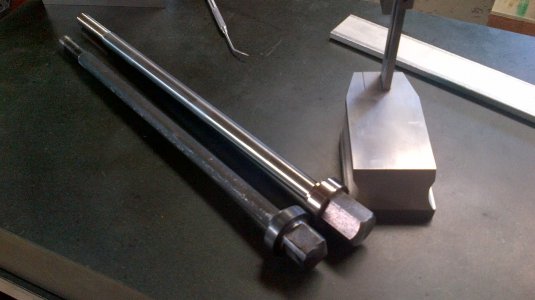
Squeezed out 3 hours of time to bang out a new drawbar for the CNC , it's a PITA when your trying to get a house ready to sell it cuts into your shop play time, anyways I'm sick of using a wrench for tool changes which has become a double pain since replacing the spindle motor in the CNC and now need 2 wrenches because I needed to remove the spindle lock to accommodate the new spindle motor.
I picked up a butterfly impact for tool changes but the original drawbar has a square head and I needed a hex for a socket, I'll use the impact as is for now and when time allows I'll do a full blown power drawbar.

IMG_00001216.jpg

IMG_00001216.jpg
 
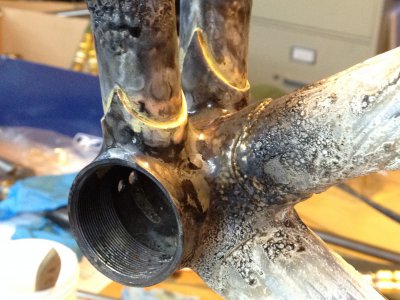
I'm working on a new commuter bicycle for me. One of the things I got done was to braze the chain stays into the bottom bracket this afternoon. Steel and bronze - this is prior to soaking off the flux.

14559911176_808a738a69_k.jpg

-Ryan

14559911176_808a738a69_k.jpg
 
UnobtainableScammellballjointremovers R us..........

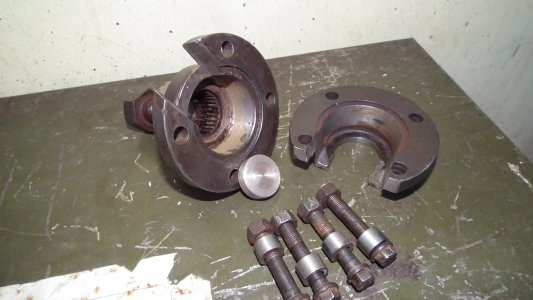
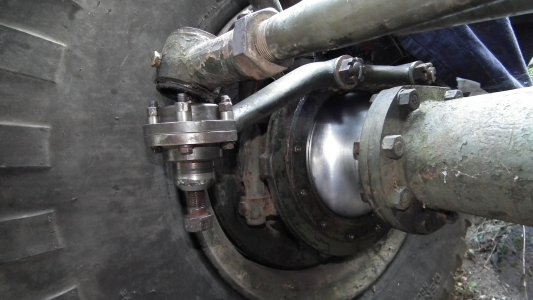
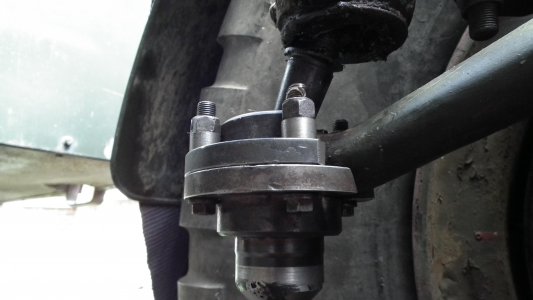
Large and stubborn steering ball joints had to come off to fit new rubbers, I knew a welded up extractor wouldn't hold up so after some frustration I spotted a couple of scrap drive shaft flanges. Modified them with my lathe and shaper and a little mig welding, with a ally button thread protector and the tool worked a treat....

DSCF3778.JPG

DSCF3773.JPG

DSCF3776.JPG

Yes my weld was so lumpy I just had to turn it down !

Bernard

DSCF3778.JPG DSCF3776.JPG DSCF3773.JPG
 
Last edited:
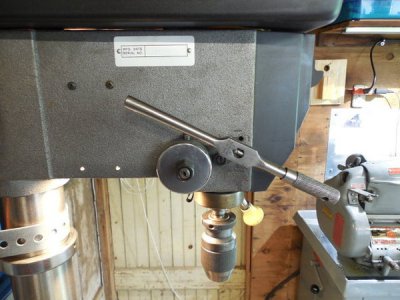
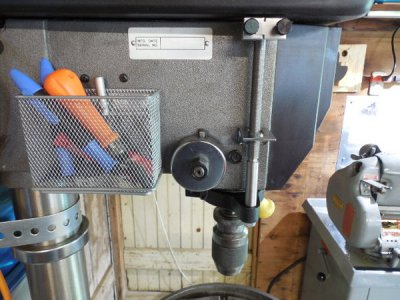
Attached a different quill stop to the HF drill press.

The HF drill press has been performing yeoman service in the shop for a few years now, but one thing that really bugged me about this tool was the quill stop. Instead of the typical nut-on-a-threaded-rod setup, it uses a pinch bolt and sleeve on the collar of the handle. It's not that intuitive to use and if you don't have the bolt really tight it slips.

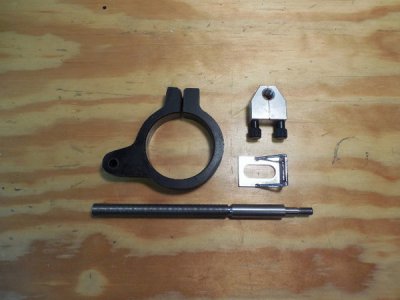
Grizzly has the same style of drill press with the quill stop I wanted, so I d/l'ed the manual for the parts numbers and ordered a quill clamp, bracket and spring-loaded split-nut. The threaded-rod on the Grizzly is metric and split nuts are very hard to find for this size, so this was a good excuse to try my hand at singe-point threading. It went reasonably well for my first attempt and I got a usable rod.

Here's the parts:

drill_stop_1.jpg

Tapping the holes for the bracket in the casting of the drill press. I didn't poke through the side into the internal cavity as it looked like I stayed inside the support webbing. Sometimes an educated guess is good enough. :bitingnails:

drill_stop_2.jpg

And here it is all assembled:

drill_stop_3.jpg

Seems to be working out well. I'm not using this setup for precision drilling, so you just move the quill down to where you want it and clip the clamp right above the bracket. It was a fun afternoon project.
 
Started to make a pair of 45[SUP]o[/SUP] vise jaws for a quick way of holding something in the mill. I really hate swinging the mill head and losing tram. While I'm at it, I'll probably make a 60[SUP]o[/SUP] set too. These will be reversible and can be flipped around. Anyhow, these are rough cut and the metal is 4150. It's HR now so I'll make the basic forms heat treat them to 55 RC grind them precisely and hopefully use them for the rest of my life.

Any ideas for other common angles?

Ray

View attachment 57902


I'm (slowly) working my way forward from the start of this delicious POTD thread . . . I see that someone raised the point that the above add-on -- as shown -- causes the movable jaw of the vise to rise, which is the bugaboo of this type of vise to begin with. But you mention that your 45[SUP]o[/SUP] vise jaws are reversible . . . if you switch the two added-on pieces shown in the picture, you can still do the same jobs BUT the fixture will have the advantage of the movable jaw being pushed down, rather than up. Sort of like a toolmaker's vise action.

From looking at the picture (above) I'm wondering how you attached those pieces to your vise. I'm concluding that the pieces aren't yet attached there but that you'll drill vertical through-holes into the added pieces and threaded holes in the tops of your vise jaws.

Or am I mistaken?:thinking:


Addendum: OK, I'm mistaken on at least one thing . . . I should have kept on reading a few more posts, to where Kevin45 makes the same point I've re-made above, only a lot sooner than I did:shocked:. I'd still be interested to know how those pieces are attached to the vise, though . . .
 
Last edited:
Since replacing the spindle motor in the CNC I now needed 2 wrenches for a tool change because I needed to remove the spindle lock to accommodate the new spindle motor.
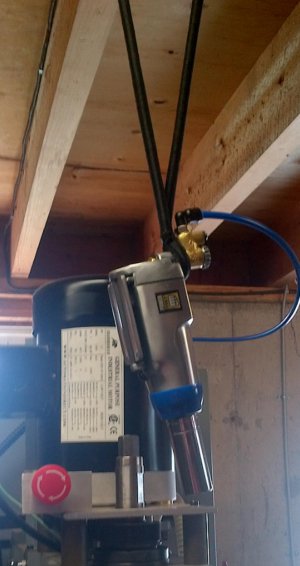
After making a new drawbar yesterday so I could use a butterfly impact for tool changes I realized there was no convenient place to set the dam impact gun, so 2 cup hooks, 3 nylon ties, and one bungeecord later it's now in a convenient location until I get more time to finalize the motor mount and incorporate a proper mount for the impact gun.
When I made the new drawbar I made the threads longer than the original, I wasn't sure how far the thread would travel after it was loosened and figured I'd just trim them back if necessary, I'm glad I made them longer, it worked out well (to avoid removal of the collet with the tool holder) if your a little heavy handed when loosening with the impact gun.

AIR_20140706_00000.jpg

AIR_20140706_00000.jpg
 
After making a new drawbar yesterday so I could use a butterfly impact for tool changes I realized there was no convenient place to set the dam impact gun, so 2 cup hooks, 3 nylon ties, and one bungeecord later it's now in a convenient location until I get more time to finalize the motor mount and incorporate a proper mount for the impact gun.

The history of civilization is divided into: Bronze Age, Iron Age, Bungeecord Age…
Neat trick!
 
This post is not really worthy of this thread, I'm just posting this in hopes it will save someone else the aggravation I went through, I picked up a treadmill for a project, it was in my way today so I decided to take the motor out of it and get it out of my way, everything on the net said left hand thread for the flywheel/pulley , tried everything I could think of to remove it, I was staring to fear I'd damage something so I started cutting, in the end it was a taper, I didn't find one thing on the net suggesting it might be tapered.:angry:

AIR_20140707_00000.jpg

AIR_20140707_00000.jpg
 
Back
Top