Group Project: Dividing Head - The Build

I was looking at Speedy Metals, I was surprised to see the the cheapest, or should I say "least expensive" Ø3.00 x 48 steel bar was 12L14. It was even significantly less than the 1018 and a much better material to work with. But still not cheap at $167.
Midwest Steel supply has the Ø3.00 x 48 12L14 for $139.
McMaster and OnLineMetals are both stupid expensive.

A bar this size is about 95 lbs so shipping may be an i$$ue, getting two 24" bars will be about $1 more for the material but can be shipped ground in 2 packages. at $1 per cut it might not be bad to order it in 6" bars. But shipping for near 100 lbs will still not be cheap.

Have you checked with some local places to save the shipping cost? This part is not fussy about alloy so check to see if they have any drops of whatever kind of steel?
 
These are the 4 places I do the most business with, Speedy has an edge because they are local so no shipping charge and if I call it in it will be ready by the time I can get there to pick it up. dependin on the material needed any one of the 4 might have the best price.
 
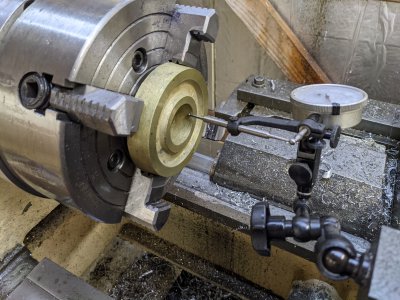
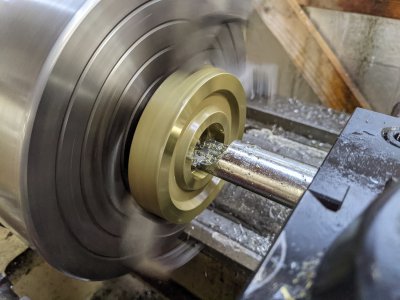
So I finished the boring/1 side facing on all 9 aluminum wheels, plus the brass one. I fortunately had given up just in time on the snap gauges, I was pretty well on for the measurements for the first 3, though the 4th one wasn't reading right. The bore gauge ended up working great!

Last I did was the brass one, it machines pretty easy. Indicated it in, and a quick boring job, and it is done!
PXL_20210601_231418739.jpg
PXL_20210601_231620460.jpg

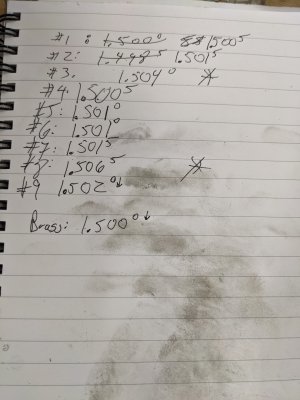
Here are all my bore measurements. Target was 1.500 -0 +.002.

#3 I knew was a little oversized. #8 I got caught being too aggressive approaching final dimension, and a spring pass took a large cut. Brass one is perhaps a touch undersized, but I didn't want to risk it. If it needs honing or something to take the last 1/4 thou, flyingfool will have to figure it out :)

PXL_20210601_232348811.jpg

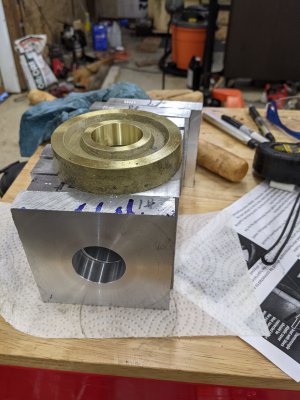
Group photo!
PXL_20210601_232355739.jpg
 
So I finished the boring/1 side facing on all 9 aluminum wheels, plus the brass one. I fortunately had given up just in time on the snap gauges, I was pretty well on for the measurements for the first 3, though the 4th one wasn't reading right. The bore gauge ended up working great!

Last I did was the brass one, it machines pretty easy. Indicated it in, and a quick boring job, and it is done!
View attachment 367836
View attachment 367837

Here are all my bore measurements. Target was 1.500 -0 +.002.

#3 I knew was a little oversized. #8 I got caught being too aggressive approaching final dimension, and a spring pass took a large cut. Brass one is perhaps a touch undersized, but I didn't want to risk it. If it needs honing or something to take the last 1/4 thou, flyingfool will have to figure it out :)

View attachment 367838

Group photo!
View attachment 367839

Some bearing retaining compound should solve the eversized bore.
 
I am more worried about the gear teeth than the bore fit. on your fixture for cutting the teeth you may have to put the blanks in order from biggest bore to smallest. That way you can make the pin to fit the biggest bear and then take the pin down in dia to match each gear as you go. If you put a 1.504 gear on a 1.500 shaft it will wobble around during cutting and have an ugly tooth profile. The issue is not retaining it to the Spindle, the set screw will do that almost regardless of the fit. The issue is that the set screw will push it to one side and that will have the gear eccentric to the spindle.

The brass ID will only be an issue if it happens to get paired with an over size spindle. So odds are it will be fine. Or if it bothers you, chuck it up and use some 400 to 800 grit emery to polish it in to size.
That's a good idea with doing those in order! I hadn't thought of that. I have to make a jig 1st for turning OD and I likely have to do the same thing.

One concern I have is the set screw hole actually. I think it doesn't end up being an issue when turning the teeth (since I have to let it free spin to cut the teeth, right? So the set screw can't be there, right?), But is a bit deal when cutting the OD.

And that concern is: I don't think I can get a tap that can go that deep! At the moment the tapped hole would be more than 1" long, and even on the finished product ends up being (3.6-1.5=2.1 / 2 == 1.05).

Is there an allowable counterbore, or do I have to track down an extra long 10-32 tap?
 
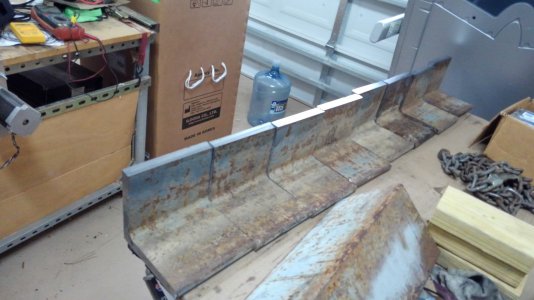
Back from vacation, I've jumped in head first. One of the things I've been thinking about is how to make my tooling last. I'm generating a ridiculous amount of chips, and they can be costly to generate. I figured the easiest way to make them last is not to use them. If I cut out holes and such before facing, then I'll generate fewer chips. I tiny bit more steel dust, but bandsaw blades are cheap compared to end mills.

So, last night and this morning was a bandsaw fiesta. I got all eight of the Main Base sections parted off. I only had to cut one completely off the main chunk, as my uncle got all the rest cut before his blade gave out. Then I got just under 1/2" shaved off the top of each. Next, I'll cut the bottoms shorter, and then the angle off each side. The hole, slots, and channels on the bottom will be next, THEN I'll move on to facing the bottom.
 

Attachments

  • KIMG0785.JPG
    KIMG0785.JPG
    1.6 MB · Views: 9
  • Like
Reactions: rwm
That's a good idea with doing those in order! I hadn't thought of that. I have to make a jig 1st for turning OD and I likely have to do the same thing.

One concern I have is the set screw hole actually. I think it doesn't end up being an issue when turning the teeth (since I have to let it free spin to cut the teeth, right? So the set screw can't be there, right?), But is a bit deal when cutting the OD.

And that concern is: I don't think I can get a tap that can go that deep! At the moment the tapped hole would be more than 1" long, and even on the finished product ends up being (3.6-1.5=2.1 / 2 == 1.05).

Is there an allowable counterbore, or do I have to track down an extra long 10-32 tap?
If all else fails, a screw can be made into a tap fairly quickly. Use a Grade 5 or better, and they've got enough carbon that one that small will harden nicely using a propane torch.
 
If all else fails, a screw can be made into a tap fairly quickly. Use a Grade 5 or better, and they've got enough carbon that one that small will harden nicely using a propane torch.
Is it going to be an oil-harden? I think I am going to have to do that. I'm not particularly worried about doing it with the the aluminum (though it might be a 2 flute thanks to the size of the bolt and my cutoff wheels :) ), but I'm a touch concerned about the brass...
 
Back
Top