-
Welcome back Guest! Did you know you can mentor other members here at H-M? If not, please check out our Relaunch of Hobby Machinist Mentoring Program!
- Forums
- THE PROJECTS AREA
- PROJECT OF THE DAY --- WHAT DID YOU DO IN YOUR SHOP TODAY?
- Project of the Day Mega-Thread Archives
You are using an out of date browser. It may not display this or other websites correctly.
You should upgrade or use an alternative browser.
You should upgrade or use an alternative browser.
2013 POTD Thread Archive
- Thread starter HMF
- Start date
- Joined
- Mar 10, 2013
- Messages
- 1,428
- Joined
- Jan 23, 2012
- Messages
- 1,216
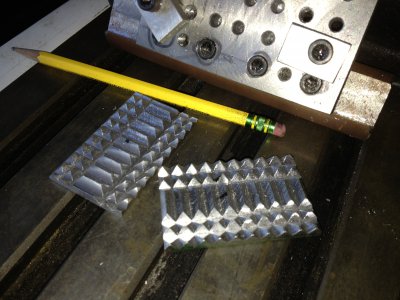
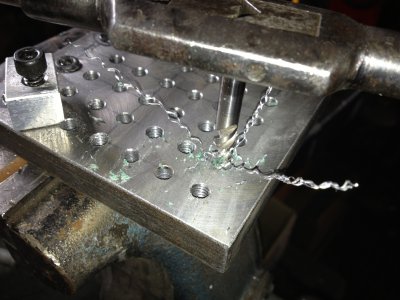
someone posted pictures of a simple little angle plate for a mill vice. I enjoy doing small parts so I figured I better have one too. found a small slab of something and a hunk of round stock and went at it.
drilled a bunch of mostly even spaced holes, some went thru and some not. . that's what I planned. all for 1/4-20 socket head capscrews.
I used my new spiral fluted tap. they do an effortless job on mild steel. I got the plug chamfered one for a trial use. still had to buy it but I told the supplier that I was going to offer them with a couple of bits, in a little box, if they worked like others have claimed. well, they do work great.
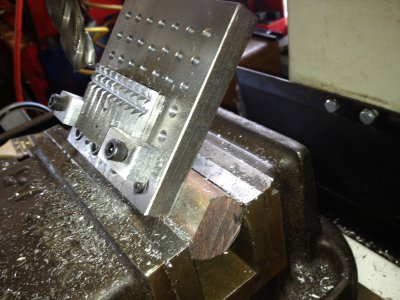
anyway, I needed this angle plate to hold a couple thin parts I wanted to carve a bunch of teeth in, like a meat tenderizer. I am totally impressed on how well it worked in holding the parts but also holding the angle as it was set to, in the mill vice. just had to share. . . .
thanks for looking. . .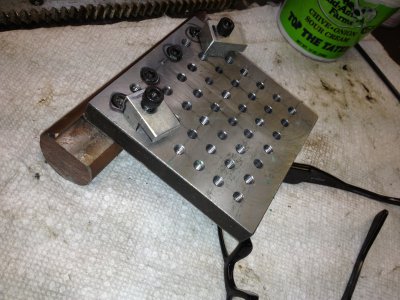


- Joined
- Oct 6, 2010
- Messages
- 699
There was no machining involved in this project but it was needed to complete some machine work in process. This project was not large but has taken place over several days since there was drying time involved.
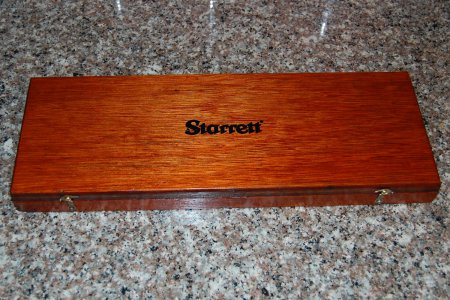
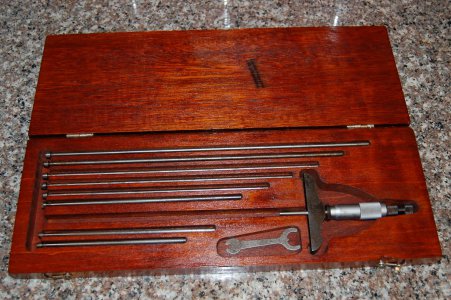
Today I put the parts back into the case for a set of Starrett depth micrometers. The set was thrown away by a large company so the price was right and I adopted it and gave it a new home. The set appeared to have gotten wet from setting in some liquid resulting in rust and case damage. The bottom half of the case had all the finish off of it and there was a large split in the wood. I glued and clamped the bottom and then re-stained and clear coated the whole case. The screws for the case and latches would not hold so I also had to fix some of them. Some of the micrometer parts still need to be soaked in Evapo-rust rust remover but the zero-to-one stem rod is useable. The remaining rust does not interfere with the function and has been stopped for the time being with steel wool and penetrating oil. The need for the 0-1 micrometer size was what prompted the project. Fellow forum member OlCatBob and I needed the micrometer some time ago in order to finish another project. I could have used a set from forum member Charley Davidson but forced myself locate and get this set usable. It was not needed when I brought it home and it had been lost in the basement “stuff”.
Benny
The Orphanage Never Closes


Today I put the parts back into the case for a set of Starrett depth micrometers. The set was thrown away by a large company so the price was right and I adopted it and gave it a new home. The set appeared to have gotten wet from setting in some liquid resulting in rust and case damage. The bottom half of the case had all the finish off of it and there was a large split in the wood. I glued and clamped the bottom and then re-stained and clear coated the whole case. The screws for the case and latches would not hold so I also had to fix some of them. Some of the micrometer parts still need to be soaked in Evapo-rust rust remover but the zero-to-one stem rod is useable. The remaining rust does not interfere with the function and has been stopped for the time being with steel wool and penetrating oil. The need for the 0-1 micrometer size was what prompted the project. Fellow forum member OlCatBob and I needed the micrometer some time ago in order to finish another project. I could have used a set from forum member Charley Davidson but forced myself locate and get this set usable. It was not needed when I brought it home and it had been lost in the basement “stuff”.


Benny
The Orphanage Never Closes


- Joined
- Oct 6, 2010
- Messages
- 699
That's really nice, Benny. Both the tools and the case. Was the original Starrett logo still good? Looks great.
Thanks, Hawkeye.
Yes the logo is original. The outside-top of the case was in pretty good condition and the clear finish was still in place for the most part. The water damage apparently came up from the bottom. However the inside of the top did need stain and a good sealing. The outside top only received one coat of clear finish and a little glue under the veneer on one corner. I used the top to match the stain color at the store.
Used the micrometer for the first time today to finish a project.
Benny
The Orphanage Never Closes
- Joined
- Jun 23, 2011
- Messages
- 120
- Joined
- Jun 23, 2011
- Messages
- 120
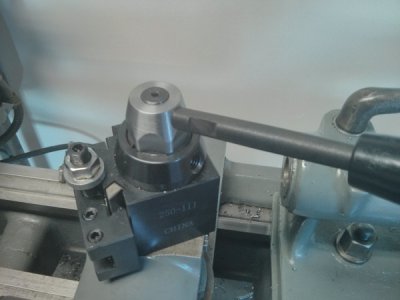
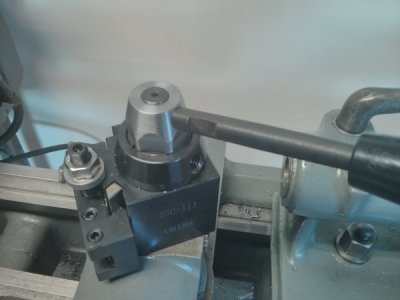
Nice, I like that much better than the handle I welded to the nut. I just ordered another AXA tool post for my new lathe, I'll be borrowing your borrowed design.
Shawn
Thanks! Truth be told, after seeing yours, I almost copied you, but in the end I didn't because I had already ordered hex stock to copy him in the first place


