2018 POTD Thread Archive

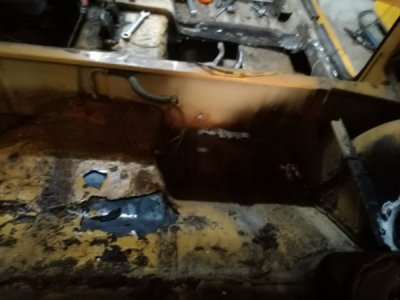
Today i spent some time assessing the health of the engine in the little 4x4, first i did a compression test and got really good numbers on cold and hot engine, all with in 0,5bar one from other, next i check the coolant system and the walter pump is leaking also some of the hoses are dryroted and the heater core is not connected, then i decided to try adjusting the timing chain, it is rattling like there is a bag of stones in the engine i follow the procedure, had to make a hand crank, to turn the engine over by hand and the chain is much more quiet, i still need to check the oil pressure when cold and warm. After dealing with the engine, i moved to the interior, managed to cut out the passenger seat, the previous owner had welded in some Ford seats directly to the floor pan and then i realized that the rear footwell isn't even welded in, some one put down some sheet metal and screw in with couple of self tappers and pop rivets, so i removed them and removed already rusted sheet metal and found this. One side is welded from underneath other just cut out, i'll be cutting some more out and making a new piece. It was a long day in the garage.
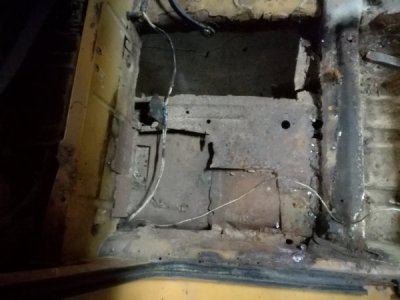
IMG_20181027_111733.jpg
 
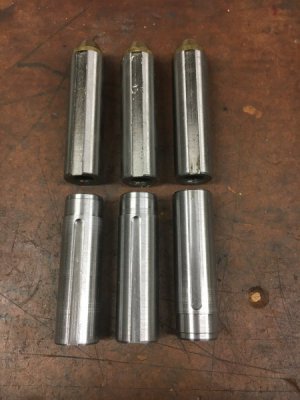
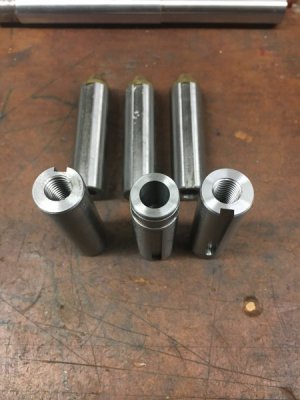
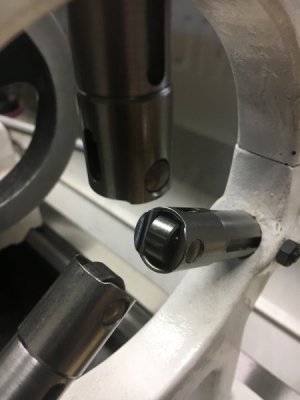
I have a job coming up that's gonna require the steady rest. I haven't had the need to use on this lathe yet so I pulled her out to take a look over. I really didn't like the brass fingers on the end for the job. I a great set of rollers that I salvaged for a diesel injector pump. So I turned down three shafts to a almost vacuum fit. The one end is turned to fit the roller Assy. Other end is threaded 1.250 down the shaft a m10-1.25 thread with a clearance hole the rest. Then I mounted on he mill and cut the slot to a nice fit for the dog point set screw. Finally pressing the roller Assy on the shafts. Should be a nice upgrade to the steady rest. Will find out.
image.jpegimage.jpegimage.jpeg
 
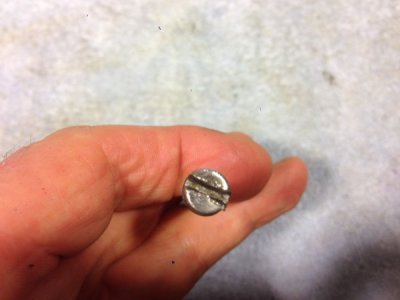
I've been cleaning up an old motor to put back into service and while the motor itself cleaned up pretty nice, the four screws that hold the two ends of the case together were all chowdered-up. In the past I've either replaced damaged ones with new or just filed away the damage and called it good.

Trouble is, when you just file a ratched head like this you end up making the slot really wide or the head really shallow in order to get past the damage. I was watching a video not long ago, (maybe This Old Tony?) where he salvaged a similar head by tapping the moved metal back into shape first. So I gave it a try on these.

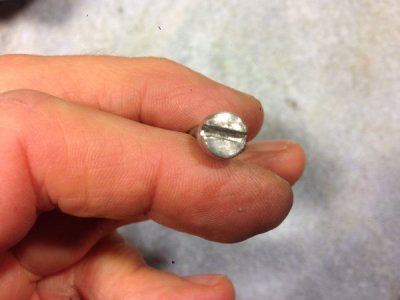
Here's one of the heads as-found and before any cleanup.

image.jpeg

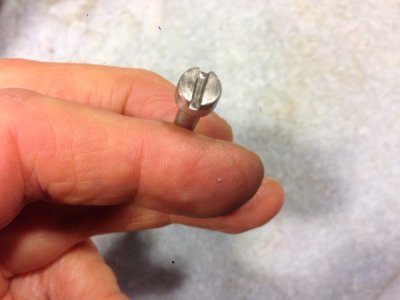
And here's the same one after gently tapping the metal back into place with a small hammer.

image.jpeg

And the final step after a very light dusting with a file and a bit of 320 paper to take the sharp edges off.

image.jpeg

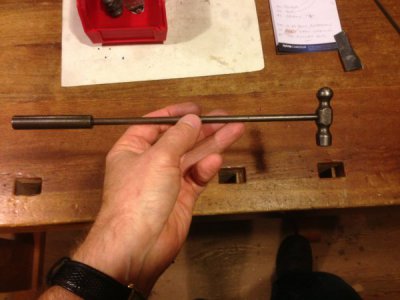
It worked pretty well, I must say, and took hardly any time at all. Not something I'd do if a replacement was nearby, but for something a bit uncommon it may be worth the effort. Part of the success I expect lies with the choice of tool -- here's the hammer I used for the dressing. It's an old one I bought at some junk store years ago, but it's just great for stuff like this. For anybody looking for a beginner lathe and hardening project I think something along these lines would be a fairly simple effort.

image.jpeg

Thanks for looking!

-frank
 
Last edited:
I have a job coming up that's gonna require the steady rest. I haven't had the need to use on this lathe yet so I pulled her out to take a look over. I really didn't like the brass fingers on the end for the job. I a great set of rollers that I salvaged for a diesel injector pump. So I turned down three shafts to a almost vacuum fit. The one end is turned to fit the roller Assy. Other end is threaded 1.250 down the shaft a m10-1.25 thread with a clearance hole the rest. Then I mounted on he mill and cut the slot to a nice fit for the dog point set screw. Finally pressing the roller Assy on the shafts. Should be a nice upgrade to the steady rest. Will find out.
View attachment 278637View attachment 278638View attachment 278639

:cower: Boy I feel dumb. I've been looking off and on for several months now, for some bearings to make the missing fingers for the rest that came with my SB 16". Yet the other side of the garage, I have 2 sets of used roller lifters from a dodge V8.
 
:cower: Boy I feel dumb. I've been looking off and on for several months now, for some bearings to make the missing fingers for the rest that came with my SB 16". Yet the other side of the garage, I have 2 sets of used roller lifters from a dodge V8.

When I was rebuilding a pump at work I was looking at the roller ends and they are a touch over 18mm and machined to accept the shaft already so it was a win win for me. You could probably just use a wide sealed bearing or stack them side to side. I was also thinking of making some brass wheels and maybe some Delrin ones for those delicate pieces. I like options.
 
Trouble is, when you just file a ratched head like this you end up making the slot really wide or the head really shallow in order to get past the damage. I was watching a video not long ago, (maybe This Old Tony?) where he salvaged a similar head by tapping the moved metal back into shape first. So I gave it a try on these.


Thanks for looking!

-frank

nice, those look like new! I've done that a bunch on screws off an old Atlas lathe. One thing that helps is having alu jaws for a bench vise to hold the screws. The threads press into the alu which holds them tight without damaging the threads.
 
I've been cleaning up an old motor to put back into service and while the motor itself cleaned up pretty nice, the four screws that hold the two ends of the case together were all chowdered-up. In the past I've either replaced damaged ones with new or just filed away the damage and called it good.

Trouble is, when you just file a ratched head like this you end up making the slot really wide or the head really shallow in order to get past the damage. I was watching a video not long ago, (maybe This Old Tony?) where he salvaged a similar head by tapping the moved metal back into shape first. So I gave it a try on these.

Here's one of the heads as-found and before any cleanup.

View attachment 278643

And here's the same one after gently tapping the metal back into place with a small hammer.

View attachment 278644

And the final step after a very light dusting with a file and a bit of 320 paper to take the sharp edges off.

View attachment 278646

It worked pretty well, I must say, and took hardly any time at all. Not something I'd do if a replacement was nearby, but for something a bit uncommon it may be worth the effort. Part of the success I expect lies with the choice of tool -- here's the hammer I used for the dressing. It's an old one I bought at some junk store years ago, but it's just great for stuff like this. For anybody looking for a beginner lathe and hardening project I think something along these lines would be a fairly simple effort.

View attachment 278649

Thanks for looking!

-frank
I discovered this trick myself a few months ago when I need to restore some specialty screws. I used a small hole in a piece of steel plate as a bolster to support the head while reforming. It works on Phillips head and cross point screws as well.
 
nice, those look like new! I've done that a bunch on screws off an old Atlas lathe. One thing that helps is having alu jaws for a bench vise to hold the screws. The threads press into the alu which holds them tight without damaging the threads.
I discovered this trick myself a few months ago when I need to restore some specialty screws. I used a small hole in a piece of steel plate as a bolster to support the head while reforming. It works on Phillips head and cross point screws as well.


Thanks guys. Yeah, I have some leather jaw faces on my Charles Parker that work nicely too, and I did think about the hole-in-the-plate trick but for only four screws I was too lazy. I'll have to remember to try it one some Phillips heads sometime -- surely I have some mangled ones of those lying around....

-frank
 
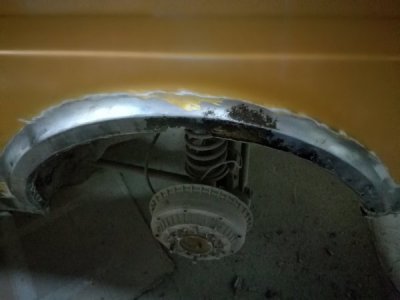
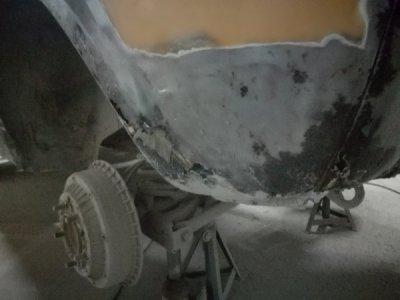
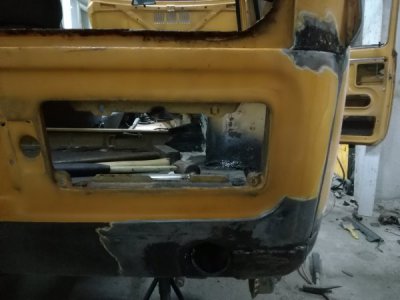
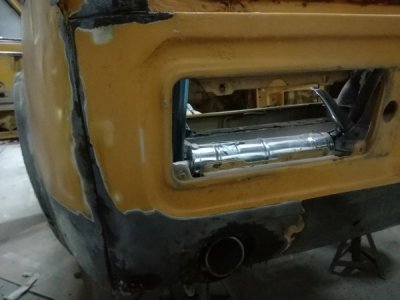
Today i made a mess in my workshop, i'm still doing rust repair on the little Lada 4x4, so today i did many clean up, used grinding discs, wire brushes and removed all the rusty metal, and wirebrushed all the rust, then i applied anti rust acid, to stop the rust , then i moved to the rear wheel arches, one side is done in metal work so i moved to the other side. I took off the rear wheels and put it on axle stands, then i got intrigued by a hole i saw when placing the axle stands, this lead me to removing the fuel tank, not complicated, 4 bolts one hose and two wires and is out but it revealed one more hole to fix. Then i clean out the metal cover for the gas tank also applied anti rust acid, and then i fire up the grinder and spend next 4 hours grounding paint and bondo off the arch and rear panel, there i also found newspaper and lots of plastic filler covering rust, on this side the bottom of the quater panel is badly rusted so i'll be cutting lot of it out and replacing it, a also clean out the seams on the rear panel because they had bubbling paint and found rust on wich i also applyed anti rust acid, it was a hard and long day in my workshop also a very dirty one.
IMG_20181030_160722.jpgIMG_20181030_172538.jpgIMG_20181030_160735.jpgIMG_20181030_172624.jpgIMG_20181030_172612.jpgIMG_20181030_160735.jpgIMG_20181030_160749.jpgIMG_20181030_172549.jpgIMG_20181030_172606_1.jpg

Hope you like seeing how i deal with rust.
 
Back
Top