2018 POTD Thread Archive

That is awesome Bruce. You're going to enjoy that.
Thanks Chip,

I'm starting to fill it up and will start on the 2nd cabinet this weekend. I have bolt/screw/nut/washer, etc. hardware in 3 of these HF storage bins hanging on the wall. They fit perfectly in the 4" deep drawers. Was contemplating taking two of the 6" drawers and cutting them down to 4", then make another 4" drawer for a stack of four 4" drawers. On second thought, I'm making a second cabinet so the original plan still holds; fill up the first one then make the second one with drawers sized for what's left over. These HF bins are a little small for larger hardware, so headed to Menards for some stackable bins. Will make the drawers to the bin height and get stuff where I can actually find it!

Bruce


1532783299657-png.272840


1532783299657.png
 
Thanks Chip,

I'm starting to fill it up and will start on the 2nd cabinet this weekend. I have bolt/screw/nut/washer, etc. hardware in 3 of these HF storage bins hanging on the wall. They fit perfectly in the 4" deep drawers. Was contemplating taking two of the 6" drawers and cutting them down to 4", then make another 4" drawer for a stack of four 4" drawers. On second thought, I'm making a second cabinet so the original plan still holds; fill up the first one then make the second one with drawers sized for what's left over. These HF bins are a little small for larger hardware, so headed to Menards for some stackable bins. Will make the drawers to the bin height and get stuff where I can actually find it!

Bruce


1532783299657-png.272840
"Can actually find it" is the key phrase. I struggle with organization so when I saw your cabinet I suffered a bit of covetousness. You did a really nice job, and I know it's going to be a pleasure everytime you go to grab something. I'm headed to HF now :)

--Chip
 
Thanks Chip,

... so headed to Menards for some stackable bins. Will make the drawers to the bin height and get stuff where I can actually find it!

Bruce


I got a slightly damaged Lista cabinet at an Auction and have found that the stackable bins fit very nicely in the drawers. The also make it easy if I want to grab a bin and take it with me to where the work is.
 
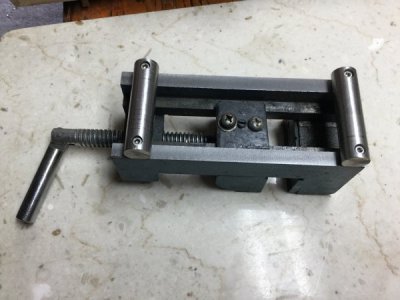
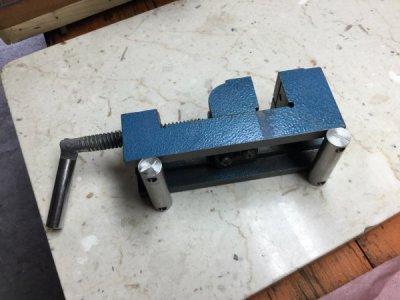
How about a poor man’s sine vise? I had an unused cheap bench vise, so I clamped a 123 block in my mill vise, and then clamped the bench vise onto that. I took a skim cut over the entire base of the bench vise to ensure all square.

Then made the round pieces...make sure the diameter is the same. Doesn’t matter at all what the diameter actually is. I milled a small flat on each for the base contact.

Then drilled and countersunk the mounting holes on the rods, at that center to center spacing of the vise rails.

I used the mill DRO to space the rods exactly 5” apart, and of course exactly parallel and square to the vise jaws ( still clamped onto the 123 block). Drill, tap and attach, done.

If you have not used a sine vise or sine bar before, it is a very clever application of trigonometry. If you want a particular and very precise angle, this is the tool. It works because of the exact and known 5” between rollers, in that the hypotenuse (long side) of the triangle is always that, 5”, no matter the angle the vise is at. If one roller is raised by say 1” exactly, then the angle of the vise is now the arcsin (angle whose sin is) 1”/5”, or arcsin (0.2) or 11 degrees, 32 minutes, 13 seconds.

The other way, more generally useful, is to figure the height needed for a given desired angle. Say you wanted a 15 degree angle. The sin of 15 degrees is 0.2588. Multiply by 5”, to get 1.2941. Now make a block 1.2941 high, stick under one rod, done.

Of course make the rod spacing whatever fits your vise, just make it exact and change 5” to your new number.

Keep the rods shorter than the width of the bench vise so you can clamp the whole assembly, vise plus height reference, sideways in your mill vise.

FE56A831-975C-4AF4-84F9-D0BEA750EBCA.jpegDA7A81E3-34AD-44C2-8B9B-24D2A0FF66AE.jpeg
 
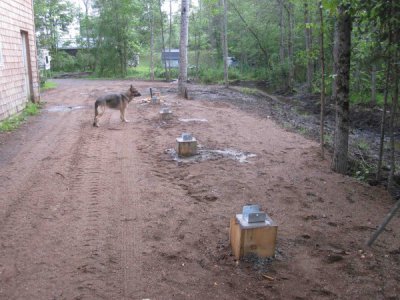
Poured the footings for the carport. Have a cement mixer that goes on the 3pt hitch of the tractor. Mixes a full bag of cement and 7 5 gallon pails of gravel in a shot. One mix per footing.
IMG_4100.jpg

We had a couple of days of heavy rain after about 3 weeks of hot dry weather. My pond turned into a lake.
IMG_4102.jpg

Greg
 
How about a poor man’s sine vise? I had an unused cheap bench vise, so I clamped a 123 block in my mill vise, and then clamped the bench vise onto that. I took a skim cut over the entire base of the bench vise to ensure all square.

Then made the round pieces...make sure the diameter is the same. Doesn’t matter at all what the diameter actually is. I milled a small flat on each for the base contact.

Then drilled and countersunk the mounting holes on the rods, at that center to center spacing of the vise rails.

I used the mill DRO to space the rods exactly 5” apart, and of course exactly parallel and square to the vise jaws ( still clamped onto the 123 block). Drill, tap and attach, done.

If you have not used a sine vise or sine bar before, it is a very clever application of trigonometry. If you want a particular and very precise angle, this is the tool. It works because of the exact and known 5” between rollers, in that the hypotenuse (long side) of the triangle is always that, 5”, no matter the angle the vise is at. If one roller is raised by say 1” exactly, then the angle of the vise is now the arcsin (angle whose sin is) 1”/5”, or arcsin (0.2) or 11 degrees, 32 minutes, 13 seconds.

The other way, more generally useful, is to figure the height needed for a given desired angle. Say you wanted a 15 degree angle. The sin of 15 degrees is 0.2588. Multiply by 5”, to get 1.2941. Now make a block 1.2941 high, stick under one rod, done.

Of course make the rod spacing whatever fits your vise, just make it exact and change 5” to your new number.

Keep the rods shorter than the width of the bench vise so you can clamp the whole assembly, vise plus height reference, sideways in your mill vise.

View attachment 272852View attachment 272853

That is a neat idea. Another project to add to my list of things lol.
 
I did a simple project today. My Granddaughter has a toy trash can that came from the dollar store. Her little brother broke one of the wheels off so her older brother sad PaPa can fix it. So I had to fix it. Used some derlin to make them and super glued them on. Video is attached
 
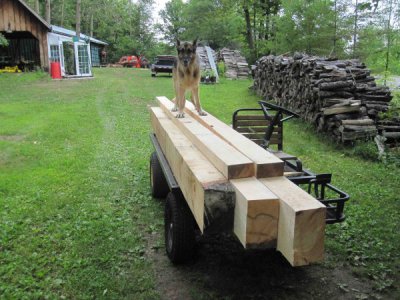
Moved the timbers into the machine shop where I have an overhead crane to move them while making the joints.
IMG_4107.jpg

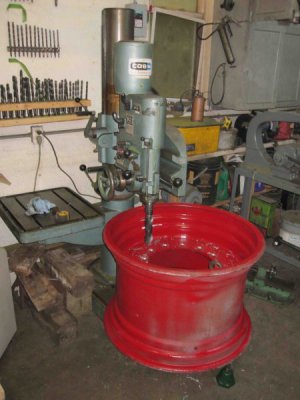
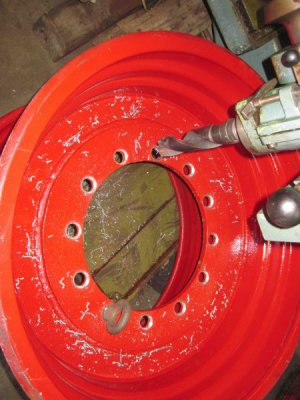
Then got a call wondering if I could chamfer the bolt holes in a rim. A 300 pound rim mind you. Ground a 1 5/8 drill bit to match the 111 deg angle on the nuts. First time the work wouldn't fit on the drill table.

IMG_4108.jpg

IMG_4109.jpg

Greg
 
Back
Top