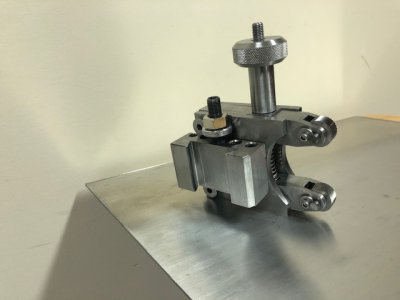
Finally got my knurler done today. I got a lot of inspiration from Mikey's build but changed some things based on the materials I had on hand. The cheek plates are 3x3 and the arms are 3/4" square. I used shoulder bolts for the arm pivots and the other parts are all 1018. I had an old 1/4" solid carbide end mill that was junk so I cut that up for the wheel axles. It has a capacity of 0-2 1/2.
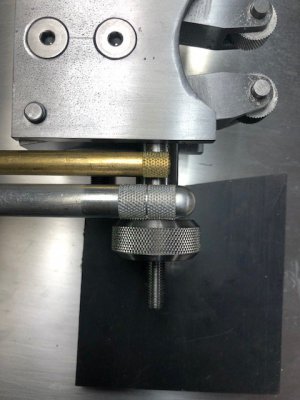
With the non beveled wheels the technique is a little different. I found a post from a guy who said he's been knurling for 30yrs and followed his plan. Bring the tool up and approximately center the wheel axles over the work piece. Bring the wheels down until they just touch. Back the tool out and place a piece of stock up against the work piece, then bring the tool in so the wheels just touch the stock, zero your cross slide dial. Add the thickness of the stock, half the diameter of the wheels and half the diameter of the workpiece together and dial the cross slide in that amount. Now you're on center of the workpiece. Set up a stop or indicator to be able to return to that point.
I then tighten the tension knob down about a half turn and feed it in until you hit the stop. If it looks good you're done, if not tighten a little more and try again.
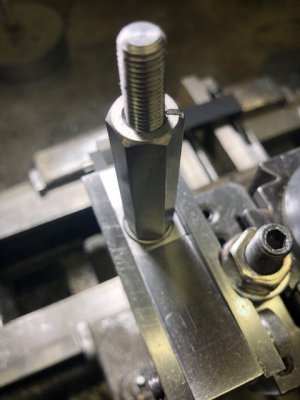
I will probably buy some convex wheels at some point to be able to feed from the end. It makes great knurls on brass
and aluminum and not too bad even on crappy old 1018. Very happy with the outcome.
Forgot to add that this was made without a mill. I used my lathe with milling attachment. Sure would have easier with a mill. Some day hopefully. I also sacrificed my old bump knurler that came with the tool post for use here by cutting the ears off that held the wheels, milled the slot all the way through and added a couple more set screws.