

-
Welcome back Guest! Did you know you can mentor other members here at H-M? If not, please check out our Relaunch of Hobby Machinist Mentoring Program!
You are using an out of date browser. It may not display this or other websites correctly.
You should upgrade or use an alternative browser.
You should upgrade or use an alternative browser.
Clausing 5428 rebuild
- Thread starter AndySomogyi
- Start date
- Joined
- Nov 9, 2018
- Messages
- 377
Thanks man! I was debating adding a few more coats, but I think it’s good enough.Wow, those look great Andy! Nice work.
- Joined
- Nov 9, 2018
- Messages
- 377
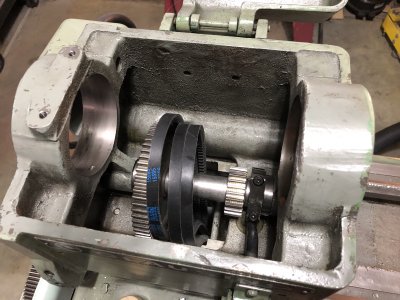
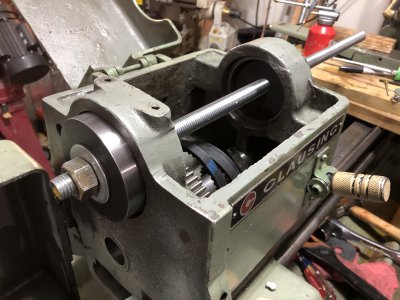
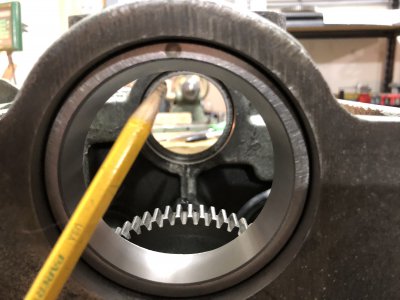
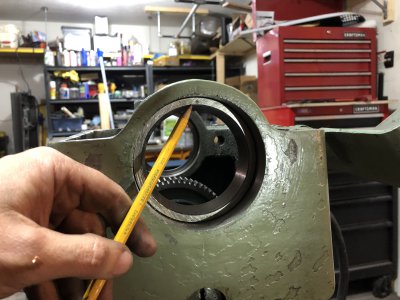
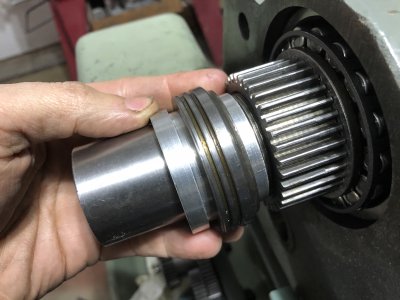
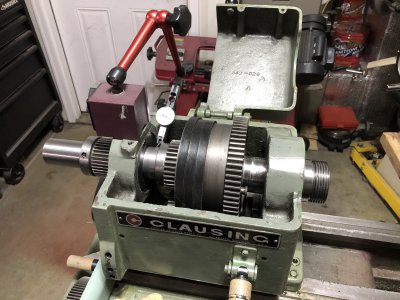
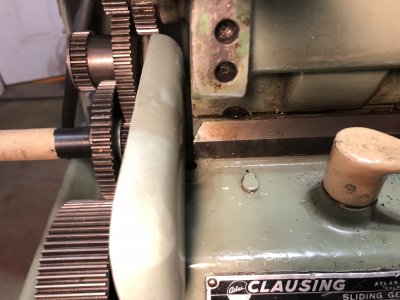
Installed the jack shaft and the rear bearing race.
The right shoulder on the jack shaft had some ridges from some idiot hammering it out with a chisel. Though this isn’t a thrust surface, the back gear does bump against it. So I chucked it in the mill and stoned it smooth with a slip stone.
The jack shaft bearings looked OK, no slop, so I just put them back in.
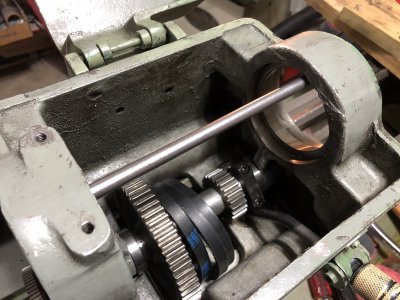
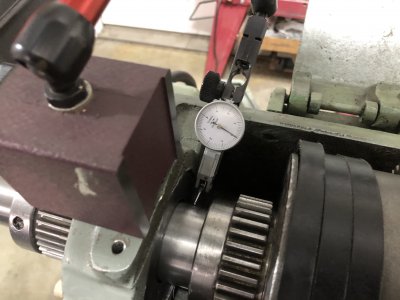
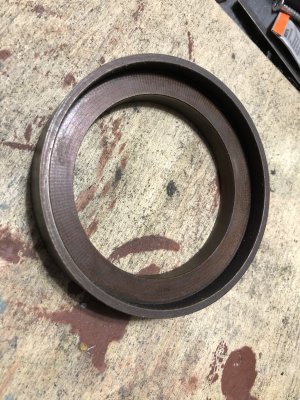
The front race looked pretty good, so I left it alone. Also when I measured front runout, it was around 0.0001 at most.
I got ahold of precision class bearings for the rear, and looks like at some point this lathe was upgraded to precision class bearings. According to the Clausing engineer I spoke with, this lathe originally shipped with standard industrial grade bearings. The precision class bearings for the rear was expensive, even on eBay, found an old stock inner one for $140, and race for $40. About 4 times what industrial costs, and brand new, was like $300 for just the roller cage part.
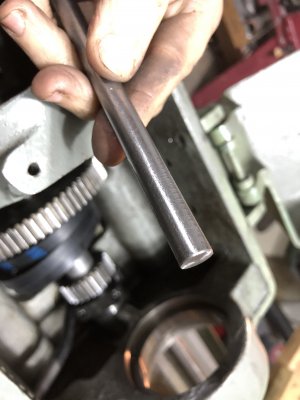
Installed the race with my puller setup, this ensures that it goes in straight. Then measured parallelism with a ground rod with a very slight taper at the face. I ground it so it just catches. Then moves the rod all the way around and measured the race at all positions.
Because these are precision class bearings, they have alignment marks that indicate the location of maximum runout. It’s important that they are aligned with each other. These are these little burnt darker spots on the race faces. If they are not aligned, the spindle will not be parallel with the bored hole in the headstock.
The right shoulder on the jack shaft had some ridges from some idiot hammering it out with a chisel. Though this isn’t a thrust surface, the back gear does bump against it. So I chucked it in the mill and stoned it smooth with a slip stone.
The jack shaft bearings looked OK, no slop, so I just put them back in.
The front race looked pretty good, so I left it alone. Also when I measured front runout, it was around 0.0001 at most.
I got ahold of precision class bearings for the rear, and looks like at some point this lathe was upgraded to precision class bearings. According to the Clausing engineer I spoke with, this lathe originally shipped with standard industrial grade bearings. The precision class bearings for the rear was expensive, even on eBay, found an old stock inner one for $140, and race for $40. About 4 times what industrial costs, and brand new, was like $300 for just the roller cage part.
Installed the race with my puller setup, this ensures that it goes in straight. Then measured parallelism with a ground rod with a very slight taper at the face. I ground it so it just catches. Then moves the rod all the way around and measured the race at all positions.
Because these are precision class bearings, they have alignment marks that indicate the location of maximum runout. It’s important that they are aligned with each other. These are these little burnt darker spots on the race faces. If they are not aligned, the spindle will not be parallel with the bored hole in the headstock.
Attachments
-
 12321B67-D54D-4F1B-B1CB-BB74358925D2.jpeg2.9 MB · Views: 7
 -
 3A3DC7BA-61CA-4C15-908A-61DD2ED6168E.jpeg2.1 MB · Views: 7
 -
 FFB52A3B-FF8C-4464-ADE6-85EECEB95CB5.jpeg3.4 MB · Views: 7
 -
 5DD481CF-E8D3-4D89-90F1-29E084F38D4D.jpeg2.9 MB · Views: 7
 -
 5BB2CDFD-3847-4B31-BB02-BA1337D038F5.jpeg2.9 MB · Views: 7
 -
 31ACE35B-40FF-47E8-ABE7-82C0CDA96ABD.jpeg1.1 MB · Views: 7
 -
 815FE97A-0175-4F69-98C3-D9528A3F6331.jpeg2.8 MB · Views: 8
 -
 7D135607-9896-494F-BC5D-47084EE79E26.jpeg3 MB · Views: 7
- Joined
- Nov 9, 2018
- Messages
- 377
- Joined
- Nov 9, 2018
- Messages
- 377
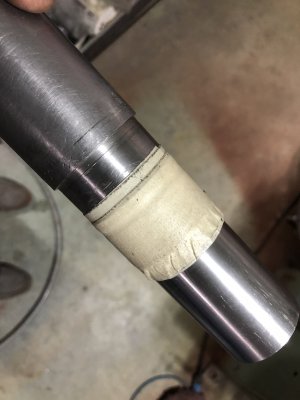
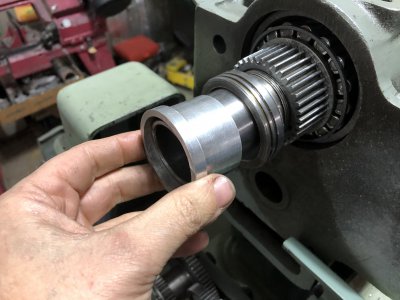
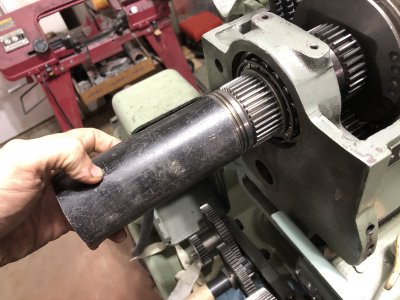
Re-installed the spindle using the pressing fixtures I made. This aluminum bushings keeps the pipe centered on the spindle so it pulls straight.
Using a precision class rear bearing, and made sure to align the bearing alignment Mark with the mark on the front bearing.
After installing and setting preload, measured the runout. At the front getting about 0.0002 and in the rear, about 0.00015. Pretty happy with these runouts.
I’m super happy with the fit of the bushings I made. It spins freely, and comes to a very nice slow stop, you can really feel the oil film in there providing a hydraulic drag.
Then started it up to test everything, and hell yes!!!, finally fixed the massive noise in the headstock. I’m going to put together a video of my diagnostic procedure, and how to go about deductive reasoning.
I still got to play around a bit with the belt tension. It seems kinda tight, however they’re flapping around a bit. Need to adjust the main variable speed drive also.
Couple important things to remember when re-assembling the spindle:
1: insert some wood blocks and make sure the spindle gets fully pressed into the bull gear. Only the wood blocks hold the bull gear in place.
2: Make sure none of the spindle ridges catch on the bearing dust covers, really each to catch and bind it up.
3: Go slow and easy, spindle should go in steady, if there's any abrupt change in resistance, stop, it's binding on something.
4: It's easy to catch the rear spacer that pushes the rear bearing in on the spindle ledge, that's why I made an aluminum bushing.
Attachments
-
 F69F6671-FD86-46C2-A2A6-1572859A4E60.jpeg2.8 MB · Views: 7
 -
 9AAC45B4-0B8C-4441-9970-1620D9FC7F44.jpeg2.7 MB · Views: 7
 -
 5D6F045E-2BF6-4930-92EA-E4DF729CD33D.jpeg2.9 MB · Views: 5
 -
 715DC87B-0165-4DFF-86B6-D8333479CC4F.jpeg3.2 MB · Views: 5
 -
 6639358B-5734-4600-9BE3-F0779E1F3D97.jpeg2.5 MB · Views: 6
 -
 5644E640-BF3E-4367-BC43-082A9DF01E43.jpeg3.1 MB · Views: 10
Last edited:
- Joined
- Nov 9, 2018
- Messages
- 377
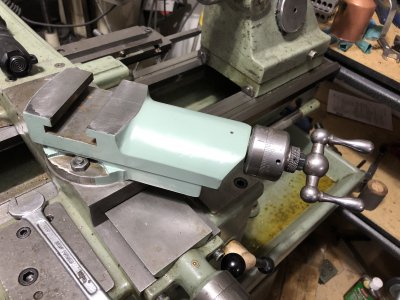
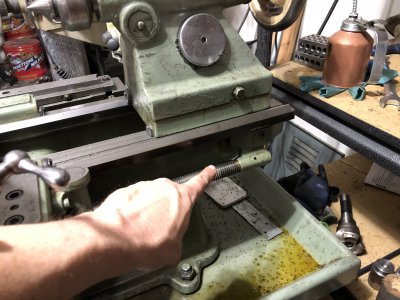
Assembled and installed the top slide. Really happy with how it feels, pretty good for my first go at hand scraping. Remember, it was just destroyed before and feels brand new now. I’ve got about 8 thousands of backlash on the top slide, guess that’s OK. Note, the gibs adjustment is really sensitive, feels best when the screws just literally touch, then it’s solid but still nice and smooth to turn.
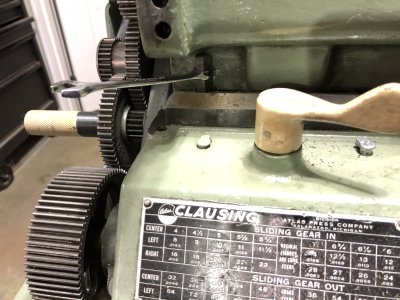
The lead screw had about 1/8” of end play, and there was this gap between the guard plate and the head stock, so I figured the quick change box was not aligned right.
Loosened up the quick change, and it has about 1/8” of movement with the screws loose.
Moved it to the right, about maybe 1/16 or so, and tightened the screws. This got rid of A LOT of end play in the lead screw.
However there’s still this gap between the guard plate and the head stock, so I’ll just make a spacer for it.
I moved the end holder part for the lead screw in until it just touches, so now there’s maybe a few thousands of lead screw end play. Much better than the 1/8” of end play it had before.
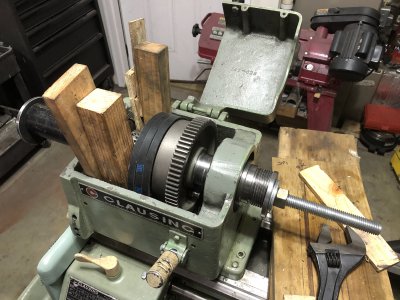
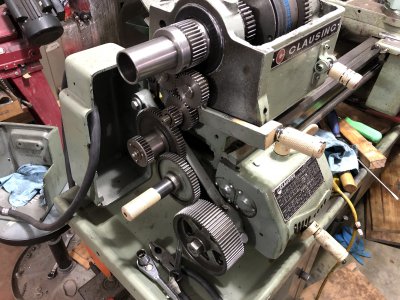
Installed and adjusted the gear train, it’s actually in surprisingly decent shape.
The lead screw had about 1/8” of end play, and there was this gap between the guard plate and the head stock, so I figured the quick change box was not aligned right.
Loosened up the quick change, and it has about 1/8” of movement with the screws loose.
Moved it to the right, about maybe 1/16 or so, and tightened the screws. This got rid of A LOT of end play in the lead screw.
However there’s still this gap between the guard plate and the head stock, so I’ll just make a spacer for it.
I moved the end holder part for the lead screw in until it just touches, so now there’s maybe a few thousands of lead screw end play. Much better than the 1/8” of end play it had before.
Installed and adjusted the gear train, it’s actually in surprisingly decent shape.
Attachments
- Joined
- Nov 9, 2018
- Messages
- 377
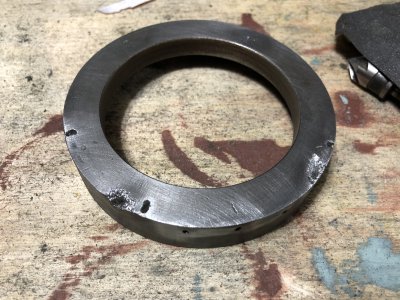
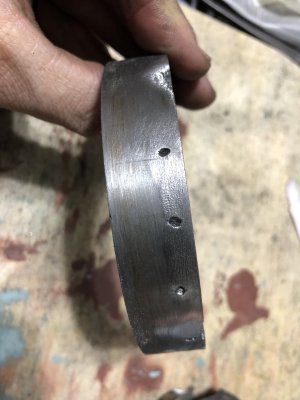
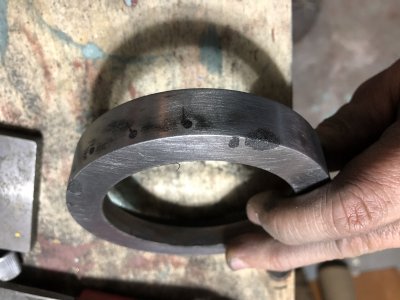
The nose collar around the spindle was also badly damaged from some damned idiot trying to remove it with a chisel .
It’s cast iron, but it was coated with some sort of copper colored coating, looked like anodizing. Yeah, I know it’s cast iron, not sure what the coating is.
Anyways, cleaned it off, wire brushed all the grease out, cleaned out the gouges with a dremel, and filled them with epoxy.
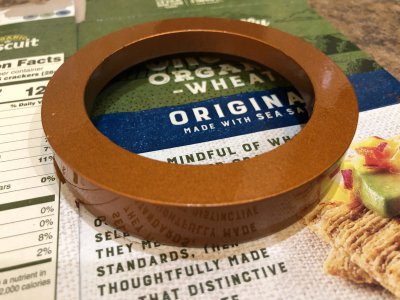
Then I had a can of VHT high temp brake caliper paint left over from my last car (Nissan 350Z), it was copper. So I painted this collar with that copper paint. I think it looks real good.
It’s cast iron, but it was coated with some sort of copper colored coating, looked like anodizing. Yeah, I know it’s cast iron, not sure what the coating is.
Anyways, cleaned it off, wire brushed all the grease out, cleaned out the gouges with a dremel, and filled them with epoxy.
Then I had a can of VHT high temp brake caliper paint left over from my last car (Nissan 350Z), it was copper. So I painted this collar with that copper paint. I think it looks real good.
Attachments
- Joined
- Mar 17, 2018
- Messages
- 1,400
Very nice restoration! I can't believe the number of things that were Bubba'd up on this single machine. It would have been so much better if Bubba never tried to fix anything.
- Joined
- Nov 9, 2018
- Messages
- 377
Very nice restoration! I can't believe the number of things that were Bubba'd up on this single machine. It would have been so much better if Bubba never tried to fix anything.
thanks. It’s just astonishing how many things were so completely buggered up beyond belief on this lathe.
But the thing is like 60 years old, so you can imagine a lot of idiots had ample opportunity to get their hooves on it.