Clausing 5428 rebuild

Got the spindle taken out, LOL, was much easier taking it out the second time.

Some hints, make sure you pull the keys before pulling the spindle, some idiot before me didn’t and destroyed both the bushings and dust covers. Took me a while to straighten them out.

This is the elegant way to pull a dust cover, make a washer like this that slides behind it, and pull with a screw.

The dust covers were installed wrong, blocking the oil holes, so bearings were run dry.

Basically follow the manual taking the spindle out.
 

Attachments

  • 44E14E8D-F0C2-4EA2-AA35-270A1229A471.jpeg
    44E14E8D-F0C2-4EA2-AA35-270A1229A471.jpeg
    3 MB · Views: 38
  • 7A26D8DA-5573-4DCA-81B1-FF11CD5E3E0C.jpeg
    7A26D8DA-5573-4DCA-81B1-FF11CD5E3E0C.jpeg
    3.3 MB · Views: 34
  • 738FFC51-02B9-4DBF-8B8A-E735CA0FDAD6.jpeg
    738FFC51-02B9-4DBF-8B8A-E735CA0FDAD6.jpeg
    3.5 MB · Views: 23
  • 239DBE39-A44E-4447-8E13-E80B0FE0F60D.jpeg
    239DBE39-A44E-4447-8E13-E80B0FE0F60D.jpeg
    2.7 MB · Views: 22
Looks like I did a pretty good job maintaining tolerance on the new bushings. Was not easy with this lathe, as the cross slide nut is just about ready to fall through, got about 70 thousands of backlash, and impossible to return to the same spot. So I used the top slide at a 30 degree angle (sin (30) = 0.5), so that moves in 0.5 thousands increments. Top slide is also worn, so had to keep my hand on it, keeping it tight.

Got the fit on these just right, and check out the old bushings. They were rammed in, blocking the oil hole, so they were run dry. I’m guessing about 30 thousands slop with the old ones.

 
Pressed in the new bushings. They fit very nicely in the pulley. However, because of the crush, they just barely won’t fit over the spindle now.

I made the bushings exactly to spec, however the pulley bore was about 4 thousands under size, which led to increase crush.

I think what I’ll try is use the expanding arbor as a lap, and try to shave a thousandth out of them.

Used the arbor as a guide to press them

I really don’t want to try to spin the pulley on the spindle now, because I’m concerned the bushings would act as a lap.
 

Attachments

  • 6FF8D6C3-C841-4B8C-ABCF-7BFE9E86D265.jpeg
    6FF8D6C3-C841-4B8C-ABCF-7BFE9E86D265.jpeg
    3 MB · Views: 11
  • 12EE3ED1-B7AF-4D68-81AC-037744BE0C68.jpeg
    12EE3ED1-B7AF-4D68-81AC-037744BE0C68.jpeg
    3.1 MB · Views: 10
Pressed in the new bushings. They fit very nicely in the pulley. However, because of the crush, they just barely won’t fit over the spindle now.

I made the bushings exactly to spec, however the pulley bore was about 4 thousands under size, which led to increase crush.

I think what I’ll try is use the expanding arbor as a lap, and try to shave a thousandth out of them.

Used the arbor as a guide to press them

I really don’t want to try to spin the pulley on the spindle now, because I’m concerned the bushings would act as a lap.
Well, two steps ahead, 1/2 step back. On the plus side, sure looks like you are doing every right and not cutting any corners trying to soon up the job. My complements to your attention to details. My Clausing 5418 takes about 30 seconds to stop spinning when I turn it off about around 800 RPM. Yours will probably go 2 minutes.

Bruce
 
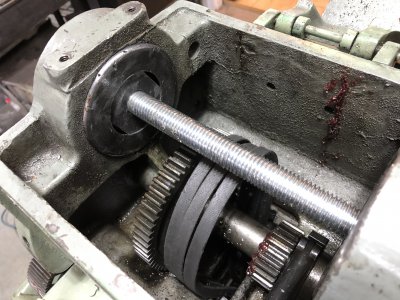
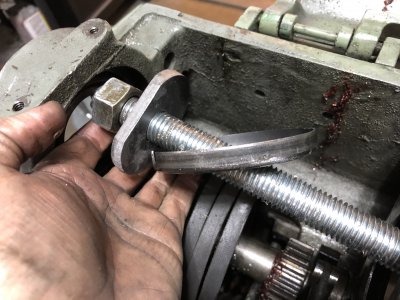
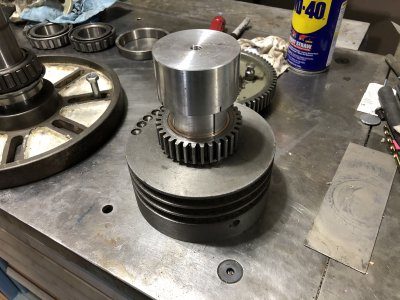
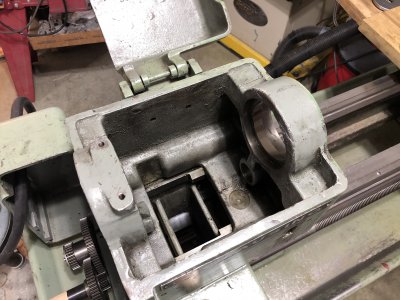
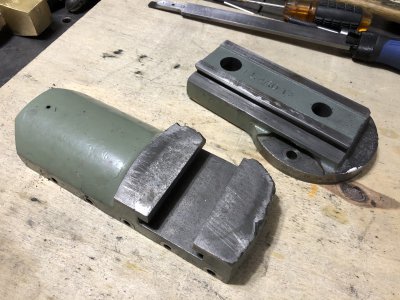
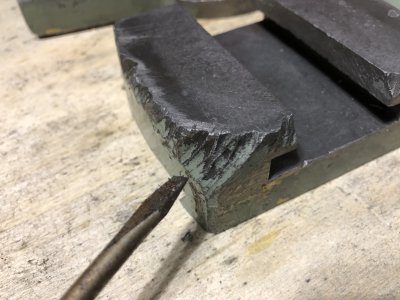
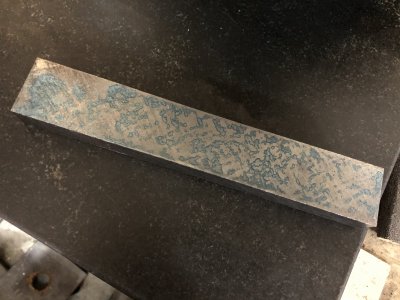
Back gear accomplishments.

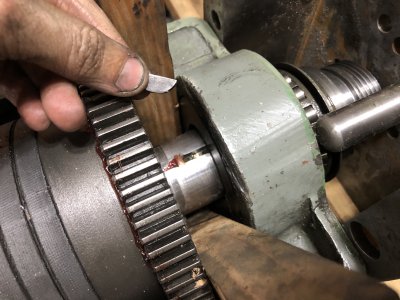
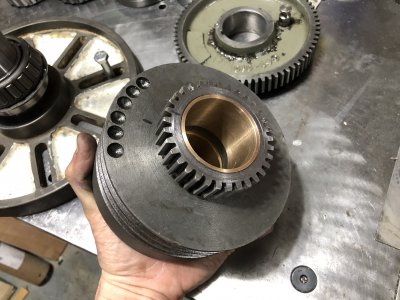
I needed a way to hone out the back gear bushings about a thousandth or so because were a bit underside after pressing them in.

I decided to use a 2” brake cylinder hone. Went nice and easy, made sure to take off the same about evenly. This worked very well, ended up with maybe a tenth or so runout.

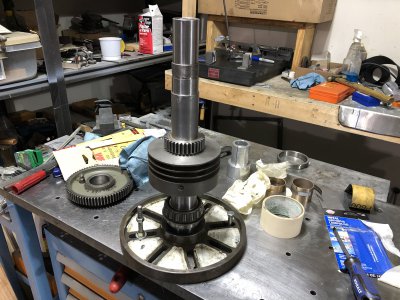
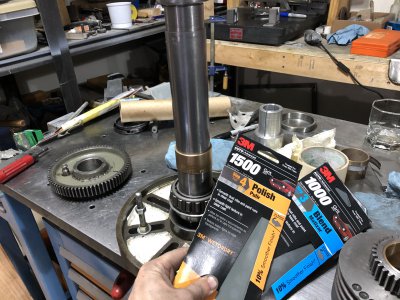
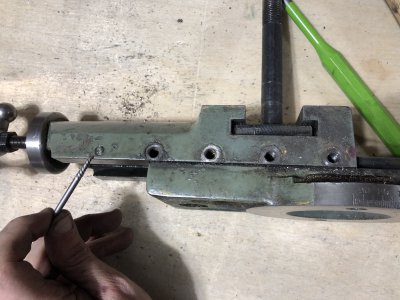
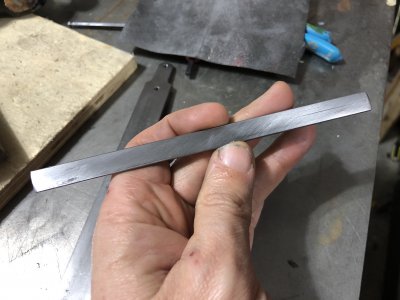
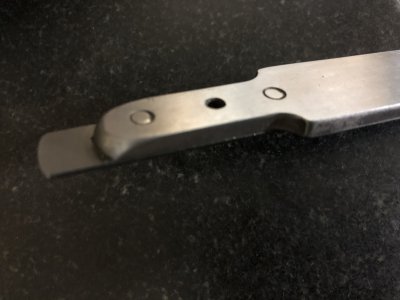
The spindle itself had a lot of damage from the old bushings running dry. After I opened up the bushings just so it could slide over the spindle, I noticed that the damaged spindle journal left some scratches on the bushing surfaces. There were clearly some raised up sections here. So I decided to make a cylinder lap, to ensure that the journal surface is smooth and flat, without any raised up burrs. I used some coarse, then switched to fine lapping compound, and this very cleanly removed almost all the damage on the journal. I kept continuously monitoring how much material I was removing. The lapping process itself removed about 5 tenths. Then I switched to 400 and 800 grit wet dry paper, used WD40 to keep the sanding clean. Then left the journal reasonably well polished.

Right now, I’ve got about 0.0015 oil clearance between the bushing and journal. Not sure, but I think this is about right.

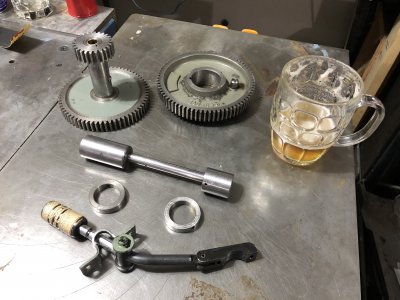
I’m thinking about using a Dremel and adding some oil pockets.

In this video, I meant to say 1-2 TEN Thousands, LOL, not thousands if front runout.

Here’s a quick video. I’m putting together an edited, bit more pro video.


Attachments

  • E4BD4B1A-B248-4190-998F-CD0806F7BA9B.jpeg
    E4BD4B1A-B248-4190-998F-CD0806F7BA9B.jpeg
    3.7 MB · Views: 16
Last edited:
Pulled the back gears out, and look what I found under 50 years of sludge, an actual set of back gears.

Soaked them a while in the parts washer bucket, cleaned off all the grime. The bushings and spindle look pretty good, so I just gave them a polish with 1000 grit paper, stoned off all the burrs, and stoned the gear tooth faces.

Finished cleaning up the spindle, polished it with 1000, then 1500 wet, make sure the journal surfaces are nice and shiny. Did a few more measurements and the oil clearance is 1.5 thousands on the spindle to pulley, I think that’s OK. I’m probably going to leave the pulley alone and not cut oil dimples, think it’s OK as is.

Having a fantastic pale ale from Taxman Brewery, my new all time favorite beer.

Gave the headstock a bit more of a clean, but think I’ll hit it with the steam cleaner one more time.

Now basically just waiting on the new rear bearing to arrive. Ordered a precision class 3 bearing. It was expensive, but want to make sure runout is very low.

Finally threw out these nasty ass greasy shredded ancient belts, and fitted the new ones.
 

Attachments

  • 5410D270-7DF2-4D07-8160-79A15AD166CB.jpeg
    5410D270-7DF2-4D07-8160-79A15AD166CB.jpeg
    3.3 MB · Views: 15
  • DD721C51-FC78-492B-91A1-8E4AB20F9473.jpeg
    DD721C51-FC78-492B-91A1-8E4AB20F9473.jpeg
    3 MB · Views: 16
  • 452DF48A-A2F8-46C1-9007-76877CA4D9D7.jpeg
    452DF48A-A2F8-46C1-9007-76877CA4D9D7.jpeg
    3.3 MB · Views: 14
  • 7C555765-1CC3-4A2D-88A6-7FD12F1BC895.jpeg
    7C555765-1CC3-4A2D-88A6-7FD12F1BC895.jpeg
    2.5 MB · Views: 20
The top slide was a real mess, some idiot stripped off one of the gib adjusting nuts. Hence, the gib was pushed out at the end, and the top slide would bind about half way though.

I pulled out the broken screw, took the stop slide apart and gave it a thorough cleaning. There’s a lot of cosmetic damage, going to clean it and fill it with JB Weld and iron filings, then sand it down and paint it.

I figure I’d give the ways a scraping that I’ve got it apart. So I made a mini scraper to get in the dovetail. I’m using a $6 Warner carbide paint scraper blade, works well. Just used a piece of cold rolled and tapped it for the 6-32 holes. I’m making a prism type straight edge to use as a master. This is only my second attempt at scraping. The straightedge here is after 5-6 passes. Still have a low spot, but thinking that will come in as I keep scraping the remaining areas.

The factory gib was badly damaged, so I straightened it, then spent a good bit of time lapping it flat. Eventually I’ll make a new bronze gib, but I’ll just use this for now.
 

Attachments

  • 60CDAFA9-87B6-4EFB-9C7B-41D54E857F45.jpeg
    60CDAFA9-87B6-4EFB-9C7B-41D54E857F45.jpeg
    2.5 MB · Views: 18
  • 9E9CA326-F465-4A3B-BE0D-3D2CFC68E9D9.jpeg
    9E9CA326-F465-4A3B-BE0D-3D2CFC68E9D9.jpeg
    2.3 MB · Views: 18
  • 07AEC132-5FB0-4651-9E68-79B490AF65F3.jpeg
    07AEC132-5FB0-4651-9E68-79B490AF65F3.jpeg
    3.1 MB · Views: 17
  • B1BFBEEC-B96E-434C-A79D-D935B36B6ACD.jpeg
    B1BFBEEC-B96E-434C-A79D-D935B36B6ACD.jpeg
    2.3 MB · Views: 19
  • ADCEF71B-2144-42D4-B8D2-126FD8B0D699.jpeg
    ADCEF71B-2144-42D4-B8D2-126FD8B0D699.jpeg
    3.3 MB · Views: 21
  • EC5C7F4F-8D61-4DE2-A48F-45FF3A96150F.jpeg
    EC5C7F4F-8D61-4DE2-A48F-45FF3A96150F.jpeg
    2.5 MB · Views: 22
  • F965FB31-9D77-43E9-94D3-9E70B0751EAB.jpeg
    F965FB31-9D77-43E9-94D3-9E70B0751EAB.jpeg
    3.5 MB · Views: 21
  • A8E2AE72-5E4B-4777-9D62-1E2C477F72DC.jpeg
    A8E2AE72-5E4B-4777-9D62-1E2C477F72DC.jpeg
    2.4 MB · Views: 22
  • 8E41D573-54BA-4B33-A6A6-A1D4D9AF1C04.jpeg
    8E41D573-54BA-4B33-A6A6-A1D4D9AF1C04.jpeg
    2.6 MB · Views: 20
  • B480DB0F-36E0-4BF1-802C-62AAE732EA45.jpeg
    B480DB0F-36E0-4BF1-802C-62AAE732EA45.jpeg
    3 MB · Views: 27
cool work on the scraping! A word of caution about lapping that gib - it's really had to lap something thin and bent to flatness, as the pressure needed to remove metal (with sandpaper I'm guessing?) will push the bowed area down. Ideally you'd put it on a surface grinder and shim the non-touching areas, grind and then flip it. Not many people have surface grinders though :)

If you have a surface plate (I'm guessing from the scraping print?), I'd be tempted to map it and then step grind it with a bench grinder or angle grinder. Get it flat and then bring it in with lapping. Just an idea.

Thanks.
I did get the gib pretty flat just by first straightening it. It was badly bent because one side was pushed out by the broken adjusting screw. I straightened it with a combination of vise work, and hammer / anvil work. That got it flat to about 0.005, kept checking it with the surface plate. Then took the remaining 0.005 off with sandpaper glued to a lapping plate.
 
Back
Top