FreeCad - really just getting started

He is very understandable, which is great. At 3/4 speed, still intelligible. I did notice that he made the icons bigger so they were easier to see.

What keyboard trackers? I missed that.

This really is a good video series. Have learned quite a bit so far.

The mouse has the marker circle around it. Later in, he manages to make the mouse pointer itself huge. That helped a lot. The keyboard tracker is the black square at the bottom. All of his key presses show up there. Originally it was on the lower left. At some point he moved it to the lower right so it didn't cover the bottom of the control panel.

I believe it's video #11 which is an odds-n-ends compilation. The second section is on using the Sketcher. He covers several things that would have been very helpful to know earlier on about closing the sketch body and the automatic constraints.
 
I'd like to learn FreeCad. I've soldiered along using LibreCad for a while, but I would like to be able to model my parts in 3D as they have been getting more complicated. I've managed to install v0.19 on my Linux computer. Previously had 0.18, but couldn't get very far with it. Going to the Tutorials page, there are 10 topics. Where to really start? Modeling parts? I had started with Creating a simple part with PartDesign v0.17. But can't seem to get through it, since the interfaces seem to be different. The scale was whacked. Seems like the default settings are a bit weird. The view was quite different. Took me a while just to figure out how the pan the drawing!

Had difficulty getting the lines to actually connect to each other. The display was too small to see the endpoints. When zoomed in I could see the lines weren't connected. Didn't see a way to snap the lines together, like in 2D. Dragging the endpoints moved the whole line, rather than stretching it, so the other end got disconnected! What am I missing? Never made it to the part of the tutorial where the drawing turned into 3D because I couldn't create a fully closed constrained 2D object. Is there an even more basic tutorial than this one? Or just do this one over and over again wishing for a different result ;)
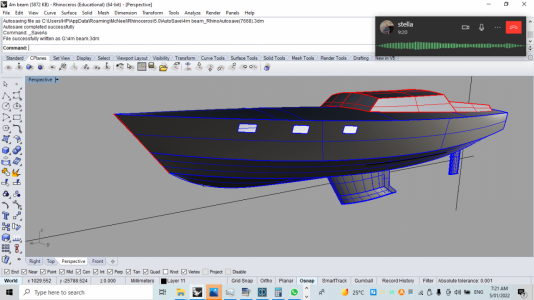
maybe it has already been suggested, but RHINO is the industry standard, you can download a free copy of rhino 6, it is not free forever but its good eh
 

Attachments

  • Screenshot (905).png
    Screenshot (905).png
    567.6 KB · Views: 6
maybe it has already been suggested, but RHINO is the industry standard, you can download a free copy of rhino 6, it is not free forever but its good eh
Thanks for the recommendation. Unfortunately, RHINO is not available for Linux.

FreeCad is cross platform. And so far, free forever. It's quite the learning curve, but slowly getting there. Video series are helping, just have to keep plodding away at it. The paradigm is different from what I was used to, but it works.
ok, I should have taken more notice of your post, sorry
 
I am going to throw a few things out here, but keep in mind that I do not use FreeCad. I did download it not too long ago and tried it but found the interface to be lackluster at best. Most of my work has been in Solidworks, although initially, it was Fusion 360, so if my suggestions are not directly targeted for FreeCad, I will apologize in advance.

1). Use planes. Planes are a must when it comes to 3D CAD. Utilizing planes to develop your drawing into a 3D model is crucial. Offset planes and center planes help in the placement of features within a part, or an assembly.

2.) Learn the revolve command (if FreeCad has one). When I first started in CAD it was Sketchup and unfortunately, I got into the mode of extruding and/or cutting to make my 3d parts. That is not the way to do it.
Drawing the sketch with dimensions and a center rotation line will work much better. You can change the dimensions quickly by reverting back to sketch, which makes changing the overall part you are working on quite easy.

3.) Learn the Mirror command. It can save you a lot of work once you get into more complex designs.

4.) Utilize construction lines. These are invaluable for making the drawing parametric, amongst other primary roles, such as making the aforementioned Mirror command work.

Don't get discouraged. It takes a LOT of work to get the hang of CAD, but once you do, it becomes a hobby within itself. Also, keep in mind that there are usually multiple ways to approach a project in CAD. Some avenues work better than others, but just be aware that there is more than one way to draw a part. I utilized my Solidworks and 3D printer for a TON of projects in the shop and around the house. The first item I printed with my 3D printer was a replacement knob for the wife's slow cooker. That scored me some points!

I have been interested in Alibre lately, but it does not run on Linux unfortunately. https://www.alibre.com/
Thanks for the tips. Yes, between us, shhhh, been thinking about a 3D printer. Kind of hard to justify one without knowing 3D CAD.

But for now, I'll be happy to draw projects and assemblies. That way I can dream up more interesting things to make.
 
Almost bedtime, but I"ll answer quickly. All four items on your list are in FreeCad. Indeed, they are all covered in the first 5 or 6 videos of the series under discussion here. The series is currently up to 27 parts. And the first was purely devoted to downloading and installing the package.

If you downloaded FreeCad 0.18, you are missing a lot. If you downloaded 0.17, you haven't seen FreeCad. The interface totally changed. I was running 0.18. I couldn't get 0.19 to run on the (OLD!) Linux installation I had. I not only updated the OS just to get 0.19, I jumped to a distro that supports FreeCad as a native package without relying on the flatpack.

FreeCad is not free for now. It is free for ever. LGPL2. Here is the license https://wiki.freecad.org/Licence
 
I agree that FreeCAD is a hobby unto intself. Like machining, it takes practice and you get better and better as you go. I really enjoy using it.

One thing to note is that FreeCAD has the PATH (CAM) workbench which will generate G code for the mill or lathe ( I haven't tried it for the lathe). I looked at other tools that didn't offer this. They required a separate tool. So, this is a big plus. Adventures in creation doesn't cover this in his 27 part series, but in other videos. If you have a CNC mill, this is the way to go. There are others on YT such as Sliptonic and Joko Engineeringhelp that do, but make sure they are using version 0.19. Like mentioned previously, the tool has changed a lot over the revisions. I think PATH is more difficult to learn than CAD (Part Design, Part, etc.).

Even if I'm manually machining a part (no CNC, G code, etc), I love the way I can look at how the pieces fit together (or don't!) so I can modify, adjust, tweak until they do. This is a great plus for me. When I was building my belt grinder, I made countless changes to the design so that the thing went together without a hitch. No changes needed!

And I always generate a drawing using TechDraw which I find invaluable. When I'm manually milling, I bring these drawings into the shop.
 
Lesson 6 was fun, the golf ball marking template. That one was pretty easy. Was very impressed at how simple it was to go from the CAD design to a 3D printed part.

Made it through Lesson #7, the parametric table. This is the lesson where the parameters for the dimensions of a table are driven from a spreadsheet table in FreeCad. Table based table design. Change a parameter in the spreadsheet and the part automatically changes. :cool:

Sure hope I can remember all this stuff when I need it! Seem to be making progress, and it is getting a little easier.:)
 
Back
Top